Pages

Thursday, 31 January 2013

Pink Bootees Hello Baby Card & Altered Frame


This is what I sent to my friend Kelly to welcome baby Grace Amelia into the world and to congratulate Kelly on being a new mum!  What a happy time I had in my craft room making this card and frame, new baby projects are such a joy to make!

Huge thanks to my SU! upline Joanne who showed me how to make the baby bootees using the SU! Full Heart punch.  After trimming the Pretty in Pink hearts into bootee shapes I cut a strip of white CS to make the tops of the bootees and embossed all the shapes together using the Lacy Brocade folder.  I inked the edges with Pretty in Pink ink, glued the white top pieces onto the pink shapes and added white twine bows.  I set the bootees aside while I  made a side opening Pretty in Pink A6 card base.  I cut a Whisper White panel, stamped the sentiment and added a stamped and fussy cut lacy strip.  I also stamped and fussy cut the Gossamer Lace image.  I layered the white panel onto a Primrose Petals mat, added the ribbon corner piece and popped up the bootees with twine strings taped to the back before attaching the mat to the card front.  I then embellished the ribbon with a double stacked button and added hearts to the bootees and above the sentiment.  I used the SU! Fashionable Hearts Embosslits die which embosses as well as die cuts the hearts - one of the Christmas gifts I was lucky enough to receive!  Then all three hearts got a tiny heart shaped pink jewel.


For inside the card I cut a white panel, stamped the oh, so sweet, ducky toy image, added a lace strip, hearts and a stamped sentiment.  One of the hearts and the wheels of the toy got pink jewels.


The double stacked button embellishment made the card a tad chunky so I've used an A6 expandable envelope.  I stamped and fussy cut another lacy strip, punched a Full Heart shape and added two more die cut embossed hearts - and another pink jewel!  You can't NOT break out the pink jewels and lace for a baby girl card!


 I bought this pink 'baby is sleeping' frame with the idea of gussying it up a bit.  I decided to get rid of the thick hemp string hanger - not pretty enough for a baby girl frame!  I replaced that with some Primrose Petals stitched satin ribbon.  I then added some white and pink pearls and a butterfly.  I die cut 3 butterflies from Whisper White CS and glued them together.  I then applied a coat of Glossy Accents and once that was dry I applied a coat of Picket White Distress Crackle Paint.  When the crackle paint had dried I inked the butterfly with Primrose Petals ink and applied a coat of clear gloss varnish.  When the varnish had dried I hot glued a Primrose Petals Dahlia embellishment onto a metal brad.  I placed the brad in the centre of the butterfly body and tucked a pearly stamen behind the brad prongs to act as antennae. I then hot glued the butterfly to the frame.  I'm thinking if Kelly doesn't want to use it as a baby is sleeping frame then she could place a photo inside the frame instead.


Here's a close up view of the butterfly.


 I was so happy to hear Kelly's news and relieved to hear Mum and baby are both doing well.  I really hope Kelly likes the card and frame - I have a feeling I may not hear from her for a while as she will be a tad busy!

I've had a really nasty cold and cough and had to take to my bed for a few days.  I actually made it downstairs today before noon (just!) so I call that an achievement!  It's been 5 days since I set foot in my craft room and I don't like going that long without a crafty fix.  I'm hoping to spend some time in my craft room this afternoon even if it's only for a gentle potter!  I know to avoid paper piercing - personal experience has taught me that sneezing and a straight row of paper piercing do NOT go hand in hand LOL!

Supplies for card:
Stamps: SU! 'Gossamer Lace', 'Viola's Lace' wheel, 'Sweet Essentials' & 'Embellished Events' sets, Hobby Art 'Sentiments' clear set
CS: SU! Pretty in Pink, Primrose Petals & Whisper White
Ink: SU! Pretty in Pink, Primrose Petals & Crumb Cake
Tools: SU! Full Heart punch, Lacy Brocade embossing folder, Fashionable Hearts Embosslits die, sponge dauber
Embellishments & accessories: SU! Primrose Petals stitched satin ribbon,  Pretty in Pink button, Vintage Faceted button, Whisper White Baker's Twine, Dimensionals, PaperMania pink jewels


Supplies for frame:
CS: SU! Whisper White
Ink: SU! Primrose Petals
Tools: SU! Beautiful Butterflies Bigz die, hot glue gun, paper piercer, sponge dauber
Embellishments & accessories: frame, SU! Primrose Petals stitched satin ribbon,  Primrose Petals Dahlia Embellishment, silver brad, Ranger Glossy Accents & Tim Holtz Picket Fence Distress Crackle Paint, clear gloss varnish, pearly stamen, white & pink pearls


Photobucket


Saturday, 26 January 2013

Snowflakes Warm Winter Wishes Card - 52 {C}CT Jan Technique Challenge

This week at 52 {C}CT we have a technique challenge for you - and the technique is triple time stamping.  This took the card making world by storm a while back and I think it's a great technique!  Dawn Olchefske has a wonderful video tutorial on the technique here if you'd like to check that out.


I inked up the gorgeous SU! Snowflakes set to create my card and used Midnight Muse, Pool Party, Marina Mist and white for my colour combo.  I love that the Warm Winter Wishes sentiment in the Snowflakes set contrasts warmth against the chilliness of snowflakes!

There's a measurement formula you can choose to follow with the triple time stamping technique to make it easier.  I'll give you my mat and stamped layer measurements and you'll see that the formula is to decrease panel sizes by 1".  You don't have to follow this method though and can opt to make your panels different sizes.  Check out the cards Louise and Danielle from the DT made to see excellent examples.  My card base measures 5 1/4" and then:

Midnight Muse mats were cut at:
4 1/4" square
3 1/4" square

White stamped layers were cut at:
5" square
4" square
3" square

Before gluing the smallest panel down I added a strip of ruffled ribbon and a button.  I just had to add rhinestone jewels to my snowflake centres!


It's hard to tell from the above photo but I dotted a bit of glitter here and there on my snowflakes - just a light dusting of sparkle.  Here's a close up photo.


Here's a photo of the inside of the card and the envelope flap.  I really love this colour combo!


 I really hope you'll try this fab technique and join in with our challenge this week, I'd love to come and see your triple time stamped creations!  There's some great inspiration from the rest of the DT so please check out their cards.  Also this is the last week of the DT call so if you'd like to apply for a spot on the team remember to add DT after your name when linking up your card.


Supplies:
Stamps: SU! 'Snowflakes' set, Hero Arts 'Holiday Cheer' clear set
CS: SU! Midnight Muse, Pool Party & Whisper White
Ink: SU! Midnight Muse, Pool Party & Marina Mist
Tools: Circle punches
Embellishments & accessories: SU! Pool Party ruffled ribbon, Marina Mist button, Dazzling Diamonds, Rhinestone Jewels


Photobucket

Friday, 25 January 2013

CAS Banner, Doily & Flower Hello Card

This card is so out of my colour comfort zone!  I know yellow and grey is a very popular combo right now but it's never done anything for me.  I don't use yellow or grey very often and would never have thought to put them together.  I do like the projects shown on page 39 of the current UK Stampin' Up! catalogue though - so I challenged myself to make a card with yellow and grey on it - eek! 

I've had the patterned paper for a while and I like it 'cos it's a silvery grey - and it's damask and I think damask is gorgeous!  I die cut the banner, added the partial doily piece, stamped the sentiment and added the ribbon.  I die cut two Daffodil Delight Floral Fusion flowers, sponged the edges with ink, added some shaping and put a black brad in the centre. I popped up the whole banner piece.


Here's the inside and the envelope. 


OK, so there's just a splash of yellow used on the card and I kept it CAS - I didn't want to go too mad!  I don't dislike it but I don't love it either.  I wasn't expecting an epiphany where I would suddenly love grey and yellow together and now I'm not exactly sure WHY I challenged myself to make a card with this combo!  Maybe I felt in the minority for not liking it and wanted to see what I was missing.  Anyway, after some musing I've come to the conclusion that some colour combos just aren't to my taste and that's OK - there's plenty more out there that I love!  Maybe I'll try this combo again one day - maybe not - and either way that's absolutely fine!

Supplies:
Stamps:  SU! Elementary Elegance set
CS:  PaperMania A6 white card blank, SU! Daffodil Delight, Basic Black & Whisper White

Patterned paper:  Echo Park Style Essentilas 'Grey Damask'
Ink: Memento Tuxedo Black, SU! Daffodil Delight
Tools: Sizzix Banners Framelits die, Cheery Lynn French Pastry doily die, SU! Floral Fusion Sizzlits die, small hole punch, sponge dauber
Embellishments & accessories: black ribbon, black brad, 3D foam pads


 photo ruthrainbow2.gif

Wednesday, 23 January 2013

Blue Birthday Wishes Circular Card - Inkspirational Challenge #4

It's time for a sketch challenge at Inkspirational this week.


I'm partial to shaped cards so I took the opportunity to make a circular card.  I decided I wanted to use my much loved SU! Medallion stamp, a perfect choice for a circular card.  I stamped that first onto Whisper White CS using Midnight Muse ink and I then got out my circle cutter and cut around the image.  I then cut a 5 1/4" Pool Party mat circle followed by two 5 3/4" Midnight Muse circles for my card base.   I added a white mat circle to one Midnight Muse circle, scored a vertical line to form a hinge and glued the two circles together to form the card base.  I cut a sliver off the bottom of the base so that the card stands up nicely.  I popped up a Midnight Muse circle in the centre of the Medallion and then adhered a Pool Party Woven Circle die cut over the top.  I used an SU! Apothecary Accents die to cut out the white label in the centre and I stamped the sentiment.  I then had a very happy time two step stamping and fussy cutting - I really enjoy doing that! - with the small flower from the SU! Stippled Blossoms set.  I popped up the white label and the three flowers.  I threaded thin strips of Midnight Muse CS through the holes of Pool Party buttons and attached those to the white label.  I debated whether to add rhinestones to the flower centres or not but I actually really like the stamped detail centres so I added rhinestones to parts of the Medallion instead.


Here's the inside of the card with a Pool Party sentiment label and three more flowers.

 Here's the envelope with a Woven Circle and a small flower on the flap.


What a great sketch - it looked very CAS to me when I first saw the layout.  However, as my card evolved I definitely veered off the CAS path - but I'm very happy with the end result nevertheless! I like layouts that lend themselves to different styles and I think this layout is so versatile.  I hope you'll play along with us at Inkspirational, I'd love to come and see what you make using this fab sketch!  There will be great inspiration to be had from the other DT members so please do check out their creations!

Supplies:
Stamps: SU! 'Medallion' stamp, 'Stippled Blossoms' & 'Watercolor Trio' sets, Penny Black 'Lovely Day'
CS: SU! Midnight Muse, Pool Party & Whisper White
Ink: SU! Midnight Muse & Pool Party
Tools:  EK Success Circle Scissor Pro, SU! Apothecary Accents die, SU! 2 1/2" & 1 1/4" circle punches, Memory Box Woven Circle die, Stamp-a-ma-jig
Embellishments & accessories: SU! Pool Party buttons, Rhinestone Jewels, Dimensionals


 photo ButterflyFlutterRuth.gif

Tuesday, 22 January 2013

Snowman Merry Christmas Card - Sweet Stop Sketch 194

A day or so ago I came across a card someone had entered into this week's Sweet Stop Sketch 194 challenge and I really liked the look of the sketch.  Also, it's a sketch with a spin and the spin is to use a snowman.  Well, that's right up my street so I had to play along!


My snowman is part of a larger image - this Hero Arts Cupcake Snowman stamp. 
 I stamped the whole image but fussy cut just the snowman part.  I coloured the nose and hat band and added some glitter to the body.  I then made the side opening A6 sized Island Indigo card base and assembled the mat layers using Pool Party, Early Espresso & Island Indigo CS and snowflake patterned paper.  I stamped the sentiment and added Early Espresso stitched ribbon and metal nailhead embellishments.  I opted to place the image panel on the card as a square rather than a diamond shape.  The image panel and the snowman are both popped up.


More patterned paper inside with a stamped sentiment and punched snowflakes.


Here's what happened when I went to take a photo of the envelope.  Suddenly, there was a furry body in front of the envelope.  Obviously, I had spent far too much time photographing cards and it was now time for me to pay attention to my Tingha boy!  


Duly fussed, Tingha obligingly got down from the cabinet and allowed me to take a photo of the envelope.  Can you tell I love that snowflake paper?!  As well as the paper I added a stamped and punched label and a punched snowflake. 


I didn't intend on making a Christmas card this week - aside from my 52 {C}CT DT card - but I just couldn't resist taking part in this challenge!  It's a fab sketch layout and it seemed fitting to make a snowman card while we have snow on the ground!  Also, I'm always happy to add another Christmas card to the box!

Supplies:
Stamps: Hero Arts 'Cupcake Snowman', SU! 'Seasonal Wishes' & 'Four Frames' sets, Hero Arts 'Holiday Cheer' clear set
CS: SU! Island Indigo, Pool Party, Early Espresso & Whisper White

Patterned paper:  Bo Bunny Snowfall 'Drift'
Ink: SU! Early Espresso, Island Indigo, Pool Party, Pumpkin Pie, blender pen
Tools: Square Nestabilities dies, SU! Decorative Label punch, Fiskars snowflake punch, Perfect Layers, Stamp-a-ma-jig
Embellishments & accessories: SU! Early Espresso stitched ribbon, Dazzling Diamonds glitter, metal nailheads, 3D foam tape


 photo ruthsnowman.gif

Sunday, 20 January 2013

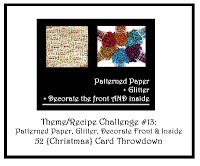
Sparkly Snowflake Noel Card - 52 {C}CT Jan Recipe Challenge - Card #2

A few of my most favourite things - snowflakes, sparkle, pretty patterned paper, stamping and punching - all combined into this creation - what a happy time I had in my craft room!  I don't normally make two cards for a challenge but this is a CAS version for the recipe challenge I set at 52 {C}CT this week.  The recipe calls for patterned paper, glitter and a decorated inside.


Sandie, a fellow DT member at Inkspirational left a comment on my first card to say that the recipe was a bit scary for a CAS girl.  Well, I certainly didn't intend to scare anyone!  So I set about making a CAS card to show Sandie my recipe challenge needn't be scary at all - and to, hopefully, encourage her to take part!

I already had the silver glitter snowflake cut out - waiting either to be put on a card or put away in my card bits box.  Yes, it's been hanging around since before Christmas!  I delved into my Christmas papers and found some gorgeous Echo Park Winter Wishes paper that I hadn't used yet so I was on my way!  I die cut the banner and tried my layout on an A6 size card and then a 5 1/4" square card but neither looked right.  I opted for a 5" x 7" card which means there's more white space - a lot better!

I stamped the sentiment with VersaMagic Aegean Blue chalk ink which has been in my stash for years.  I don't use my chalk inks often these days and last time I had a craft room clearout I wondered whether to keep them or let them go.  I have the Dew Drop pads so they don't take up a lot of room and I decided to keep them.  The Aegean Blue goes beautifully with the paper colour so I'm very happy I kept the chalk inks!  I put a circle of the flourishy paper on a Build a Brad, placed the brad in the centre of the snowflake and I popped the snowflake up on the banner.


Here's the inside and the envelope flap.


Hmmm, I actually prefer this CAS card to my first card, I like this one much better!

Supplies:
Stamps: SU! 'Greetings of the Season' & 'Wacky Wishes' sets
CS: PaperMania 5" x 7" white card blank, SU! Silver Glimmer Paper

Patterned paper:  Echo Park Winter Wishes 'Warm Mittens' & 'Ice/Teal'
Ink:  VersaMagic Aegean Blue chalk ink
Tools: SU! Snow Flurry die, Sizzix Banners die, circle punches, Fiskars snowflake punch, Stamp-a-ma-jig
Embellishments & accessories:  SU! Build a Brad, 3D foam pads


 photo BlueBflyRuth.gif

Saturday, 19 January 2013

Recessed Window Just A Note Card - Inkspiration Challenge #3 - EOWE

It's time for the January CASE challenge at Inkspirational this week.  I'm here with an EOWE (end of the week encouragement) post to encourage you to join in with the challenge if you haven't done so already!  We are asking that you CASE Victoria's lovely card which you can see here.


To me CASE stands for Copy And Selectively Edit so I like to change a few things.  For my card I've changed the colour scheme, changed the orientation to landscape and I added some ribbon, a sentiment label and some popped up flowers.  I love the way Victoria popped up a panel in the same colour CS as the card base and I also love the recessed window and the rounded corners so I kept all those features.

I stamped the SU! Very Vintage wheel on Very Vanilla CS using Raspberry Ripple ink.  I added a touch of colour here and there with inks and a blender pen and sponged the whole panel lightly with Soft Suede ink.  The vanilla panel was glued flat to the card and the Raspberry Ripple panel with the window cut out of it was popped up.  I tied the Primrose Petals ribbon around the panel before popping it up, stamped the sentiment, cut it out with the Word Window punch, edged the label with Always Artichoke ink and glued it to the ribbon.  I then stamped 3 flowers in Always Artichoke ink - stamping off once first and then rock 'n rolling in Always Artichoke ink.  I fussy cut the flowers, popped them up and added jewels to the centres to finish off the front. 


I stamped the wheel again on a panel for inside the card, added a line with an Always Artichoke marker and edged the panel with Artichoke ink.  I couldn't resist adding two more stamped and fussy cut flowers inside!


For the front of the envelope I simply stamped the wheel again and added an Always Artichoke CS strip.


Please go and check out what the rest of the Inkspirational DT have made, there's sure to be lots to inspire you!  Then please go and get inky and join in with the challenge, I'd love to pop by your blogs to see what you make!  There's a monthly sponsor prize on offer - the challenge blog has all the details!

Supplies:
Stamps: SU! Very Vintage wheel & Vintage Vogue set, Hobby Art 'Sentiments' clear set
CS: SU! Raspberry Ripple, Always Artichoke & Very Vanilla
Ink: SU! Raspberry Ripple, Always Artichoke, Primrose Petals & Soft Suede
Tools: Corner rounder punch, SU! Word Window punch, sponge daubers
Embellishments & accessories: SU! Rhinestone Jewels & Dimensionals


Photobucket

Ornament Merriest Wishes Card - 52 {C}CT Jan Recipe Challenge

This week at 52 {C}CT we have a fun recipe challenge for you.  The recipe is:

  • patterned paper
  • glitter
  • & you must decorate the inside of the card as well as the card front


I used the SU! Snow Festival papers and chose my colour combo based on the colours in the papers.  I took the opportunity of using yet another New Year half price bargain - the Sizzix ornament die that comes with a matching embossing folder.  I have the stocking set and I love it so I couldn't resist the half price ornament set!  I cut the ornament from Cherry Cobbler Core'dinations CS, embossed it,  sanded the embossing and added glitter to some embossed parts by way of Star Dust Stickles.  Whilst that was drying I made the Primrose Petals 5 3/4" card base and assembled the mat layers.  I stamped the 'Merriest Wishes' onto Baja Breeze CS, cut it out with Decorative Label punch, sponged the edges with Cherry Cobbler ink, added some glittered dome stickers and popped the label up.  I tied a ribbon bow, attached it to the hole in the top of the ornament using a deep red glittered brad and popped the ornament up.


Close up view of the label with the glittered dome stickers.  They look like little snowballs don't they?!


 Close up view of the bow and glittered brad. 

 
I cut a Whisper White panel for inside the card and used more fun Snow Festival papers to decorate.


No surprises for the envelope - more Snow Festival papers used to decorate the envelope front!


I hope you agree that this is a fun recipe to work with - I certainly had a happy time making this card!  I know decorating the insides of your cards may be a new idea to some of you.  It doesn't have to add a lot of time to your project though, just adding a little element to tie it in with the card front kicks the design up a notch.  It can make a big difference and certainly makes the recipient feel they've received a special creation!   I've been decorating my card insides and envelopes for quite some time now and a card doesn't feel finished to me now unless I do it.  I'm chuffed to see I've influenced some of my fellow teamies to decorate more card insides now!  Also, I think it's another way we can set our hand made creations apart from shop bought cards, it really adds a special touch.  At least I spared you having to decorate the envelope in this recipe challenge ; ) - but please do that as well if you'd like to!

The other members of the DT will have fab cards to inspire you so do please check those out and then do join in with the challenge, I can't wait to see your creations, inside and out!  Don't forget, the DT call is still going on so keep those cards coming if you want to apply for a spot on the team, just remember to add DT after your name when you link up your card!

Supplies:
Stamps: Hero Arts 'Very Merry Christmas' clear set
CS: SU! Primrose Petals, Cherry Cobbler, Gumball Green, Baja Breeze & Whisper White, SU! Cherry Cobbler Core'dinations CS

Patterned paper:  SU! Snow Festival DSP
Ink: SU! Cherry Cobbler
Tools: Sizzix 'Ornament #5' Bigz die with matching embossing folder, SU! Decorative Label punch, SU! Sanding System, Perfect Layers, sponge dauber
Embellishments & accessories: SU! Gumball Green stitched satin ribbon, Star Dust Stickles, glittered dome stickers, DoveCraft glittered brad, 3D foam tape


Photobucket

Friday, 18 January 2013

Spice Cake Fabric Box

Today I'm sharing a non card project - a bit of a rarity here at Flower Sparkle!  It's a box made using the SU! Scallop Envelope Bigz die, Spice Cake fabric and CS.  My SU! Upline Joanne showed me how to make it a few weeks back - thanks to Joanne for her know how and incredible patience!  I assembled the box at that time but I've only just got around to adding the finishing touches with embellishments.

You attach the fabric to CS with Multipurpose Adhesive Sheets (which are sticky on both sides) and then you die cut four Scallop Envelopes.  To make the box you join the four envelopes together.  We used Sticky Strip when we assembled the box as that will hold the box together securely. 


I stuck the scalloped flaps down flat and added a strip of gorgeous Very Vanilla velvet ribbon all the way around the box.  I then stuck a piece of fabric to a piece of Multipurpose Adhesive Sheet and die cut the flower.  I also die cut two Very Vanilla flower shapes and stacked them all together to make the flower thicker.  I threaded linen thread through a brown button and hot glued that to the flower centre and then I hot glued the flower to the ribbon.  I finished off by adding three rhinestone jewels.

Here's a couple more photos.


This box sits out on my desk holding items I reach for often - my smaller sized SU! acrylic blocks and my most used stamp - my 'Created by Ruth' stamp that I put on the back of most of my cards.  It also holds a very useful mini pincushion.

So why a pincushion?  Well, I use a PVA glue bottle with an ultrafine tip and it has to have a treated pin kept in the tip - originally a white pearl topped pin.  Whenever I used the glue I put the pin down and then could never find it again on my messy desk and had to search for it.  A lady at my card group suggested I colour the pearl with bright nail varnish so I did that so it was easier to locate - but I still ended up searching for it 'cos I always placed it somewhere on my desk and it would get covered up!  Hubby must have witnessed me undertaking a pin search one day while in my craft room (no doubt I was muttering madly to myself!) because one of my advent gift box gifts from him was the mini pincushion.  To be honest, I did wonder why Owen had given me a pincushion but I thanked him kindly and he said "that's to keep your glue bottle pin in".  Wow, I was SO impressed!  So now I always know where to find my glue bottle pin when I'm ready to place it back in the tip. 

I thought I'd take a filled up photo too!


I love my box, it's functional yet lovely to look at too!

Brrrrrr, it's very chilly today and we woke up to snow!  A perfect day to stay at home and craft so I've just made myself a big mug of tea and I'm heading up to my craft room now to make a mess!

Supplies:
CS: SU! Very Vanilla
Tools:  SU! Scallop Envelope Bigz die, Fun Flowers Bigz L die, hot glue gun
Embellishments & accessories: SU! Spice Cake Designer Fabric, Multipurpose Adhesive Sheets, Sticky Strip, Very Vanilla Designer Velvet Ribbon, Latte Designer Button, linen thread, rhinestone jewels


 photo FlowerSparkleSRuth.gif

Wednesday, 16 January 2013

Memorable Moments 21st Birthday Card For Naomi

This is the birthday card I made for our friend Naomi's 21st birthday.  I can clearly remember the day Gill, Naomi's mum, told me she was pregnant - eek, I can't believe that was 21 years ago!

I've just got the SU! Memorable Moments set so I got that out to ink up.  I also used some items from the upcoming SU! Sale-a-bration (SAB) promotion - an embossing folder, button and a stamp set.  Oh, and a set of SU! 'Birds and Blooms' Sizzlits dies that I got from eBay in the US.  They're retired from the US catty now and they were never offered for sale here in the UK but they've been on my wish list for some time.  I love the shape of the flower and as there are 3 sizes they layer beautifully.

The colour combo came about because I had a very untidy desk with different colours of CS scattered on it.  I set to work tidying it up and I noticed some Pool Party and Primrose Petals CS on top of some Early Espresso CS and I really liked how they looked together.  I stamped and die cut the label first, stamping the numbers again onto Pool Party CS so I could cut them out and glue them over the top.  I die cut the flowers and leaves, sponged the edges of the flowers with ink and added some shaping.  I used Pretty in Pink CS for the smaller flower and sponged the edges with Primrose Petals ink.  I made a Pool Party side opening A6 card base, embossed a Primrose Petals panel with the Vine Street embossing folder and layered the embossed panel onto an Early Espresso mat.  Before gluing the panel to the card I added some Pool Party ruffled ribbon - it's so pretty!  I popped up the label and the flower.  I threaded a thin strip of Primrose Petals CS through the holes of a Pool Party button and attached that to the flower centre.  I had to add some sparkle in the way of a few rhinestone jewels!


I added a matted panel inside the card and stamped the lovely 'Wishing you many happy moments of discovering new things in life' sentiment.  This is part of a larger stamp that also includes 'have a wonderful birthday' but I wanted to omit that as that wording is a lot larger than the rest of the wording and the sentiment would then have taken up the whole left side of the panel!  I decided I can add that part myself when I write the card.  I stamped a leafy stem (which the embossing folder I used on the front matches!) and added die cut flower shapes and a jewel centre.


Then it was onto the envelope.  The flap got leaves and another flower.


The front got a name label and 3 small flowers.  I think a milestone birthday merits a decorated envelope front plus a flap!  I hope Naomi likes her card, has a very happy birthday, and enjoys a bright future!  


Supplies:
Stamps: SU! 'Memorable Moments', 'Madison Avenue' & 'Four Frames' sets, Stampendous 'Birthday Wish'
CS: SU! Pool Party, Primrose Petals, Pretty in Pink, Early Espresso & Whisper White
Ink: SU! Pool Party, Primrose Petals & Early Espresso
Tools: SU! Labels Collection Framelits dies, SU! Birds & Blooms Sizzlits dies, SU! Vine Street embossing folder, SU! Decorative Label punch, Memory Box Tender Leaves die, Stamp-a-ma-jig, sponge daubers
Embellishments & accessories: SU! Pool Party ruffled ribbon, Rhinestone Jewels, Dimensionals


Photobucket