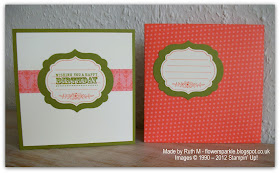
It's our wedding anniversary on Friday and this is the card I made to give to Owen. It's been a strange and unsettling week and for one reason or another I just haven't been able to spend much time in my craft room this week. While he was at work today I managed to get the card made, I cut it a bit fine, only just got it made in time to take a photo while the light was still good! Owen has always liked the cards I make where a negative punched or die cut shape panel is popped up and he loves red and black together. Once I'd decided what I was going to do the card came together really quickly - thank goodness!
I started with a piece of the lovely red Everyday Enchantment paper, layered that on a black mat, stamped the sentiment and added the 3 black brads. I then cut a square piece of the luscious black flocked paper from the Mocha Morning pack. I punched out the heart and popped the black panel up over the red one at an angle with thick foam tape. It was hard cutting into that piece of special paper that I've been hoarding and occasionally stroking - but I reckon Owen is worth it!
I couldn't let the positive heart shape go to waste so I glued it inside the card next to the stamped sentiment. I stamped the love label, punched it out and glued that to the envelope flap to finish off. Just got to write in it now and it's all ready to give to Owen tomorrow morning.
Supplies:
Stamps: Stampendous 'Happy Anniversary', PSX 'with love', 'Love' label stamp from SU! You Are Loved set
CS: PaperMania 5 1/4" square white card blank, SU! Basic Black & Whisper White
Patterned paper: SU! Everyday Enchantment & Mocha Morning DSP packs
Ink: Memento Tuxedo Black, SU! Real Red
Tools: SU! Full Heart & Decorative Label punches, Stamp-a-ma-jig, Perfect Layers
Embellishments & accessories: PaperMania black brads, 3mm foam tape
Pages
▼
Thursday, 30 August 2012
Monday, 27 August 2012
Snowflake Warm Wishes Window Gatefold Card
Deb, who is on the Design Team with me at the Simply Stampin' challenge blog, made a beautiful window gatefold card for one of our colour challenges back in March. I loved her fabulous card and was chuffed to bits to receive the card in person for my birthday in April. I CASEd her card a while ago but have just come across the photos and realised I hadn't posted it to my blog.
Having the card in front of me meant I could scrutinise it to see how it was put together. Deb had joined two separate pieces of CS together to make the card base but I decided to try it using just one piece of CS. It worked out fine but the card is less wide than a usual A6 card - the finished card turns out to be 3 3/4" wide as opposed to the standard 4 1/8" width of an A6 card. I started off with a piece of Cherry Cobbler CS cut to 11 1/4" x 5 7/8". I scored at 1 7/8", 3 3/4", 7 1/2" and 9 3/8" to make the gatefold card base. After attaching the patterned paper panels I very carefully punched two scalloped circles out to form the window. You need the scalloped circle to line up when the card is closed so taking a bit of time and care at this stage was worth the effort as my circle lined up very nicely!
I die cut a snowflake, added a brad and attached it to a scalloped circle. I popped up the scalloped circle so it nestles within the window. I then made a belly band to slide over the card to keep it closed.
This photo of the card with the belly band removed better shows how the card is put together as you can see the scoring and the scalloped circle punched out areas. You will also see I stamped a snowflake border and a sentiment on a white panel.
Supplies:
Stamps: Hero Arts Warm Wishes, Hero Arts Winter's Butterfly clear set, Stampendous Christmas Wishes clear set
CS: SU! Cherry Cobbler & Whisper White, Core'dinations Broken China
Patterned paper: old Basic Grey Christmas paper
Ink: SU! Cherry Cobbler, Broken China Distress Ink
Tools: SU! 2 3/8" scalloped circle punch, Sizzix Snowflake #23 Sizzlits die, Petite Oval Nestabilities dies, 1 3/4" & 2" circle punches
Embellishments & accessories: SU! Buid a Brad kit, 3d foam pads
Having the card in front of me meant I could scrutinise it to see how it was put together. Deb had joined two separate pieces of CS together to make the card base but I decided to try it using just one piece of CS. It worked out fine but the card is less wide than a usual A6 card - the finished card turns out to be 3 3/4" wide as opposed to the standard 4 1/8" width of an A6 card. I started off with a piece of Cherry Cobbler CS cut to 11 1/4" x 5 7/8". I scored at 1 7/8", 3 3/4", 7 1/2" and 9 3/8" to make the gatefold card base. After attaching the patterned paper panels I very carefully punched two scalloped circles out to form the window. You need the scalloped circle to line up when the card is closed so taking a bit of time and care at this stage was worth the effort as my circle lined up very nicely!
I die cut a snowflake, added a brad and attached it to a scalloped circle. I popped up the scalloped circle so it nestles within the window. I then made a belly band to slide over the card to keep it closed.
This photo of the card with the belly band removed better shows how the card is put together as you can see the scoring and the scalloped circle punched out areas. You will also see I stamped a snowflake border and a sentiment on a white panel.
I decided that come Christmas I would like to write my message on the back of the card which meant cutting another white panel for the back. I stamped another snowflake border and yet another sentiment - 3 on one card! A snowflake circle element on the envelope flap finished the card off.
I love this style of card and I have made a mental note to make a non Christmas version soon - hmmm, featuring a paper rosette maybe. The list of cards I want to make is growing ever longer though so I don't know when I'll get round to it! I loved making this one - thanks so much to Deb, not only for the beautiful card but for the fabulous inspiration too!
Supplies:
Stamps: Hero Arts Warm Wishes, Hero Arts Winter's Butterfly clear set, Stampendous Christmas Wishes clear set
CS: SU! Cherry Cobbler & Whisper White, Core'dinations Broken China
Patterned paper: old Basic Grey Christmas paper
Ink: SU! Cherry Cobbler, Broken China Distress Ink
Tools: SU! 2 3/8" scalloped circle punch, Sizzix Snowflake #23 Sizzlits die, Petite Oval Nestabilities dies, 1 3/4" & 2" circle punches
Embellishments & accessories: SU! Buid a Brad kit, 3d foam pads
Saturday, 25 August 2012
Two Chipboard Cards - 52 {C}CT Aug Embellishment Challenge
This month's embellishment challenge at 52 {C}CT is to use chipboard pieces. Well, this challenge gave me the chance to use stuff that has been in my stash for YEARS! My first card is a silver bell shaped card. I've always loved shaped cards and I've bought quite a few types over the years. I bought bell and bauble shaped cards from Craftwork Cards many years ago. I still have a few left 'cos they never make it out the door when I have a clear out - they're too unusual and I can't let them go!
The card is made up of three separate pieces - two metallic silver bell shapes and a plastic bell shape. All the pieces have holes and you tie the three pieces together with ribbon, placing the plastic shape at the front - and the card stands up - fab! I embossed one silver bell with a snowflake embossing folder and then attached my silver glittered chipboard snowflake to the plastic bell. The snowflake was self adhesive but I also attached it to the bell with a charm brad. The brad anchors my small sentiment piece which I punched out with the SU! Word Window punch.
I simply added a stamped die cut circle inside the card. The cards came with snazzy silver envelopes and I added a punched snowflake circle to the flap.
The bell card came together so quickly I took the opportunity of making another card using a chipboard tree that's been hanging about for years! I used some Bella Bleu retired SU! papers - not Christmassy but I don't think that matters! I added a fishtail banner, a scalloped punched strip, a button and a sentiment piece to the card front. I covered the tree shape with patterned paper and sponged the edges with Crumb Cake ink. I punched a star shape for the top of the tree and added a sparkly silver dome sticker.
Here's the inside and the envelope. Two Christmas cards to add to the box and old items used from my stash - it's a win-win situation! Don't forget to check out the great cards from the other 52 {C}CT Design Team members and then do join in our chipboard challenge, I'd love to come and see your Christmas cards!
Supplies for bell card:
Stamps: PTI Tag Its #9 set, PSX Snowflake Medley, SU! Best Yet set
CS: Craftwork Cards silver bell shaped card base, SU! Whisper White & Basic Black
Ink: Memento Gray Flannel & Tuxedo Black
Tools: Cuttlebug Snowflakes embossing folder, circle Nestie die, circle punches, SU! Word Window punch, paper piercer
Embellishments & accessories: My Mind's Eye silver glittered chipboard snowflake, Dovecraft Charm Brad, silver glitter ribbon
Supplies for tree card:
Stamps: SU! Season of Joy set, Stampendous Christmas Cheer
CS: SU! Not Quite Navy, Marina Mist & Very Vanilla
Patterned Paper: SU! Bella Bleu DSP
Ink: SU! Crumb Cake & Not Quite Navy
Tools: SU! Eyelet Border punch, MFT Fishtail Flags Stax die, X Cut star punch, circle Nestie dies, sponge dauber
Embellishments & accessories: Craftwork Cards chipboard tree shape, SU! Marina Mist button, PaperMania silver dome glimmer stickers
Happiest Birthday Card & Matching Gift Box - Simply Stampin' Challenge # 74
It's colour combo time at Simply Stampin' and this week we'd like to see the following colours:
Don't worry if you don't have exactly those colours, you can substitute similar shades. It would be great if you joined us! Please check out the rest of the Design Team projects, there's bound to be some fab inspiration!
I learned how to make a lovely spring top gift box earlier this week thanks to Joanne. I took the opportunity of making one while the process was still fresh in my mind! The box uses just one piece of CS and doesn't require a separate lid piece. I didn't actually assemble my box when I learned how to make it, I did all the cutting, scoring and punching but bought it home still flat as I knew if I tried to make one from looking at a completed box I'd lose the plot entirely! Having this piece to refer to made making my own box much easier.
EDITED TO ADD: I've been asked for measurements so I've added them below before the photo of the template. Hope that helps!
Start off with a piece of CS measuring 10 1/2" x 8 1/4". On the long side score at 2 1/2", 5", 7 1/2" and 10". On the short side score at 2 1/2", 5", 6 1/4 " and 7 1/2". Refer to the photo to see where to cut tabs, punch the fancy border and cut out the triangles.
So here is my finished box, tied up with Very Vanilla ribbon and decorated using the Apothecary Art set and Labels Framelits dies. I stamped the 'For You' circle separately on a piece of Pretty in Pink CS, punched it out and popped it up. I added some jewels to the label to finish off the box.
This photo shows the box with the ribbon untied - the top sort of springs up and you can get to the goodies inside by pushing the sides of the lid outwards.
Having made the box I just had to make a matching card! The card measures 5 1/4" square. I coloured the image with inks and a blender pen, using Pretty in Pink for the flowers and Old Olive for the leaves. I stamped the sentiment strip onto Pretty in Pink CS, cut it out and popped it up. For the ribbon I used the technique where you tie a loose knot in your strip of ribbon, feed a smaller strip through the knot, pull tight and trim your tails. It's easy, you get a nice neat knot and it's ideal for ribbon that is patterned on one side and plain on the other! Just like the box, one of the labels got some sparkly jewels to finish off.
Here's the inside and the matching patterned paper envelope with more Apothecary Art and Framelits dies goodness. I am loving whipping up patterned paper envelopes with the Diagonal Plate, so fast and easy - and reduces my paper stash to boot!
Finally, here's a photo of the card and box together. I don't often make matching cards and boxes but when I do I always enjoy seeing them together, there's something very appealing about a matching ensemble!
Supplies:
Stamps: SU! Apothecary Art & Happiest Birthday Wishes sets
CS: SU! Pretty in Pink, Calypso Coral, Old Olive & Very Vanilla
Patterned Paper: Calypso Coral paper from In Color DSP stack
Ink: SU! Pretty in Pink, Calypso Coral, Old Olive & blender pen
Tools: SU! Labels Collection Framelits dies, 1" circle punch, Eyelet Border punch, Simply Scored & Diagonal Plate, Stamp-a-ma-jig
Embellishments & accessories: SU! Old Olive Scallop Dot ribbon, Very Vanilla grosgrain ribbon, rhinestone jewels, Dimensionals
Wednesday, 22 August 2012
Medallion & Rosette Happy Birthday Card
I'm really late to the rosette party LOL! I've always liked the look of rosettes but I wasn't sure how dimensional they end up being and I do like most of my cards to fit in envelopes. Also, I wasn't too sure if I wanted to do all the scoring and folding to make one. I know I could use my Simply Scored tool to make one but if I'm honest I wouldn't ever have got round to actually doing it. You can be sure if there is a die that makes a process quicker and easier then I'm interested! I got the Tim Holtz Paper Rosette Decorative Strip die for a great price from eBay and was anxious to try it out.
So I made my first rosette using SU! patterned papers, a flower punch and a brad and wondered if it would fit in the centre of my much loved Medallion stamp - yes it did and it fitted perfectly - yay! My birthday card for Amanda, my fellow team mate on the Simply Stampin' Design Team, came together fairly swiftly after that. I've used Riding Hood Red, Pool Party and Very Vanilla for my combo. I kept to a very simple layout - but couldn't resist adding embellies in the form of the domed red glittery dots. I was drawn to these shiny, glittery goodies straight away when I saw them on the shop shelf, I couldn't decide whether to go for red or silver - you know what happened next - I got both! I was pleased to find that the card fitted inside a standard envelope, the rosettes are not as chunky as I'd feared.
Here's the inside and the envelope. I used two of my most favourite SU! patterned papers ever. They come from different DSP collections but they went together so well! More faves - the Eyelet Border, Boho Blossoms and Decorative Label punches - got a look in as well. I hope Amanda liked the card as much as I enjoyed making it!
Supplies:
Stamps: SU! Medallion, SU! Happiest Birthday Wishes & Four Frames sets, Hero Arts 'Fabulous Birthday'
CS: SU! Riding Hood Red, Pool Party & Very Vanilla
Patterned Paper: SU! Spice Cake & Everyday Enchantment DSP
Ink: SU! Riding Hood Red & Pool Party
Tools: Sizzix Tim Holtz Paper Rosette Decorative Strip die, MFT Fishtail Flags Stax die, SU! Eyelet Border, Boho Blossoms & Decorative Label punches
Embellishments & accessories: SU! Everyday Enchantment brad, rhinestone jewels, Dimensionals, PaperMania red glitter dome stickers
Monday, 20 August 2012
A Handful Of Thank You Note Cards
I've had a clear out of my crafty stash recently. I adopted a policy a while ago whereby if something new entered the craft room that meant something had to leave the craft room and I was able to stick to that quite happily. However, I realised I was holding onto things because I loved/liked them but in a lot of cases these items weren't being used. There were lots of "I'm sure I'll get round to using that some time" items. Also there were some items I'd purchased thinking I'd love them but then after I'd actually used them I realised I wasn't that keen on them after all. So I decided that a major clear out was called for. I made myself be realistic and assess what I actually used and I was strict and if I wasn't actually using the item - out it went! I feel so much better having whittled my stash down and knowing that what I have is stuff that will be and is used. I know that I will always be adding new items and I really don't want to run out of room and get overwhelmed feeling I have too much stuff. The result was a big box of miscellaneous stuff got donated to a charity shop and I also sold quite a few items on eBay.
I always like to include a hand made thank you note in each eBay package I send out. This is one of the things I started doing a while back and now it doesn't feel right if I don't continue to do it! I made a few different designs and made multiples of each one.
First up is a rainbow of butterflies 7" x 3" card made with a Craft Tonic butterfly punch and my fave SU! thanks stamp. I added Star Dust Stickles to each butterfly body. I used Real Red, Pumpkin Pie, Daffodil Delight, Wild Wasabi, Pacific Point, Concord Crush and Wisteria Wonder CS for the butterflies.
Next is a 4" x 4" stamped bird card using the SU! Always set, the thanks stamp and a fave colour combo of black white and lime green. The flower circle is popped up.
Next is a 4" x 4" square flower card. I stamped a Hero Arts background (Canvas Stripes) in Crumb Cake ink and sponged the edges. The leaves were cut using a PTI leaf die and Wild Wasabi CS. I used the SU! Mixed Bunch set and Blossom punch for the flower - stamping in Rose Red and Rich Razzleberry for the centre - and I popped the flower up. That fave thanks stamp got in on the action again!
Next is a 4 1/4" x 4 1/4" square card with a more masculine design. I used Memory Box patterned paper and Poppystamps dies - and the thanks stamp again. I glued the Lorelai Leaf branch flat to the card but applied glue to the stems only and then curled the leaves up a wee bit. I added a gem for the eye and popped up the Serene Bird.
Lastly is this 4" x 4" Pale Plum flower thanks so much card using a new purchase - the PTI In Bloom set. I've always loved this set but I don't order directly from PTI any more 'cos of the shipping and customs charges. I was chuffed to get a used set from eBay recently and, even better, I had money in my PayPal account to pay for it after my crafty clear out! I love the notepaper look when I see it on cards and I have the SU! Spiral punch to enable me to do it - but I just don't seem to get round to doing it! I rectified that with this card design, I glued thin white notepaper to a piece of Whisper White CS, trimmed it to the size I wanted and then added the punched border. I stamped the two flower stamps on Pale Plum CS, cut them out and sponged the edges with Perfect Plum ink. I popped the smaller flower up on top of the larger one. I stamped the leaf sprig on Certainly Celery CS, sponged the edges with Old Olive ink and glued the sprig to the notepaper and then I popped up the flower. I gave my thanks stamp a rest and used the Thanks So Much from the Sincere Salutations set instead.
Lots of parcels were posted off today, that feels good! I'm now going to spend some time in my craft room having fun using some of my goodies!
Saturday, 18 August 2012
Blue & Green It's Your Day Card - Simply Stampin' Challenge #73
Simply Stampin' have this great sketch for you this week - very nice don't you think? I hope you'll give it a go!
I've inked up my sadly neglected Precious Butterflies set and used a combo of Island Indigo, Pool Party, Lucky Limeade and white. Years ago I would NOT have put blues and greens together but I really like pairing them together nowadays - so interesting how your tastes change and develop! I started off with an Island Indigo A6 card base and added Pool Party striped paper. I die cut and embossed the scalloped edge and added the Limeade dotted paper. After stamping the leafy flourish I inked the butterfly circle with Island Indigo ink, stamped off once, added Indigo ink just around the edges with a sponge dauber, stamped it and punched it out with the 1 3/4" circle punch. I punched a Pool Party Boho Blossoms flower, snipped between the petals, sponged the edges with Island Indigo ink and attached it to the centre of the circle with a Limeade brad. I popped up the flower circle and the sentiment and added a couple of jewels to finish off the card front.
I do love a matching patterned paper envelope - so I got out my trusty Simply Scored and Diagonal Plate and made the envelope. I added die cut labels, 3 butterflies and more jewels. Some patterned paper, a CS strip and some simple stamping and punching finished off the panel inside the card.
Please visit the Simply Stampin' blog and check out the other fab cards the Design Team girls have made to inspire you. One of the DT girls has a birthday today - please pop along to Amanda's blog to wish her a happy day! Then - go and get inky - happy stamping!
Supplies:
Stamps: SU! Precious Butterflies, It's Your Day & Happiest Birthday Wishes sets
CS: SU! Island Indigo, Pool Party, Lucky Limeade & Whisper White
Patterned paper: SU! Pool Party, Lucky Limeade & Island Indigo In Color DSP
Ink: SU! Lucky Limeade & Island Indigo
Tools: SU! Adorning Accents Edgelits die & embossing folder, Labels Collection Framelits dies, Boho Blossoms, 1 3/4" circle, Extra-large Oval, Word Window & Modern Label punches, Beautiful Wings Embosslits die, Simply Scored & Diagonal Plate, paper piercer, sponge dauber
Embellishments & accessories: SU! Limeade brad, rhinestone jewels,Dimensionals
O The Rising Of The Sun & The Running Of The Deer - 52 {C}CT August Theme Challenge Card
This week at the 52 {Christmas} Card Throwdown challenge blog we have a really fun Christmas song/music theme challenge.
My card depicts a sunrise and deer to go with the words "O the rising of the sun and the running of the deer" from the carol "the Holly and the Ivy". OK, so the deer are stationary at the moment but that's 'cos they're taking a breather after running under the trees to witness the sunrise LOL!
I sponged So Saffron, Apricot Appeal, Calypso Coral, Bashful Blue, Night of Navy and Always Artichoke inks to create my sunrise scene. Then I die cut the deer trio from Early Espresso CS, glued the legs to the card but popped up the bodies. I added punched leafy fronds to look like overhanging trees and matted onto an Early Espresso layer. I decided to keep to a CAS layout and simply mounted the image panel to a Bashful Blue 5 1/4" card base. A simple but stylish stamped sentiment finished off the card front.
I cut a panel for inside the card, stamped the Happy Christmas sentiment, added some pine boughs and sponged the edges. I used Always Artichoke ink for the pine boughs but made sure to stamp off once before each stamping so the ink came out lighter. The front of the envelope got more pine boughs and a stamped and cut out frame.
Make sure you visit the blog to check out the fab cards the other design team members have made and then play along with us - surely you can't resist this fun, festive challenge! I know I want to create another card inspired by a Christmas song!
Supplies:
Stamps: Hero Arts Holiday Cheer clear set, Woodware Happy Christmas, Hero Arts Real Pine, SU! Frames with a Flourish set
CS: SU! Bashful Blue, Early Espresso & Whisper White
Ink: SU! So Saffron, Apricot Appeal, Calypso Coral, Bashful Blue, Night of Navy, Always Artichoke & Early Espresso
Tools: Memory Box Deer Trio die, Martha Stewart Pine Branch punch, sponges
Embellishments & accessories: 3d foam pads
Friday, 17 August 2012
Everyday Enchantment Hello & Happy Thoughts Card
I've been playing with the gorgeous Everyday Enchantment papers and the Elementary Elegance stamp set and I made this Hello card. I used Poppy Parade, Pool Party, Lucky Limeade and Peach Parfait as my colour combo and stamped with Early Espresso ink. I LOVE that flowery paper, it's my favourite patterned paper from SU! for sure!
Inside - ta dah, surprise, a pop up flowerpot!
Kaitlyn, a sweet blog reader, recently emailed me a lovely message, bless her! Kaitlyn wanted some info about the pop up cards I'd made and I replied saying that I would make a pop up card and take progress photos along the way for her. After I'd finished the card I sent it to Kaitlyn so she has this card as a reference as well as the photos I'd emailed earlier. Hopefully, she will be popping up to her heart's content now!
I always use the Sizzix Pop Ups die to make pop up cards - you definitely don't need a die, you can just cut and score strips of CS - but if there is a tool that makes something easier then you can be sure I'll choose to use a tool!
I punched the flowerpot and gave it a contrasting rim. I used SU! flower punches for the flower and added a gorgeous brad to the centre. Before attaching a pop up element I always make sure that it will fit inside when the card is closed - I'm not keen to make THAT mistake again LOL! I cut a CS strip for a stem, added the leaves and glued the pot to the pop up. I then added the patterned paper, punched strip, sentiment and the butterflies.
Here's the envelope, I couldn't resist using more of the pretty papers to make a matching envelope!
Supplies:
Stamps: SU! Elementary Elegance & Four Frames sets, inside sentiment from Hero Arts
CS: PaperMania square white card blank, SU! Poppy Parade, Pool Party, Lucky Limeade, Peach Parfait & Whisper White
Patterned paper: SU! Everyday Enchantment DSP
Ink: SU! Early Espresso
Tools: Sizzix Pop Ups die, Woodware flowerpot punch, SU! Curly Label, Decorative Label & Dotted Scallop Ribbon Border punches, SU! Beautiful Wings Embosslits die, SU! Little Leaves Sizzlits die, SU! Simply Scored & Diagonal Plate
Embellishments & accessories: SU! Everyday Enchantment brad, rhinestone jewels, 3d foam tape
Tuesday, 14 August 2012
Flower Happy Birthday Stepper Card
It's my friend Jackie's birthday on Friday and this is the stepper card I made for her. When I sat at my desk to make this I knew I wanted to create a stepper card and I wanted to use pretty My Mind's Eye Lime Twist papers - but that was it. I took my colour combo from the colours in the papers - I used Cherry Cobbler, Lucky Limeade, Blushing Bride, Early Espresso, Pool Party and just a dash of Calypso Coral ink. This card evolved and took shape as I went along and it took ages to come together. I kept trying different stamps, punches, dies, ribbons, not to mention different placement of the elements! You know what? I didn't care one jot how long it took, it was a pure joy to make, I had the time and inclination just to sit and play, it was fab!
I started off with a 6" x 6" PaperMania foldies card - a foldies card is a concertina card with 5 square panels in all. I chopped two panels off - which I can use to make a normal square card - and I scored and folded the third panel at the halfway mark to form the stepper card. Then I glued pretty papers and CS mat layers and started to work on the main circle element. I die cut a couple of leafy branches out of the woodgrain patterned paper and then tried several die cut, punched and stamped flowers before hitting on the winner from the Mixed Bunch set. I inked the stamp with Calypso Coral ink and then added Cherry Cobbler ink around the edges with a sponge dauber. I added a punched Limeade circle with a decorative brad in the centre.
I wanted to mount the flower and branches onto a white circle but it didn't look quite right on just plain white. The patterned paper has some distressing to it so I thought I'd add a touch of colour with some distress ink. I added texture first by embossing the circle with my Bricked embossing folder and then I lightly sponged Antique Linen ink over the embossed areas and sponged the edges of the circle. I die cut two circle mat layers, one Cherry Cobbler and one Lucky Limeade and I popped the white circle up over the Limeade circle. I then mounted the circle onto a square of Blushing Bride CS, rounded the corners and added chocolate candy dots. I popped the flower up and added the sentiment fishtail banner. I'd applied some Old Olive scalloped ribbon before gluing the patterned paper panel to the card and I decided to add some Early Espresso narrow taffeta ribbon tied in a knot over the top. Still not finished with the front - I added photo corners, butterflies and gems to the bodies.
Here's a side view of the card.
So now it was time to move onto the back of the card which is where I wanted my sentiment and where I would write my message. A strip of pretty paper, a scalloped Limeade CS strip and a narrow strip of Espresso CS went at the bottom. I stamped the sentiment onto Pool Party CS, punched it out with the Decorative Label punch and added Cherry Cobbler mat pieces.
The great thing about the packs of foldies cards is that they come with gusseted envelopes which can accommodate cards with a bit of bulk and dimension. I kept to the same layout as the back of the card to decorate the front of the envelope, I just used different paper and colours of CS and added a stamped frame. It was a marathon crafting session, spread over 2 days but I enjoyed it muchly! I've known Jackie since we met at primary school at the age of 5! She's definitely worth taking the time and trouble for! What I didn't enjoy quite so much was gathering up and putting away the mountain of supplies I'd used or tried and rejected!
Supplies:
Stamps: SU! Mixed Bunch & Happiest Birthday Wishes sets, Hobby Art 'Sentiments' clear set
CS: PaperMania white 6" x 6" foldies card, SU! Cherry Cobbler, Lucky Limeade, Blushing Bride, Early Espresso, Pool Party & Whisper White
Patterned paper: various My Mind's Eye Lime Twist papers
Ink: SU! Calypso Coral, Cherry Cobbler, Lucky Limeade & Early Espresso, Tim Holtz Antique Linen Distress ink
Tools: Poppystamps Lorelai Branch die, circle Nestabilities dies, SU! Blossom, Decorative Label, Photo Corners & 1/2" circle punches, SU! Beautiful Wings Embosslits die, MFT Fishtail Flags Stax die, Sizzix Tim Holtz 'Bricked' embossing folder, Crop-a-dile Corner Chomper, Sizzix Scallops Decorative Strip die, paper piercer, sponge daubers
Embellishments & accessories: SU! Old Olive Scallop Dots ribbon, SU! Early Espresso 1/8" taffeta ribbon, SU! Everyday Enchantment brad, Pebbles Inc, Chocolate Candy Dots, rhinestone jewels, 3d foam tape
Saturday, 11 August 2012
Bird Birthday Wishes Card - Simply Stampin' Challenge #72
The Simply Stampin' challenge girls have set a challenge to make a card for the boys - we'd like to see your masculine cards this week. I decided I wanted to use a layout with squares of patterned paper and when I went through my DSP it struck me that some of the Paisley Petals papers are fairly masculine so I chose to work with those along with the bird punch. I've used Always Artichoke, Early Espresso, River Rock, Bravo Burgundy and Crumb Cake as my colour combo - quite an earthy colour scheme I think. I popped the River Rock circle and the bird up. To get the tiny circle for the eye I punched a piece of Crumb Cake CS with the Eyelet Border punch and used one of the dots.
I've used strips of the leafy patterned paper to decorate the inside of the card and the front of the envelope. I also stamped and punched a bird label for the envelope as a place to write the recipient's name.
Supplies:
Stamps: SU! Sincere Salutations & Four Frames sets
CS: SU! Always Artichoke. Early Espresso, River Rock, Bravo Burgundy & Crumb Cake
Patterned paper: SU! Paisley Petals DSP
Ink: SU! Early Espresso
Tools: SU! Bird Builder punch, Eyelet Border punch, 2 3/8" scallop circle punch, 1 3/4" circle punch, circles #2 die, Decorative Label punch
Embellishments & accessories: SU! Dimensionals
I've used strips of the leafy patterned paper to decorate the inside of the card and the front of the envelope. I also stamped and punched a bird label for the envelope as a place to write the recipient's name.
Aah, it feels good to have a masculine card to add to the stash! Do please join us this week, I'd love to come and check out your masculine cards! The other DT ladies will have great cards to inspire you so please check them out!
Supplies:
Stamps: SU! Sincere Salutations & Four Frames sets
CS: SU! Always Artichoke. Early Espresso, River Rock, Bravo Burgundy & Crumb Cake
Patterned paper: SU! Paisley Petals DSP
Ink: SU! Early Espresso
Tools: SU! Bird Builder punch, Eyelet Border punch, 2 3/8" scallop circle punch, 1 3/4" circle punch, circles #2 die, Decorative Label punch
Embellishments & accessories: SU! Dimensionals
Sparkly Season's Greetings Card - 52 {C}CT Colour Combo Challenge Card
This week at the 52 {C}CT blog we have a fab colour combo challenge for you.
I used an Aspen Trees stencil with pearlescent white embossing paste and I liberally sprinkled glitter over the paste while it was still wet. Once the trees panel was dry I matted onto red and black layers and mounted them onto a Brushed Silver 5 1/4" square card base. I then popped up a sparkly red bird with a silver wing and a tiny black gem for the eye. I stamped and die cut the sentiment and finished off with shiny silver pearls.
I cut a white panel for inside the card, stamped a sentiment and bird and added a few silver punched snowflakes. I punched just a portion of the bird image for the envelope flap.
What a great colour combo for Christmas cards - I hope you'll join in with the challenge this week, I'd love to come and see what you make! The other gals on the Design Team are sure to have fab cards to inspire you so check them out!
Supplies:
Stamps: SU! Four the Holidays set, Inkadinkado Winter Birds set, Hero Arts Holiday Cheer clear set
CS: SU! Real Red, Basic Black. Whisper White & Brushed Silver, red glimmer paper
Ink: Memento Tuxedo Black, SU! Real Red
Tools: Crafters Workshop 'Aspen Trees' stencil, SU! Bird Builder punch, Spellbinder's Labels Trio die, Woodware small snowflake punch, circle punches
Embellishments & accessories: Dreamweaver Pearlescent embossing paste, crystal ultrafine glitter, black gem, silver pearls, 3d foam pads