Don't worry if you don't have exactly those colours, you can substitute similar shades. It would be great if you joined us! Please check out the rest of the Design Team projects, there's bound to be some fab inspiration!
I learned how to make a lovely spring top gift box earlier this week thanks to Joanne. I took the opportunity of making one while the process was still fresh in my mind! The box uses just one piece of CS and doesn't require a separate lid piece. I didn't actually assemble my box when I learned how to make it, I did all the cutting, scoring and punching but bought it home still flat as I knew if I tried to make one from looking at a completed box I'd lose the plot entirely! Having this piece to refer to made making my own box much easier.
EDITED TO ADD: I've been asked for measurements so I've added them below before the photo of the template. Hope that helps!
Start off with a piece of CS measuring 10 1/2" x 8 1/4". On the long side score at 2 1/2", 5", 7 1/2" and 10". On the short side score at 2 1/2", 5", 6 1/4 " and 7 1/2". Refer to the photo to see where to cut tabs, punch the fancy border and cut out the triangles.
So here is my finished box, tied up with Very Vanilla ribbon and decorated using the Apothecary Art set and Labels Framelits dies. I stamped the 'For You' circle separately on a piece of Pretty in Pink CS, punched it out and popped it up. I added some jewels to the label to finish off the box.
This photo shows the box with the ribbon untied - the top sort of springs up and you can get to the goodies inside by pushing the sides of the lid outwards.
Having made the box I just had to make a matching card! The card measures 5 1/4" square. I coloured the image with inks and a blender pen, using Pretty in Pink for the flowers and Old Olive for the leaves. I stamped the sentiment strip onto Pretty in Pink CS, cut it out and popped it up. For the ribbon I used the technique where you tie a loose knot in your strip of ribbon, feed a smaller strip through the knot, pull tight and trim your tails. It's easy, you get a nice neat knot and it's ideal for ribbon that is patterned on one side and plain on the other! Just like the box, one of the labels got some sparkly jewels to finish off.
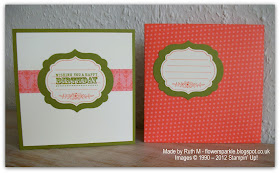
Here's the inside and the matching patterned paper envelope with more Apothecary Art and Framelits dies goodness. I am loving whipping up patterned paper envelopes with the Diagonal Plate, so fast and easy - and reduces my paper stash to boot!
Finally, here's a photo of the card and box together. I don't often make matching cards and boxes but when I do I always enjoy seeing them together, there's something very appealing about a matching ensemble!
Supplies:
Stamps: SU! Apothecary Art & Happiest Birthday Wishes sets
CS: SU! Pretty in Pink, Calypso Coral, Old Olive & Very Vanilla
Patterned Paper: Calypso Coral paper from In Color DSP stack
Ink: SU! Pretty in Pink, Calypso Coral, Old Olive & blender pen
Tools: SU! Labels Collection Framelits dies, 1" circle punch, Eyelet Border punch, Simply Scored & Diagonal Plate, Stamp-a-ma-jig
Embellishments & accessories: SU! Old Olive Scallop Dot ribbon, Very Vanilla grosgrain ribbon, rhinestone jewels, Dimensionals


I love making boxes and your box is just beautiful. I need to find some time to have a go at making one of these. Deb x
ReplyDelete