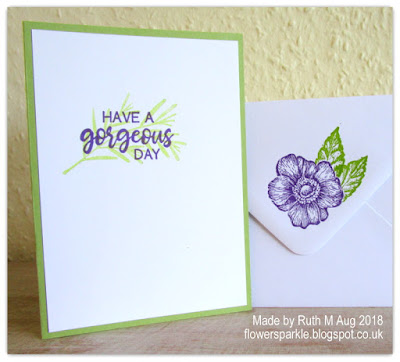
Friday, 31 August 2018

Tarnished Foil Background With Leaf Cluster Anniversary Card

Today hubby and I are celebrating our wedding anniversary - 34 years, blimey!   I decided to try a technique I discovered recently - the Tarnished Foil technique.  Owen loves black and metallic cards so this seemed the perfect technique to use for his anniversary card!  I learned this technique from Lisa Curcio - her blog post is here where Lisa shares a fabulous video tutorial plus some lovely technique example cards.

Here's the card and envelope together.


There was some SU! 'Champagne' Foil Sheet in my stash which had never been used so I chose that and embossed a panel of the foil with the SU! 'Hexagons' 3D Dynamic embossing folder.  I followed Lisa's excellent instructions using SU! Black Archival ink, VersaMark and Copper and Silver embossing powders.  I was really pleased with the way the panel turned out, Lisa does promise that the technique is fool proof!

For the sentiment panel I stamped onto a die cut rectangle, stamped in VersaMark and heat embossed using Copper embossing powder.  I die cut two leaf clusters, one in black and one in Copper Foil sheet, leaving the pieces in the copper shape I removed the pieces from the black shape and glued it on top of the copper shape.  I popped up the leaf cluster and the sentiment rectangle.  To finish the front I added some copper metallic gems.


Here's a closer look at the tarnished foil panel.


Here's the inside of the card.  The sentiment is copper heat embossed and I added three Champagne Foil Sheet punched hearts.  Underneath I adhered a die cut black 'ribbon' using a Grosgrain Ribbon die and added a narrow strip of Copper Foil Sheet underneath.  I used the largest die in the Creative Dies Plus 'Nesting Rectangles Wonky Stitches' die set to cut the panel for inside the card.  I just LOVE that it fits A6 sized cards when the majority of die sets are more suitable for A2 sized cards!  I'm very happy about that - plus the bargain £5.49 price! 


Here's the front of the envelope with a popped up leafy cluster and a bookplate name label.  I added silver nailheads to the bookplate label.  It's fun to mix up metallics now and then!


Supplies:
Stamps: 'Sincere Sentiments' set free with Simply Cards & Papercraft mag #169, Clearly Besotted 'Brushed Greetings II' set
CS: SU! Basic Black & Whisper White, Foil Sheet in 'Champagne' & 'Copper'
Ink: VersaMark
Tools: SU! 'Hexagons' 3D Dynamic embossing folder, leaf cluster die from M&C Boutique, Creative Dies Plus 'Nesting Rectangles Wonky Stitches' die set, Sizzix Originals 'Bookplates' die, SU! 'Heart to Heart' punch
Embellishments & accessories: SU! silver & copper embossing powder, Dimensionals, Marianne Design metal adhesive gems, silver nailheads

Ruth


Tuesday, 28 August 2018

Sparkly Village Merry Christmas Card - RRCB#94

Woohoo, my flip-flops card was chosen as the Top Pick for challenge #92 over at the Retro Rubber Challenge Blog and as a result I'm a guest designer for their current challenge!  I'm excited to be joining them for their Anything Goes Retro Rubber Challenge #94!


Well, I've gone from a summery flip-flops card to a wintery Christmas village card!  The PSX 'Christmas Village' stamp has been in my stash for a VERY long time - the date on the stamp is 1999 so that's pretty retro!  My friend Jan also owns this stamp and each year we both try to use the stamp to make at least one Christmas card. 

I stamped the image in Cherry Cobbler ink onto a piece of Whisper White CS and stamped the sentiment in Tranquil Tide ink.  The sentiment comes from the SU! 'Four the Holidays' set which came out in 2009.  I cut a piece of double sided adhesive sheet, adhered it to my stamped panel, removed the backing sheet and covered the panel in SU! Dazzling Diamonds sparkly glitter.  After trimming the panel to size I layered it onto mats of Mint Macaron and Tranquil Tide CS.  I made a 5 1/2" square Cherry Cobbler card base and added a strip of patterned paper from the SU! 'Delightfully Daisy' DSP pack.  No, not typical Christmas paper but I think it looks snowy so I went with it!  I die cut a strip of Cherry Cobbler 'ribbon'  using a Memory Box 'Grosgrain Ribbons' die and I popped up the main image panel.  To complete the card front I added some retro embellishments - Cherry Cobbler Candy Dots.


It's really difficult to capture sparkle in a photo but here's a closer look at the sparkly village panel.  In real life it is super sparkly!


Here's how I decorated the inside of the card and the envelope flap.  I stamped the sentiment in Tranquil Tide ink, coloured the holly leaves with Mint Macaron ink and a Blender Pen and coloured the berries with a Cherry Cobbler marker.  For the envelope flap, I stamped the village again and used a circle die to cut a portion out and then used a 2" circle punch and another die to cut out the matting circles.


Another Christmas card to go in the box - that's always a good thing!  To the team over at the Retro Rubber Challenge Blog, thanks so much for having me, I loved joining in as a guest designer!

Supplies:
Stamps: PSX 'Christmas Village' stamp, SU! 'Four the Holidays' set, Stampendous 'Merry Wishes'
CS: SU! Cherry Cobbler, Mint Macaron, Tranquil Tide & Whisper White

Patterned paper: SU! 'Delightfully Daisy' DSP pack
Ink: SU! Cherry Cobbler, Mint Macaron & Tranquil Tide
Tools: Memory Box 'Grosgrain Ribbons' die set, SU! 2" circle punch, 'Layering Circle' Framelits die set & Blender Pen
Embellishments & accessories: double sided adhesive sheet, SU! Dazzling Diamonds glitter, Candy Dots & Dimensionals

Ruth


Friday, 24 August 2018

Sparkling Forest Christmas Card

Having just purchased the absolutely beautiful SU! 'Rooted in Nature' bundle I went to YouTube to watch the SU! video for the bundle.  Jessica presented the video and a card she showcased really took my fancy - the card is also featured on page 144 of the SU! annual catalogue.  I decided to make my own CASEd version and to make it a Christmas card - because I need to increase the stash in the Christmas card box!

Jessica's tips for stamping the forest were very helpful and I stuck with her guidelines and I stayed with the layout of the card.  I've used Mint Macaron, Tranquil Tide and Whisper White as my colour combo and I made an A6 sized card base.  Once I'd decided to use the 'may your Christmas sparkle with joy and happiness' sentiment I knew I'd have to introduce some seasonal sparkle to the card!  I've used some Mint Macaron glimmer paper and I added Dazzling Diamonds glitter to the trees.  The sentiment panel and two die cut trees are popped up.


Here's a closer look at the sparkly trees.


Here's the inside of the card and the envelope.  I used the Stamparatus to stamp the sentiments and I stamped 'Christmas Blessings' twice in order to get a deeper shade of Mint Macaron ink.  I added a touch of twinkle inside by placing a tiny dot of Mint Macaron glimmer paper on each side of the 'to you and yours' sentiment. 


Supplies:
Stamps: SU! 'Rooted in Nature' & 'Christmas Pines' sets
CS: SU! Mint Macaron, Tranquil Tide & Whisper White, Mint Macaron glimmer paper
Ink: SU! Mint Macaron & Tranquil Tide
Tools: SU! 'Nature's Roots' Framelits dies, 'Triple Banner' punch, Stamparatus
Embellishments & accessories: SU! Dazzling Diamonds glitter, Dimensionals

Ruth

Sunday, 19 August 2018

Leaves To You From Me Aperture Card - RRCB#93

Back to work for me tomorrow after a two week holiday - as it was a staycation I've enjoyed spending lots of time getting inky in my craft room!  I wanted to create a card on my last holiday day and I visited the Retro Rubber Challenge Blog and took part in their #93 Tic Tac Toe challenge.


For my card I chose the diagonal line - die cut or punch, green and leaves.  I used circle dies to create an aperture and frame, my colour combo is SU! Granny Apple Green, Mossy Meadow and Whisper White and I've used two old SU! sets, the leaves are from 'Gently Falling' (released 2011) and the sentiment is from 'Best Yet' (released 2008).

'Gently Falling' is a two-step stamping set and it produces gorgeous images!  I inked the solid background images in Granny Apple Green ink, stamped off once, added some Mossy Meadow ink around the stamps using a sponge dauber and then stamped onto Whisper White CS.  I stamped the leaf outline images in Mossy Meadow ink using a Stamp-A-Ma-Jig to ensure perfect placement.  I made an A6 sized card base from Whisper White thick CS and used the SU! 'Layering Circle' Framelits die set to cut the aperture from the card front and to cut the Mossy Meadow scalloped circle frame.  I stamped the sentiment through the aperture, fussy cut the leaves and popped them all up.  To finish the card front I sprinkled on a few gold sequins.


I added two stamped and fussy cut leaves on the inside of the card and stamped a leaf direct to the envelope flap.


Many thanks to the Retro Rubber Challenge Blog for encouraging us to use our old stamps from our stash - 'Gently Falling' is one of my all time favourite stamp sets and it's always a joy to ink it up!

Supplies:
Stamps: SU! 'Gently Falling' & 'Best Yet' sets
CS: SU! Mossy Meadow & Whisper White (regular & thick)
Ink: SU! Granny Apple Green & Mossy Meadow
Tools: SU! 'Layering Circle' Framelits dies, Stamp-A-Ma-Jig
Embellishments & accessories: gold sequins, SU! Dimensionals

Ruth

Saturday, 18 August 2018

Dangly Butterfly Tent Card

A card featuring another Simply Cards & Papercraft magazine freebie.  CraftStash sell some back issues of the magazine and the freebie gift with issue #178 was a huge A4 sized stamp set with a few matching dies.  Also, the magazine was under half price so that was just too tempting for me, I couldn't resist!

As soon as I saw the butterfly I knew it would be perfect for a dangly tent card!  I opted for a bright and cheery colour, SU! Melon Mambo, combined with some lovely Doodlebug clouds patterned paper.  The card base measures 5 1/2" square and I cut out a square aperture from the front of the card.  My order from CraftStash contained some dies along with the magazine.  I loved the Creative Dies Plus 'Wonky Stitches' nesting die sets and they seemed excellent value at just £5.49 per set - naturally I had to get more than one set - choosing to get squares, rectangles and ovals!  I've used two of the square nesting dies to create the frame to go around the aperture.  I stamped and die cut two butterflies and sandwiched some silver cord between the two shapes and dangled the butterfly using the cord.  After I'd stamped the butterflies in SU! Melon Mambo ink I carefully added some colour to the body and wings using ProMarkers.  I stamped and die cut the sentiment, popped it up and added two rhinestone jewels.


Here's a side view showing how I added a 'W' piece of CS to the tent fold card base.  I always do this when making a dangly element card as tent cards don't always want to stand up which can be annoying.  I cut a piece of CS to the width of the card x 3 1/2" and score at 1/2", 1 3/4" and 3".


Here's a closer look at the butterfly.


Here's the back of the card and the front of the envelope.


Supplies:
Stamps: 'The Best Of Card Making Magic' stamp & die set freebie from Simply Cards & Papercraft mag #178, Apple Blossom 'Banner & Sentiments' stamp set
CS: SU! Melon Mambo & Whisper White

Patterned paper: Doodlebug Flower Box 'Garden Garland'
Ink: SU! Melon Mambo, ProMarkers
Tools: die set freebie from Simply Cards & Papercraft mag #178, Apple Blossom 'Banners' die set, Creative Dies Plus 'Wonky Stitches' square & oval nesting die sets, SU! Simply Scored

Embellishments & accessories: silver cord, SU! rhinestone jewels, Dimensionals
Ruth

Thursday, 16 August 2018

Burlap, Wood & Leaves Just For You Card

This is a little card I made for Jan to say thank you for placing her SU! order.  Jan, like me, purchased the SU! 'Rooted in Nature' stamps and dies so I thought I'd use these beautiful products to make the card.  I'm really enjoying playing with these wonderful stamps and dies!

I stamped the 'Burlap' background stamp onto a piece of Sahara Sand CS using Sahara Sand ink, trimmed the piece to size and inked the edges with Soft Suede ink.  I added some Copper Trim, taped the ends to the back of the panel and glued the panel to the front of a 4" square card made from Whisper White thick CS.  I stamped the tree trunk slice in Sahara Sand ink, fussy cut it and inked the edges with Soft Suede ink.  I stamped the 'Just For You', made a flagged end and glued that behind the popped up tree trunk slice.  Using Mint Macaron, Mossy Meadow and Rich Razzleberry inks I stamped the three leafy images, I die cut each one and glued them in place.  I really like the rustic feel the mixture of burlap, wood and leaves gives!


Here's the inside and the envelope.  


It's great to be spending lots of time in my craft room - I'm taking full advantage of being on holiday from work!

Supplies:
Stamps: SU! 'Rooted in Nature' set, SU! 'Burlap' background stamp
CS: SU! Sahara Sand & Whisper White thick
Ink: SU! Sahara Sand, Soft Suede, Mint Macaron, Mossy Meadow, Rich Razzleberry & Early Espresso
Tools: SU! 'Nature's Roots' Framelits die set, circle punch, sponge daubers
Embellishments & accessories: SU! Copper Trim, Dimensionals

Ruth

Wednesday, 15 August 2018

Rosy Background & 3D Butterfly Birthday Card

A local stationers shop sells some crafty bits and pieces and I popped in to have a peek after work one afternoon.  I walked out with two X Cut mini dies which cost me just over a fiver so I didn't go mad!  Later that week I also purchased issue #179 of Simply Cards & Papercraft magazine which had a free gift and I've used the freebie set plus one of my new dies to make this card.

The magazine came with a 'Botanical Border' stamps and dies set and the packaging showed some card ideas and I based my card on one of their examples - adding a few touches of my own.  To create the background I stamped the rose in Berry Burst ink onto the front of a Pink Pirouette A6 card base and tied some Berry Burst ribbon around the card.  I die cut the border from Whisper White CS and cut it again using Lemon Lime Twist CS and I inlaid the green leaves to add a pop of contrast.  I glued the border in place and stamped the sentiment.  I die cut the 3D butterfly in Berry Burst and Lemon Lime Twist CS, layered the butterfly and added some rhinestone jewels.


Inside the card I did some layered stamping for the sentiment - I'm very partial to some layered stamping! - and used punched circles and a die cut butterfly shape to decorate the envelope flap.


Supplies:
Stamps: 'Botanical Border' stamps & dies gift with Simply Cards & Papercraft Mag #179
CS: SU! Pink Pirouette, Berry Burst, Lemon Lime Twist & Whisper White
Ink: SU! Berry Burst & Lemon Lime Twist
Tools: die from 'Botanical Border' stamps & dies gift with Simply Cards & Papercraft mag #179, X Cut Mini 3D Butterfly die, circle punches
Embellishments & accessories: SU! Berry Burst ribbon, rhinestone jewels

Ruth


Monday, 13 August 2018

Poinsettia Warmth Of The Season Card

My friend Jan is coming over on Thursday afternoon to make a card.  Jan has recently purchased the SU! 'Rooted in Nature' stamps and dies, the 'Under the Mistletoe' DSP pack and Shaded Spruce ink and CS.  She asked me if I would design a Christmas card using those products.  I said that I'd be very happy to only I'd need to borrow the DSP and the Shaded Spruce ink and that was soon arranged!

I did have a look online for inspiration on using the 'Rooted in Nature' stamps for Christmas cards and I saw that people had used the beautiful skeleton leaves in the set to make poinsettias and I went along with that idea.  I used Shaded Spruce and Lovely Lipstick inks to stamp the leaves and I used the matching die to cut them all out.  I flicked through Jan's pack of 'Under the Mistletoe' patterned paper - they are gorgeous papers! - and selected a Shaded Spruce sheet that has foliage and poinsettias on.  A great fit for the poinsettia themed card I thought!

Having settled on the main focal image and the colours I just needed to get a layout.  I decided on a strip of patterned paper going down one side and the design came together really quickly after that.  The Lovely Lipstick card base measures 5 3/4" square.  I embossed the white panel with the SU! 'Softly Falling' embossing folder, matted that onto a Shaded Spruce layer and added some Shaded Spruce ribbon (also borrowed from Jan).  I punched a circle to form the base of the poinsettia and used glue dots to attach each leaf in place.  I punched a small Lovely Lipstick circle to go in the centre and I added a gold faceted gem.  I popped up the poinsettia and I also popped up the sentiment label.  I love that label from the SU! 'Petals & More' Thinlits die set, it's fab for sentiments and that saying from the 'Hearts Come Home' stamp set fits perfectly!


I used the fir tree stamps from the 'Rooted in Nature' set using Shaded Spruce ink to decorate the panel inside the card and I used another sentiment from the 'Hearts Come Home' set. The poinsettia on the envelope flap was stamped using the smaller skeleton leaf stamp from the 'Rooted in Nature' set.  As with the poinsettia on the card front, I added a small punched circle and a gold faceted gem to the centre of the flower.


Supplies:
Stamps: SU! 'Rooted in Nature' & 'Hearts Come Home' sets
CS: SU! Lovely Lipstick, Shaded Spruce & Whisper White

Patterned paper: SU! 'Under the Mistletoe' DSP pack
Ink: SU! Lovely Lipstick & Shaded Spruce
Tools: SU! 'Nature's Roots' Framelits & 'Petals & More' Thinlits' die sets, SU! 'Softly Falling' embossing folder
Embellishments & accessories: SU! Gold Faceted Gems, Glue Dots, Dimensionals

Ruth

Friday, 10 August 2018

August 2018 Card Group Projects

Last Thursday we got together for our August card group meeting.  During last month's meeting two of the tops being worn that day came under scrutiny and the ladies decided to challenge me to make two cards based on the patterned tops.  I couldn't resist the challenge could I?!  Happily, the ladies were pleased with my efforts!

So first up is the top worn by Lesley featuring leafy silhouettes in yellow and blues on a white background.


Here's the card I made inspired by Lesley's top.  My colour combo is SU! So Saffron, Marina Mist and Night of Navy along with white.  I used leaf and floral silhouette stamps plus a leaf die.  I stamped a honeycomb stamp in So Saffron ink on the right hand side just to add a touch of texture and I added a line drawn with a Night of Navy marker.


Here's the inside of the card and the envelope.


Here's Margaret A's top featuring floral images and colourful parrots.


Here's the card I made inspired by Margaret A's top using the SU! Petal Palette set.  I haven't got anything parrot related so I used the lovely bird from the set instead.  My colour combo is Balmy Blue, Daffodil Delight, Flirty Flamingo, Mossy Meadow and Tip Top Taupe.  As well as taking inspiration from the top I was inspired to CASE this lovely card I saw made by Jan Clothier on Pinterest.  I popped a few small flowers up and also popped up the bird and sentiment label.  I stamped the bird on watercolour paper and used SU! watercolour pencils and an Aquapainter to colour the birdie.  I added two gold nailheads to the sentiment label to finish the card front.


Here's the inside of the card and the envelope.  During the afternoon Jan added a bird to her envelope which looked great so I'm going to add a bird to mine as well!


There's not been a lot of crafting time for me recently and I really have missed it.  I was shopping in a supermarket and made the mistake of browsing the magazines and before I knew it a craft magazine with free goodies was dropped into the trolley!  I'd also bought a couple of small X Cut dies from a stationers shop earlier in the week.  I'm a shocker at giving in to temptation on buying stuff when I haven't actually made anything for a while.  Maybe I feel like I'm still connected to my crafting even though I'm not actually doing any!?

However, after buying the dies and magazine I did get into my craft room and create something so that was good.  I've used the free stamps and dies that came with issue #179 of Simply Cards & Papercraft magazine for the third card group card.  My colour combo is SU! Pear Pizzazz, Gorgeous Grape, Granny Apple Green and white.  I stamped the background sprigs in stamped off once Granny Apple Green ink, I stamped the leaves in the same colour ink but used full strength ink and I stamped the flowers using Gorgeous Grape ink - full strength and stamped off once.  The leaves and flowers were fussy cut and the flowers were popped up.  The leafy border die is really unusual and I love the way you can lift the leaves up for a bit of dimension.


Here's the inside and the envelope.  Some layered stamping for the sentiment on the inside and I masked the flower before stamping the leaves on the envelope.


I can't believe we'll be starting Christmas cards next month!  I asked the ladies for their input and it was decided that rather than making solely Christmas projects during September, October and November we will make two Christmas projects plus one non Christmas project each time.  I always wish I'd started my Christmas cards earlier and this year is no exception!

Supplies:
Stamps: SU! 'Best Blossoms' & 'Garden Silhouettes' sets, Kaisercraft 'Honeycomb' texture stamp
CS: SU! So Saffron, Night of Navy & Whisper White
Ink: SU! Daffodil Delight, Marina Mist & Night of Navy, Night of Navy marker
Tools: Poppystamps 'Lorelai Leaf' die
Embellishments & accessories: SU! Marina Mist grosgrain ribbon, Dimensionals


Supplies for Best Wishes card:
Stamps: SU! 'Petal Palette' set
CS: SU! Balmy Blue & Whisper White, watercolour paper
Ink: SU! Flirty Flamingo, Mossy Meadow & Tip Top Taupe
Tools: SU! 'Stitched Shapes' & 'Petals & More' die sets, SU! Balmy Blue & Daffodil Delight watercolour pencils, Aquapainter
Embellishments & accessories: gold nailheads, SU! Dimensionals


Supplies for Sending Birthday Wishes card:
Stamps: 'Botanical Border' stamps & dies set (Simply Cards & Papercraft #179 freebie)
CS: SU! Pear Pizzazz, Gorgeous Grape & Whisper White
Ink: SU! Granny Apple Green & Gorgeous Grape
Tools: Sizzix 'Tags, Rounded' Framelits die set, dies from 'Botanical Border' stamps & dies set (Simply Cards & Papercraft #179 freebie)
Embellishments & accessories: SU! Dimensionals

Ruth


Thursday, 9 August 2018

Life Is Better In Flip-Flops Card - RRCB92

I recently came across the Retro Rubber Challenge blog where you must use a stamp that is at least a year old on your challenge entry cards.  Sounded perfect for me as I have quite a few retro stamps in my stash!  The current challenge, number 92, is 'Life's a Beach!' and they're asking for a summer themed card.

Hmmm, I remembered I had a Woodware 'Flip Flops' stamp set in my stash and so I dug that out.  I'm not exactly sure how old the stamp set is, I know I've had it in my stash for over two years and it could well be longer than that.  It has sat neglected and unused until now - shocking! I've also used a Hero Arts 'Woodgrain' background stamp that I've had since 2009.

One of my favourite things to do is mix my old stash items with my new crafty purchases.  For this card I used my brand new 'Nesting Rectangles Wonky Stitching' die set along with my old stamps.  I die cut the rectangle using SU! Balmy Blue CS and stamped the 'Woodgrain' image on it using Balmy Blue ink.  I know the stamp is 'Woodgrain' but I thought the lines gave a good impression  of water!

To get an authentic beach feel and look I tore a piece of very fine sandpaper, die cut just a portion of it, stamped the speckle stamp from the set over the sandpaper using Soft Suede ink and glued the sandpaper to the Balmy Blue rectangle.  The blue rectangle was mounted onto a Lovely Lipstick mat layer and I glued that to the front of a white A6 sized card base.  I paper pieced the flip flops, (the Daffodil Delight 'Polka Dot Parade' DSP is also very retro, I think that's been in my stash for 5 - 6 years!) fussy cut the elements, popped up the flowers and attached the flip flops to the panel - popping up the second flip flop.  I also popped up the 'Life is better in flip-flops' sentiment.  The finishing touch for the card front was to add a rhinestone jewel to the centre of the flowers.


I used the Daffodil Delight dotty patterned paper and Lovely Lipstick CS to decorate the inside of the card and the front of the envelope.


This was a lovely, happy card to make - it's raining and grey today so some cheery brightness was definitely called for!

EDITED TO ADD:
I'm very happy to say my card was chosen as the Top Pick for this challenge, woohoo!

Supplies:
Stamps: Woodware 'Flip Flops' set, Hero Arts 'Woodgrain' background stamp
CS: PaperMania A6 white card blank, SU! Balmy Blue, Lovely Lipstick & Whisper White

Patterned paper: SU! 'Polka Dot Parade' DSP
Ink: VersaFine Onyx Black, SU! Soft Suede
Tools: Creative Dies Plus 'Nesting Rectangles Wonky Stitching' die set
Embellishments & accessories: very fine sandpaper, SU! rhinestone jewels, Dimensionals

Ruth


01 09 10