Pages

Saturday, 31 July 2021

Alcohol Ink Background Snowflakes Christmas Card

While Lesley and Wendy were with me playing with the alcohol ink background technique I made my own background using a purple, blue and aqua colour scheme.  I left it to one side for a while before deciding on using it with snowflakes to make a Christmas card.  Here's the card and envelope together.


Here's the card - it's another Inside Z Fold Aperture card.  I used Highland Heather, Night of Navy and Basic White CS to make the card.  To create the alcohol ink background I scribbled Dark Bermuda Bay, Dark Highland Heather and Dark Night of Navy Stampin' Blends alcohol markers on to an A6 sized piece of vellum and dabbed on 99% isopropyl alcohol using a flat paintbrush.  I taped the vellum to white CS and die cut the stitched rectangle shape.  I die cut two white snowflakes, added Night of Navy circles behind the snowflake centres and popped those up.  I die cut a small white snowflake and glued that to the vellum panel.  I added rhinestone jewels to the snowflake centres.  I stamped the sentiment in VersaMark on Night of Navy CS, heat embossed with white embossing powder, cut a strip and glued that across the card front.


Here's a closer look at the alcohol ink background.  You can't tell from the photo but the panel has  shimmery drops because I added some Clear Wink of Stella by tapping the pen against my bone folder to spritz shimmer over the panel.


Here's the card fully open.  I cut a second strip of Night of Navy CS and glued it behind the front strip to add stability to the strip going over the aperture.  Basically, this fancy fold is a card with an aperture cut out from the front, a smaller white Z Fold card glued inside and a panel is nestled through the aperture and glued to half of the Z Fold panel.


Here's the inside panel.  I stamped the snowflakes in stamped off once Highland Heather ink and stamped the sentiment over the top in Night of Navy ink.  A strip of alcohol ink background was taped to the bottom.


Here's the envelope with a strip of alcohol ink background and a die cut snowflake flourish.


Supplies:
Stamps: SU! 'Frosted Foliage', 'Snowflake Wishes' & 'Snow is Glistening' sets 
CS: SU! Highland Heather, Night of Navy & Basic White
Ink: SU! Highland Heather & Night of Navy, VersaMark, SU! Dark Bermuda Bay, Dark Highland Heather & Dark Night of Navy Stampin' Blends alcohol ink markers
Tools: SU! 'Snowfall' die set, Claina Palmer 'A6 Double Stitched Nested Dies' set, circle punches, flat paintbrush
Embellishments & Accessories: 99% isopropyl alcohol, SU! white embossing powder, Clear Wink of Stella pen, Basic Rhinestone Jewels & Dimensionals

Ruth

Friday, 30 July 2021

Alcohol Ink Background Floral Birthday Card

Another alcohol ink background birthday card.  I precut some A6 pieces of vellum so I have a supply ready to grab and while I had the supplies out I couldn't resist making another alcohol ink background!  Here's the card and envelope together.


Here's the card.  I made the background for this card a little bit differently.  I used a spritzer bottle to apply the alcohol onto the vellum rather than dabbing the alcohol on with a flat paintbrush.  I found that I needed to spritz a lot to get the ink to move and blend so my vellum panel got very wet and really curled up.  I don't like the look as much, I prefer the veining look I get when using the flat paintbrush and the vellum curled up a lot.  I did manage to get it flat though so I carried on and made a card.  I taped the vellum to a piece of Basic White CS and cut the panel out using a stitched rectangle die.  I added a black floral die cut, some Basic Black shimmer ribbon and popped up a heat embossed sentiment label.  I added a sweet little die cut butterfly and then added a clear epoxy droplet to the label to finish


Here's a closer look at the ink background.  Using a spritzer bottle does have an advantage in that you don't get any colour contaminated alcohol.  However, I will continue to decant some alcohol into a small jar and dab it on with a flat paintbrush as I much prefer the look achieved with that method and the vellum doesn't curl.


Here's the inside of the card.  I die cut the leaves and snipped the die cut shape apart so I had part of the design for the inside of the card...


...and part of the design for the envelope.


Supplies:
Stamps: SU! 'Artistically Inked' & 'Happiest of Birthdays' sets
CS: SU! Basic Black & Basic White
Ink: Memento Tuxedo Black, VersaMark, SU! Stampin' Blends alcohol ink markers in Dark Flirty Flamingo, Dark Mango Melody & Dark Melon Mambo 
Tools: SU! 'Artistic' & 'Nature's Thoughts' die sets, 'Messages' die, Claina Palmer 'A6 Double Stitched Nested Dies' set, spritzer bottle
Embellishments & Accessories: 99% isopropyl alcohol, SU! white embossing powder, Basic Black shimmer ribbon, clear epoxy droplet, Dimensionals

Ruth

Thursday, 29 July 2021

Leaves & Butterfly Inside Z Fold Aperture Card & Two Gift Bags

A while ago I made two Inside Z Fold Aperture cards (CARD ONE and CARD TWO) with alcohol ink backgrounds which I gave to my lovely friends Lesley and Wendy.  They obviously liked the cards because they asked if they could come over for me to show them how it's done!  I made a very similar card for them to make but changed it up a bit.  They came over last week for their crafty lesson on alcohol ink backgrounds and the fancy fold card and we had a wonderful time!  Here's the card and envelope together.


Here's the card.  I've used Melon Mambo, Basic Black and white as my colout combo and used dies from the SU! 'Brilliant Wings' and 'Artistic' die sets.  I absolutely love the look of dramatic black die cut shapes against an alcohol ink background!  I used nesting stitched rectangle dies to cut the aperture and frame.  I have the SU! 'Stitched Rectangles' die set but here I've used the Claina Palmer 'A6 Double Stitched Nested Dies' set as it's perfectly sized for UK A6 sized cards.  I stamped the sentiment onto black CS with VersaMark, heat embossed it with white embossing powder and cut out the label shape using the SU! 'Messages' die.  I glued the label in place across the frame and added a gold Gilded Gem to the left side.


Here's a closer look at the alcohol ink background.  I scribbled Dark Mango Melody, Dark Flirty Flamingo and Dark Melon Mambo Stampin' Blends markers over an A6 sized piece of vellum and dabbed 99% isopropyl alcohol over the panel with a flat brush.  It's important to use alcohol over 90%, the 70% alcohol curls the vellum up too much and you can't get it flat! I dabbed the Mango areas first, then the Flamingo and finally the Melon.  The alcohol does get coloured so instead of dipping the brush in the bottle I decant a small amount of alcohol into a small jar and dip my brush in the jar and then get rid of the muddy coloured alcohol when I'm done.  I've found that if I make my alcohol ink background on an A6 sized vellum panel I have enough for the image panel and for strips to go on the inside of the card and on the envelope.  I cut off the strips first and then taped a piece of Basic White CS behind the vellum and die cut the stitched rectangle.  I've taken a few sheets of A4 vellum and cut them into quarters so I have A6 sized panels all ready to go for when I want to make an alcohol ink background card.


Here's the card open.  To add stability to the sentiment label I die cut a second black label and glued it behind the label on the front.


Here's a top view of the card to show how it's put together.  The Melon Mambo card base has an aperture cut out of the front and a Z Fold white card base (cut slightly smaller than the Melon Mambo card base) is glued inside.  The main stitched rectangle image layer is nestled inside the aperture and glued just to the Z Fold panel on the right.


Here's the inside of the card.  


Here's the envelope.


I made gift bags for Lesley and Wendy which held some little treats.  I used the dies from the SU! 'All Dressed Up!' set and the fun pink animal print paper from the 'Pattern Party' DSP pack.  I punched flowers from the 'Strawberry' builder punch, shaped them a bit and added them to the silver foil die cut label.  Rhinestone jewels in the centres added that all important sparkle!


We've already scheduled our next crafty get together, Lesley and Wendy will be making Double Wonder Christmas cards next time!

Supplies for cards:
Stamps: SU! 'Artistically Inked' & 'Happiest of Birthdays' sets
CS: SU! Basic Black, Melon Mambo & Basic White (regular & thick), vellum
Ink: VersaMark, SU! Stampin' Blends alcohol ink markers in Dark Flirty Flamingo, Dark Mango Melody & Dark Melon Mambo
Tools: SU! 'Artistic' & 'Brilliant Wings' die sets, 'Messages' die, Claina Palmer 'A6 Double Stitched Nested Dies' set, flat paintbrush
Embellishments & Accessories: 99% isopropyl alcohol, SU! white embossing powder, Gilded Gems

Supplies for gift bags:

Stamps: none
CS: SU! Blushing Bride, silver foil sheet
Patterned paper: SU! 'Pattern Party' DSP
Ink: none
Tools: SU! 'All Dressed Up' die set, 'Strawberry' builder punch
Embellishments & Accessories: SU! Rhinestone Jewels, Dimensionals

Ruth

Wednesday, 28 July 2021

Rose Gold Metallic Floral Die Cut Birthday Card

I love the large floral die in the SU! 'Artistic' die set and I thought it would be stunning cut out of Rose Gold Metallic specialty paper.  Oh my word, metallic specialty paper is NOT ideal to use with intricate dies, I had to painstakingly poke out every piece from the die cut and it took me ages and I tore a bit!  I think the backing paper is what prevents the pieces releasing easily from the die cut but lesson learned for sure!  Anyway, I persevered because the sparkly metallic die cut IS stunning!  Here's the card and envelope together.


I made the card base from Calypso Coral CS and used stitched rectangle dies to cut panels of  Rose Gold Metallic specialty paper and Pale Papaya CS and glued the floral die cut onto the Pale Papaya panel.  I stamped the sentiment in Early Espresso ink on Calypso Coral CS, die cut that with a 'Tasteful Labels' die, added some Faux Suede Trim and popped the label up on Dimensionals - positioning the label to cover up the torn piece of the die cut!  I added a small butterfly die cut using a die from the 'Nature's Thoughts' set in the Rose Gold paper and as it was small it was fine to poke the bits out!  I added three Champagne Jewels to the label as the finishing touch to the front.


Here's the inside of the card with another 'Tasteful Labels' sentiment and a butterfly.


For the envelope I die cut a Rose Gold solid butterfly and layered an Early Espresso outline butterfly on top.  I cut a pretty circle of Pale Papaya CS using a die from the 'Tasteful Labels' set and layered that onto a larger Calypso Coral die cut circle.


Supplies:
Stamps: SU! 'Peaceful Moments' set
CS: SU! Calypso Coral, Early Espresso, Pale Papaya & Basic White, Rose Gold Metallic specialty paper
Ink: SU! Early Espresso 
Tools: SU! 'Artistic', 'Brilliant Wings', 'Layering Circles', 'Nature's Thoughts' & 'Tasteful Labels' die sets, Claina Palmer 'A6 Double Stitched Nested Dies' set
Embellishments & Accessories: SU! Faux Suede Trim, Champagne Rhinestone Jewels, Dimensionals

Ruth

Tuesday, 27 July 2021

Penguin Merry & Bright Card

Here's a fun Christmas card using papers from the SU! 'Penguin Playmates' DSP pack.  The papers were still out on my desk after making this set of ten Double Wonder cards and I thought I'd make a card before I put the papers away.  Here's the card and envelope together.


Here's the card.  I used Misty Moonlight CS for the card base, applied two strips of paper and popped up the sentiment label (cut from the SU! 'Messages' die) and a penguin fussy cut from a piece of the 'Penguin Playmates' paper.  A very simple layout but a sweet card nonetheless.  All the critters on the paper are just so appealing but the bunny is ridiculously cute!


Here's the inside of the card with a sentiment, strip of paper and a fussy cut penguin.  


Here's the envelope.  I just die cut a stitched rectangle of paper - making sure a bunny was included! -and glued that to the flap.


Supplies:
Stamps: SU! 'Hearts Come Home' & Hero Arts 'Miracle of the Holidays' sets 
CS: SU! Misty Moonlight & Basic White 
Patterned paper: SU! 'Penguin Playmates' DSP
Ink: SU! Misty Moonlight 
Tools: SU! 'Stitched Rectangles' die set, 'Messages' die 
Embellishments & Accessories: SU! Dimensionals

Ruth

Sunday, 25 July 2021

Penguin Playmates Double Wonder Cards

More Christmas in July and another set of ten Double Wonder template cards!  One of this year's SU! Sale-A-Bration offerings is a pack of 'Penguin Playmates' 12" x 12" patterned paper.  Oh my word, it's so sweet and I love the colours!  I don't have the stamp set and punch that this paper pack co-ordinates with so I'm letting the patterned paper do most of the work - I just added some snowflake and sentiment stamping!  I made five Fresh Freesia cards and five Soft Sea Foam cards using two different sheets of 12" x 6" patterned paper.  Please see the Double Wonder section on my Tutorials page to get more info about the Double Wonder template.

Here are the five Fresh Freesia cards and envelopes.


Here are the five Soft Sea Foam cards and envelopes.


Here are the card designs for Layout #1.  This paper is certainly jolly so I thought the 'be jolly this season' sentiment was perfect for all ten cards!  The stitched circle die cut shapes are popped up.


Here are the card designs for Layout #2.  I stamped a snowflakes background on the Fresh Freesia cards but I stuck my sentiment circles on the Soft Sea Foam cards, forgetting to stamp the backgrounds.  Instead I added some Just Jade die cut snowflakes to the Soft Sea Foam cards.  The circles are popped up.


Here are both cards for Layout #3.  That band of Calypso Coral really packs a punch!  Again, the circles are popped up.


I made things a lot simpler for myself with this set of Double Wonder cards by stamping the insides and envelopes the same for all ten cards - I just used the appropriate ink colours.   


Here's how I stamped the envelopes.


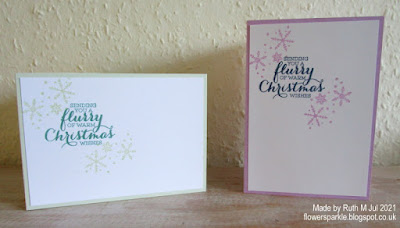
I feel quite smug that I have 20 Christmas cards made and it's only July!

Supplies:
Stamps: SU! 'Christmas Gleaming', 'Flurry of Wishes' & 'Snowflake Wishes'  sets
CS: SU! Calypso Coral, Fresh Freesia, Just Jade, Misty Moonlight, Soft Sea Foam & Basic White
Patterned paper: SU! 'Penguin Playmates' DSP pack
Ink: SU! Fresh Freesia, Just Jade, Misty Moonlight & Soft Sea Foam, VersaFine Onyx Black 
Tools: SU! 'Snowfall', 'Stitched Shapes' & 'All Dressed Up' die sets
Embellishments & Accessories: SU! Dimensionals

Ruth

Friday, 23 July 2021

Painted Christmas Double Wonder Cards

Yes, it's Christmas in July!  I thought I'd use the Double Wonder template to get a serious head start on my Christmas cards.  The Double Wonder template yields ten cards using two 12" x 6" sheets of patterned paper and three card layouts.  Please see the Double Wonder Template section on my Tutorials page for more details.  

As soon as I saw the 'Painted Christmas' suite in the SU! mini catalogue I loved it and I had to get the 'Christmas Season' stamp set, 'Seasonal Labels' die set and the 'Painted Christmas' patterned paper.  The paper is just beautiful and features hand painted images produced by SU! artists.  I made five pine cone cards and five holly cards.  Here are the five pine cone cards and envelopes.


Here are the five holly cards and envelopes.


Here are the card designs for template Layout #1.  I made two each of the designs.


Here are the card designs for template Layout #2.  Again, I made two each of the designs.


Here are both cards for template Layout #3 - just one card each of this design.


Here is how I stamped the insides of the cards for template Layout #1.


Here is how I stamped the insides of the cards for template Layout #2.


Here are the insides of both Layout #3 cards.


Here are the envelope designs.  I stamped all five of the holly card envelopes the same but stamped the pine cone card envelopes differently.


What a great feeling to have ten Christmas cards made and it spurred me on to make another ten cards using the Double Wonder template!  These cards were fairly time consuming as there was lots of stamping, die cutting and ink colours used.  For my next Christmas Double Wonder project I'm going to be simplifying and making the process faster!

Supplies:
Stamps: SU! 'Christmas Season', 'Arrange a Wreath' & 'Joyful Holly' sets, Hero Arts 'Holiday Cheer' set
CS: SU! Crumb Cake, Evening Evergreen, Pear Pizzazz, Real Red, Soft Succulent, Soft Suede & Basic White
Patterned paper: SU! 'Painted Christmas' DSP pack
Ink: SU! Crumb Cake, Evening Evergreen, Garden Green, Pear Pizzazz, Real Red, Soft Sea Foam, Soft Succulent & Soft Suede
Tools: SU! 'Seasonal Labels' & 'All Dressed Up' die sets
Embellishments & Accessories: SU! Red Rhinestone Basic Jewels, 'Wonderful Gems' & Dimensionals

Ruth

Wednesday, 21 July 2021

Ferns & Flowers Late Birthday Card

This card is being sent to the U.S. and I know it won't reach the person before their actual birthday, hence the 'little bit late' sentiment!  I used the SU! 'Positive Thoughts' stamp set and matching 'Nature's Thoughts' die set and my colour combo is Flirty Flamingo, Granny Apple Green and white.  Here's the card and envelope together.


Here's the card.  I used full strength and stamped off once ink impressions to stamp the ferns and flowers.  The butterfly has clear Wink of Stella on it so it's shimmery.  I didn't want to make the card bulky as it's being posted abroad so nothing is popped up.


Here's the inside of the card.  The sentiment is from the SU! 'Pretty Perennials' stamp set, one of my favourites.  I love how the butterfly looks glued at the end of the word happy!


Here's the front of the envelope with stamped ferns and a die cut address label.


Supplies:
Stamps: SU! 'Positive Thoughts', 'Happiest of Birthdays' & 'Pretty Perennials' sets
CS: SU! Flirty Flamingo & Basic White
Ink: SU! Flirty Flamingo & Granny Apple Green 
Tools: SU! 'Nature's Thoughts' & 'Stitched So Sweetly' die sets
Embellishments & Accessories: SU! clear Wink of Stella pen 

Ruth

Monday, 19 July 2021

Black, White & Magenta Floral Happy Birthday Card

One of Julie Davison's cards featuring the SU! 'Shaded Summer' stamp set really caught my eye and I just had to CASE Julie's card and make my own version.  I absolutely love black and white with a pop of bright colour so I used Magenta Madness along with black and white for my card.  Julie used Polished Pink and Evening Evergreen for her card.  I originally planned to use Polished Pink but I could NOT get a good stamped impression using the Polished Pink ink, it was very blotchy so I switched to Magenta Madness.  Here's my card and envelope together.


Here's the card.  I embossed the Magenta Madness panel with the gorgeous 'Parisian Flourish' 3D embossing folder.  The black and white striped paper is from the 'Pattern Party' DSP pack.  The white main image panel is popped up.  I added  a black baker's twine bow and three rhinestone jewels to finish the front. A chic, elegant little number I think!


Here's the inside of the card.


Here's the envelope.


Supplies:
Stamps: SU! 'Shaded Summer' & 'Happiest of Birthdays' sets
CS: SU! Basic Black, Magenta Madness & Basic White
Patterned paper: SU! 'Pattern Party' DSP pack
Ink: SU! Magenta Madness, VersaFine Onyx Black 
Tools: SU! 'Parisian Flourish' 3D embossing folder
Embellishments & Accessories: SU! Basic Black baker's twine, rhinestone jewels, Dimensionals

Ruth