Showing posts with label Wedding. Show all posts

Monday, 16 January 2017

Mr & Mrs T-shirts Wedding Card

This is the second wedding card I made for my friend Kath.  Once the t-shirts idea had popped into my head I just had to have a go.  This was a lot of fun to make!

I made a 5 3/4" square card, chose a colour combo of Blushing Bride, Basic Gray, Basic Black and Whisper White and used elements from my MFT 'Blueprints 14' die set.  I stamped the MR and MRS on the two t-shirts and then die cut the shapes.  I added just a bow tie to the MR t-shirt and a lacy collar and three rhinestone jewels to the MRS t-shirt.  I stamped the ampersand and used punches to make the circle element.  Once I'd adhered all the layers in place I popped up the t-shirts and ampersand circle and added the scalloped border and three punched hearts.  I sprinkled on a few rhinestone jewels to complete the card front.


My SU! order arrived while I was making this card so I took the opportunity of using a new stamp set on the inside of the card - the 'Any Occasion' SAB set.  Hmmm, some of the stamps in that set are SO teeny tiny - you definitely need to clean them and put them away immediately so they don't get mislaid!  I added a stamped and die cut 'sending you love' sentiment label.  For the envelope I stamped a lacy border using another SU! SAB set -  'Delicate Details' and popped up a die cut name label element.


Supplies:
Stamps: SU! 'Custom Tee', 'Any Occasion' & 'Delicate Details' sets, 'MR & MRS' from Clearly Besotted 'Magnolia Blooms' set, Hero Arts 'Sending You Love' set
CS: SU! Blushing Bride, Basic Gray, Basic Black & Whisper White
Ink: Memento Gray Flannel & Tuxedo Black, SU! Blushing Bride
Tools: SU! 'T-shirt Builder' Framelits die set, MFT 'Blueprints 14' die set, Hero Arts 'Small Tag Frame' die set, Sizzix 'Card, Fancy Frame Flip-Its #2' Framelits die set, MISTI, circle punches
Embellishments & accessories: SU! rhinestone jewels, silver metallic enamel heart shapes, Dimensionals


 photo RoseRuth.gif


Saturday, 14 January 2017

Detailed Floral Wedding Wishes Card

My friend Kath asked me to make a wedding card for her and I ended up making two cards for her to choose from.  I made this classic and elegant card first and then I had an idea that my new t-shirt stamps and dies would make a cute and fun wedding card.  Once I'd had the idea I just had to make it so I'll be sharing the t-shirts wedding card soon!

I made a 5 3/4" square card using the beautiful SU! 'Detailed Floral' Thinlits die set and a Rich Razzleberry and Whisper White colour combo.  I added some sparkly silver ribbon and a few rhinestone jewels and popped up the sentiment oval.


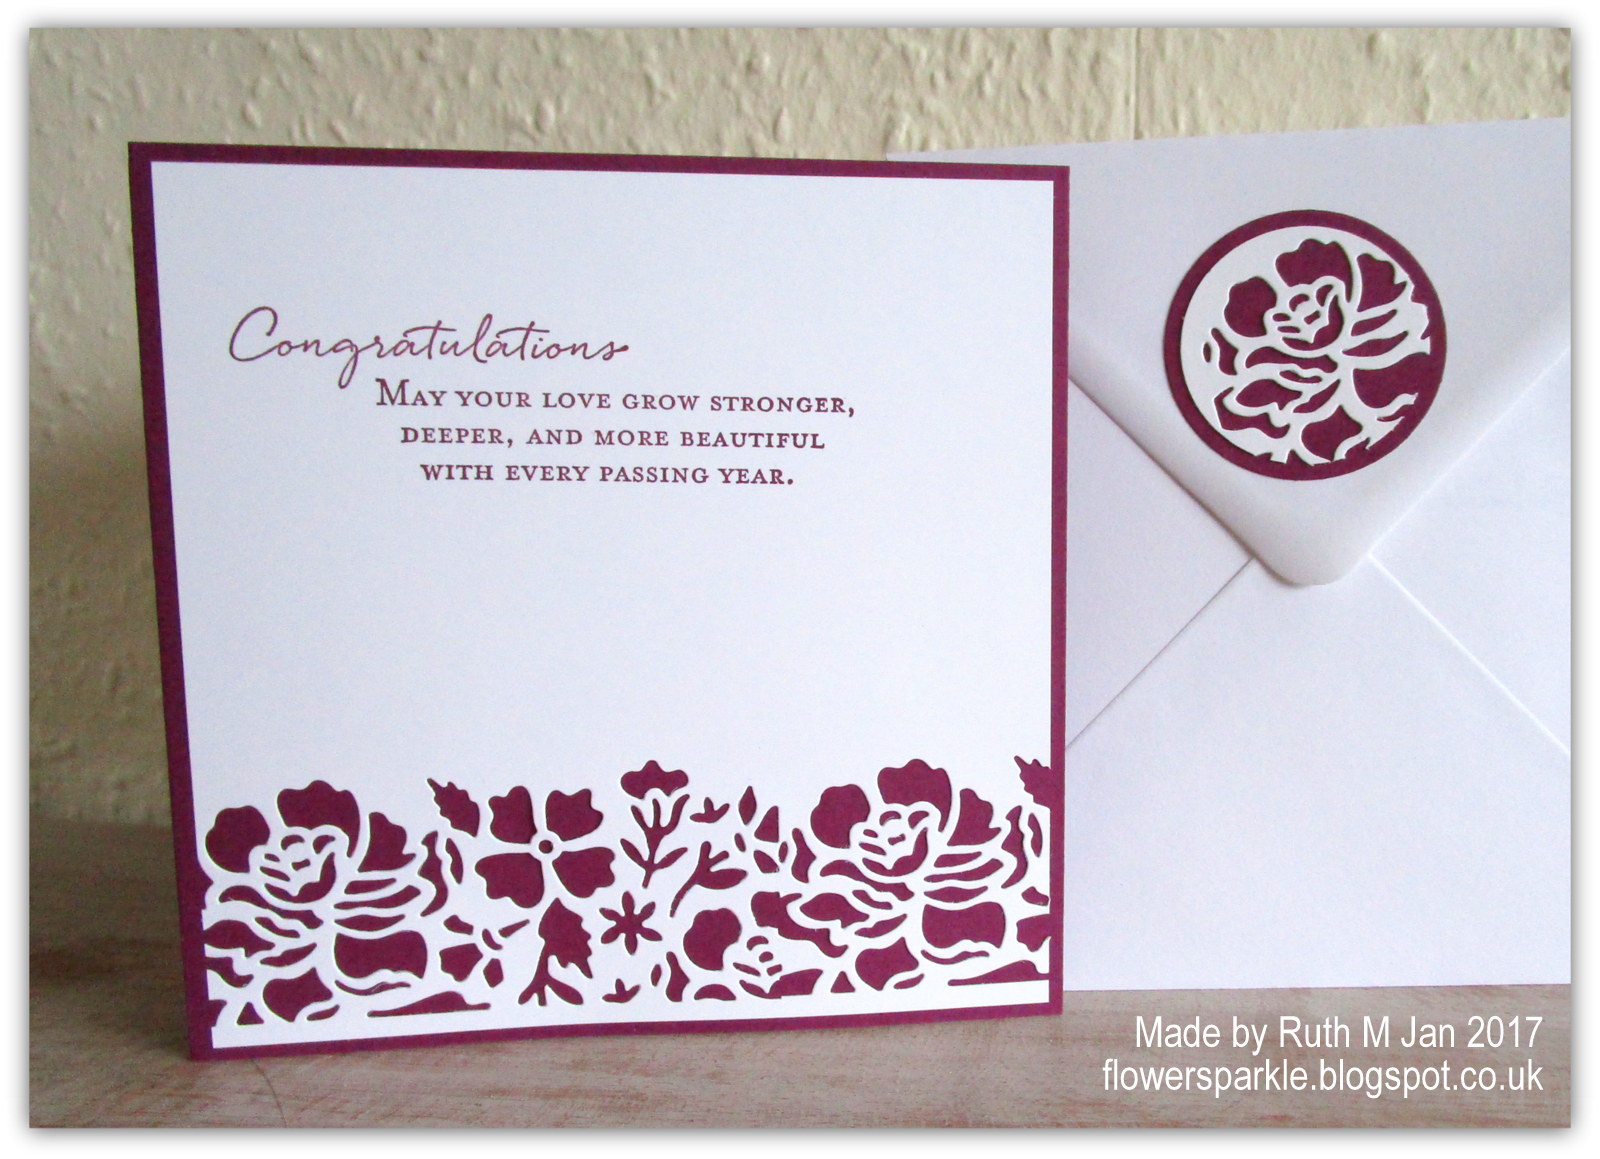
Here's the inside of the card and the back of the envelope.  To get the continuous border along the bottom of the white panel I die cut twice using the smaller floral image die.  For the envelope flap element I die cut the smaller floral image again and punched out a circle which I layered onto a larger Rich Razzleberry punched circle.    


One of the fab Christmas gifts I received from my good friend Lesley was a gorgeous Tonic Studios banner die.  I thought it would be perfect to use on the front of the envelope as a name label!


Supplies:
Stamps: SU! 'Floral Phrases' set
CS: SU! Rich Razzleberry & Whisper White
Ink: SU! Rich Razzleberry
Tools: SU! 'Detailed Floral' Thinlits & 'Stitched Shapes' Framelits die sets, SU! circle punches, Tonic Studios 'Beautiful Banner' die set
Embellishments & accessories: SU! silver glitter ribbon, rhinestone jewels, Dimensionals


 photo RoseRuth.gif

Tuesday, 2 September 2014

Ornate Frame & Heart Wedding Card

My friend Kath asked me to make a wedding card that she could give to her next door neighbours who got married last Saturday.  I thought my newly acquired 'Ornately Framed' stamp would be perfect for a wedding card!

I used Centura Pearl white with a hint of silver CS to make a 5 1/4" square card base and I popped up a layer of pearl CS that I'd dry embossed with the elegant 'Splendour' folder.  I stamped the ornate frame and the sentiment on a separate piece of pearl CS and heat embossed with beautifully sparkly Star Dust embossing powder.  After fussy cutting the frame I popped it up over the dry embossed panel.  I stamped the very pretty heart onto Pool Party CS and heat embossed that with Star Dust powder as well.  After fussy cutting the heart I popped that up and added three rhinestones to complete the front. 


The heart is from an old, long retired SU! set called 'Always' and I also got the matching 'Always in Bloom' wheel stamp.  I never keep wheel stamps mounted though, I cut the rubber off the wheel and mount it onto cling foam so I end up with a cling mounted border stamp.   I stamped the border twice onto Pool Party CS, heat embossed with the Star Dust powder and cut two strips, one for the envelope front and one for the inside of the card.  The sentiment is one I've had in my stash for many, many years and I also heat embossed that with the sparkly powder.

I really struggled to get decent photos of this card - after many attempts I just had to go with the best ones of the bunch!


Supplies:
Stamps: Penny Black 'Ornately Framed', SU! 'Always' set & 'Always in Bloom' wheel stamp, Crafty Impressions 'Medium Everyday Messages' clear set, Rubber Stampede 'Wedding Day'
CS: Centura Pearl white with a hint of silver CS, SU! Pool Party
Ink: Encore metallic silver pigment ink
Tools: Embossalicious 'Splendour' embossing folder, heat tool
Embellishments & accessories: Stampendous 'Star Dust' embossing powder, SU! rhinestone jewels, Dimensionals, 3D foam tape


 photo RoseRuth.gif


Monday, 9 January 2012

Red & White Wedding Card For David & Marie

Kath, my very good friend and neighbour, asked me to make a wedding card for her son's wedding which was back in December.  Whenever I'm commissioned to make a card I really want to make something special and I haven't made a wedding card in ages - so I found this a bit nerve wracking to say the least!  The wedding colours were red and white and so I went with those colours for the card.  Because I hadn't made a wedding card for such a long time I decided to look around the web for some inspiration.  A lovely card made by Karen caught my eye on Pinterest and so I used that as my inspiration.  Karen's lovely card can be seen here on her blog post.

I made a Real Red 5 3/4" square card base and added a black mat.  I then decorated the white panel before adhering it to the black mat - making sure everything was perfect first!  I stamped the Medallion in Real Red ink.  I used the gorgeous heart stamp from the retired SU! Always set and the matching Always in Bloom wheel.  The elegant Vintage Wallpaper embossing folder was ideal for a wedding card I thought so I embossed my red strip with that and layered it on a black mat.  I embossed the hearts with white embossing powder and cut them out.  I stamped the wheel in Real Red ink on Whisper White CS and punched out a circle which I matted on red and black layers to cover the Medallion centre.  I computer generated the sentiment using the Nuptial BT font, stamped the wheel above and below the words, punched it out with the Decorative Label punch and added a red mat.   I placed two punched butterflies on the circle and blinged them with Swarovski crystals.  The sentiment and hearts were popped up and I used a ticket corner punch on the white panel before attaching it to the black mat.  I then blinged the corners with more crystals.


I stamped the wheel and added a sentiment to a white panel before gluing that to the inside of the card.  The envelope flap got the gorgeous heart image.


This last photo shows how I decorated the front of the envelope with the stamped wheel, a CS strip and a punched eyelet border.


I liked how the card turned out and I'm very happy to say that Kath liked it too, phew, what a relief!

Huge thanks to Karen for providing the inspiration for this card!  I was a bit dubious about joining Pinterest at first 'cos I could tell I could waste huge amounts of time if I wasn't disciplined!  However, I'm loving it now for getting ideas.  I like how I can store stuff on boards instead of in favourites files which means I can always find the card instead of trying to remember the name of the blog I favourited or where I stored the card photo.  If my computer crashes I won't lose anything 'cos it's stored on a website  Plus the card is usually linked to the post on the original creators blog so I can give credit.  It's a lovely surprise when I see one of my own cards that someone else has pinned - and  when I see cards from other bloggers I know.  If I need a chuckle the humor section is always worth checking out.  As well as cards I've seen lots of other useful and interesting ideas - home decor, storage solutions and hand made gifts for example.  I'm wanting to try a home made sugar scrub for sure!  I have CASEd quite a few cards I've pinned on Pinterest so it seems to be working successfully for me so far.  I've now added a Pinterest button to my blog sidebar - you'll see my boards if you click on it.  I really enjoy it and would recommend it - with caution - it CAN suck a LOT of time if you're not careful LOL!

Supplies:
Stamps: SU! Always set & Always in Bloom wheel, sentiment from Penny Black
CS: SU! Real Red, Basic Black & Whisper White
 Ink: SU! Real Red, VersaMark & Memento Tuxedo Black
Tools: Circle Nestabilities dies, SU! Decorative Label & Ticket Corner punches, SU! Vintage Wallpaper embossing folder, Martha Stewart butterflies punch
Embellishments & accessories: Swarovski clear crystals, 3d foam pads


Photobucket
01 09 10