Saturday 31 December 2011

Bright Button Buddies Thank You Card - Simply Stampin' Challenge #40

This week's Simply Stampin' challenge is a sketch challenge.

 I pondered this sketch for a while before starting to create a card and I decided I would use circles in place of the bunting shapes on the sketch.  I know card layouts are one area where things can go awry for me sometimes, I'm unhappy with a finished card if the balance seems off.  I love sketches because they set the layout for you and you can use them as a starting point and then tweak a bit if you'd like to.  They're a great resource for card makers for sure!  Go on, join us at Simply Stampin' this week and make a card using this fab sketch, I'd love to come and see what you create!

 I thought I would break out some new goodies that I received as Christmas gifts - the Button Buddies stamp set and some buttons.  Oh my goodness, this set is fun to use, I love it!  I knew from looking at the sketch that I wanted to use a panel of patterned paper on my card so my first step was to select the paper.  That took a while but once I'd decided on the bright Big Top Birthday pattern I took my colour combo from the paper.  I made a 5 3/4" square Old Olive card base and then decorated a Tempting Turquoise mat to layer on the base.  I stamped the vase of flowers in Old Olive ink, stamped the vase separately in Tempting Turquoise ink, cut it out and layered it over the top.  I threaded Tempting Turquoise CS strips through the holes of the sweet flower shaped buttons and attached them with glue dots.  I used a square punch to make a flag shape to the sentiment banner and added more colourful buttons.  I punched 3/4" circles from two patterns of Big Top Birthday paper, layered them on 1" Old Olive punched circles and I popped them up with Dimensionals.


I glued a white CS panel inside with a stamped vase and a strip of patterned paper.  I used markers to ink the stamp.  The flower buttons are lovely to add to this image but I really like just the stamped flowers too!  I stamped just the stems, leaves and flowers on white CS, punched with the 1 3/8" circle punch and layered onto a Real Red scalloped circle for the envelope flap.


This bright and breezy little number was sent off in the post to thank Kelly for this very special Christmas gift she made for me. A personalised notebook in fabulous colours with butterflies and bling - I LOVE it!  Thank you so much Kelly!


Supplies:
Stamps: SU! Button Buddies & Curly Cute sets
CS: SU! Old Olive, Tempting Turquoise, Real Red & Whisper White
Patterned paper: SU! Big Top Birthday DSP pack
Ink: SU! Old Olive, Tempting Turquoise, Pumpkin Pie & Real Red
Tools: SU! 3/4", 1" & 1 3/8" circle punches & SU! 1 3/4" Scallop Circle punch, SU! 1 1/4" square punch

Embellishments & accessories: SU! Brights Designer Buttons, SU! Dimensionals


Photobucket

Thursday 29 December 2011

On Sharing & Thank You

I love making cards and one thing better than making them is receiving them!  I want to share three hand made Christmas cards I received.  First up is this gorgeous easel card made by Kelly.  Oh my word, it had such an impact on me when I took it out of the envelope, it has a real "ooooh" factor!  Easel cards are a fave of mine, I love the colours and the sponging and I have a soft spot for Santa, sleigh and reindeer stamps so this card ticked all the right boxes!


I get blamed by a few people at card group (and some of their husbands!) for parting them from their money.  Most unfair, but apparently I'm responsible for them buying stamps, punches dies etc. after I've shared my creations with them.  Well, that's what happened with this card, I just HAD to have these lovely stamps.  I haven't inked them up yet, I can't decide whether to make one card ready for next Christmas or to keep the set, pristine in its packaging, for me to ink up next year!  Thank you so much Kelly for the fabulous card!

Jan gets a few mentions here on Flower Sparkle.  I've known her for a few years now and she never fails to make me smile.  It's a standing joke between us that I have to make not one - but three Christmas cards for her.  I give her a card at card group, then a card from me and Owen to her and her hubby Alan and then Alan asks me to make a card for him to give to Jan.  I, in return, get two cards from Jan.  We were at one of Joanne's Stamper's Ten Make and Take evenings and one of the cards she had designed featured the Pines and Poinsettia set and used the stamps to make a wreath.  Well, I took one look at it, absolutely loved it but thought "hmmmm, that's going to be a lot of work, I don't think I'll bother making that one".  But I could see Jan was admiring the card and I knew she had the Pines and Poinsettia set so I cheekily said to her "I hope you'll make one of those wreath cards for me!".   You know what?  Bless her heart, she did make one!  This is the card Jan gave to me at card group. 


I borrowed Jan's Pines and Poinsettia set to make a Christmas card for our friends Debbie and Mike so I know how much work went into this card.  Inking the stamps repeatedly with markers is time consuming in itself - without the added stress of perfectly positioning the stamps in a wreath shape!  I will treasure this card for many years to come.

This second card from Jan also features the Pines and Poinsettia set.  Jan based this on a card we made at card group in September.  She loves taking an idea and then making it her own and what a fabulous job she did!  This is the card Jan gave to Owen and me for Christmas.


A few years ago I placed an advert in a local shop that sold some crafty goodies.  I ran two hour card making sessions in my home and I first met Jan when she answered the advert and she became a regular visitor.  A bit later on I had set up my monthly card group and Jan became a member.  It turns out that her confidence had taken a battering when a sales assistant from the shop had remarked to another customer in a very dismissive manner "oh Jan loves making cards but she can't stamp!"  Jan left the shop feeling really terrible - as well she might!  How cruel some people can be when they don't consider feelings at all.

It has been wonderful to witness her coming out of her shell, seeing her confidence develop and to receive gorgeous stamped creations like those cards above.  I've been happy to share knowledge, tips and techniques and to encourage Jan along the way.

I've come to realise that I love the sharing aspect of this hobby so much.  I love running my card group, I love sharing supplies and I love sharing stuff on my blog.  If I do happen to part you from some money because of something I shared here, it's OK to go ahead and blame me - I'm used to it LOL!  Anyway,  after all this talk about sharing, now seems a perfect opportunity for me to say a heartfelt thank you to all you readers for visiting Flower Sparkle - I'm looking forward to sharing lots more stuff with you in the future!  Ruth x


Photobucket


Wednesday 28 December 2011

Sparkly Country Landscape Voucher Holder Card

As part of Owen's Christmas gift I printed off an Amazon gift voucher for him.   I wanted to make a card to put the voucher in and I thought my newly purchased Memory Box 'Country Landscape' die would be perfect.  Oh, this is such a lovely die, I loved it as soon as I saw it but it was never in stock whenever I was at the Glitter Pot.  A few days before Christmas they got a delivery of the dies so I hotfooted it down there to snap this die up!

I made a side opening black card base, die cut the shape using silver glitter CS and glued that to the card front.  I layered two gorgeous Memory Box label dies for the sentiment and after adding brads I popped the label up.  Yes, I'm afraid to say I didn't come home from the Glitter Pot with just the Country Landscape die!


I then die cut the landscape twice more using black and white CS.  I glued the black shape to the envelope front.  I put 3d foam pads just at the bottom and sides of the white shape and popped it up inside the card to act as a pocket and that's where I put the voucher.  Owen really loved this I'm pleased to say.  At least this voucher holder is a bit more classy and sophisticated than his Christmas card LOL!


Supplies:
Stamps: SU! Season of Joy set
CS: SU! Basic Black & Whisper White, Doodlebug silver glitter CS
Ink: Memento Tuxedo Black
Tools: Memory Box 'Country Landscape', 'Bistro Label' & 'Chadwick Label' dies
Embellishments & accessories: silver brads, 3d foam pads


Photobucket

Tuesday 27 December 2011

Some Christmas Gift Packaging

I hope you all enjoyed a lovely Christmas day!  We've spent a couple of  relaxing days, full of food and fun!

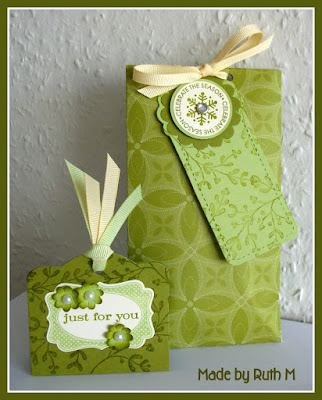
I thought I'd show some of the gifts I made for Christmas.  These are just little somethings that I created packaging for.  I sent Kelly this Christmas card after she left such a sweet comment about it.  So I packaged the little somethings I sent to her using the same colours I'd used on the card and I used the mistletoe stamp.  The larger package was an envelope pouch I created, I punched two holes and threaded the ribbon through to keep it closed and added a tag.  The smaller package was made with two tag die cut shapes from the SU! Two Tags die.  I trimmed them down to size before joining the two tag pieces together as I didn't want this holder to be too wide.  I adhered a lip balm inside with a glue dot before tying the package together with ribbons.


My friend Debbie had a cup of Christmas tea at my house a week or so before Christmas and she really liked it.  I said I'd pick some of the tea bags up for her next time I went shopping but unfortunately, the shop didn't have any left so I've shared mine with her.  Instead of just bunging some tea bags in a plastic bag though, I made an effort and altered a jar to present them in!  I wrapped patterned paper around the body of the jar and decorated the lid.  I found some long neglected metal snowflakes in my stash and I added one to some ribbon I tied around the jar in a bow.  I added an aqua rhinestone to dress the snowflake up to finish off.


This photo shows the jar and the decorated lid. This jar contained peanut butter originally, I must say it looks so much posher now!


A few days before Christmas I watched Jamie Oliver's Christmas with Bells On TV programme.  He featured Epic Hot Chocolate and showed how to make the mix up in a jar.  (You can check the recipe out by clicking here if you'd like to).  I made some for hubby and me and we absolutely loved it, oh my word, it is SOOOO good!  So I decided to make some for Debbie and Mike as part of their Christmas gift.  I put the Epic Hot Chocolate mix into a Kilner jar and added a bag of mini marshmallows on top.  To decorate the jar I tied round some gingham ribbon and added a cinnamon stick and some jingle bells.  So simple - but it was very well received!  This is a very easy but delicious gift - I will make more next year for sure!


Photobucket

Saturday 24 December 2011

Top Note Bag Gift Card Holder - Simply Stampin' Challenge #39

It's a theme challenge at the Simply Stampin' Challenge blog this week and the theme is Christmas.  I needed a gift card holder as a Christmas present so that's what I made. I'd just received some new SU! goodies among which was the Top Note die and so I just had to use that to make my holder! I saw this idea for a bag gift card holder and I just adapted it to make a Christmas version.

I die cut two Chocolate Chip Top Notes, I left one whole and scored it a little way down from the top and I cut a portion off the second one and glued the two shapes together. I die cut a Wasabi scalloped circle and then cut a plain circle out of some lovely Holly Berry Bouquet paper. I scored and folded the Wasabi circle in half and then folded the paper in half over the Wasabi circle and glued it down. Before gluing it to the bag, I punched two small holes, threaded Early Espresso taffeta ribbon through as a handle and I taped down the ends inside. After gluing the circle I punched a Riding Hood Red ornament, embossed it with the Vintage Wallpaper embossing folder and sponged the edges with Riding Hood Red ink. I added the 'just for you' Word Window sentiment, three tiny rhinestones and I popped it up.  I die cut just a portion of the Top Note die twice - once in Chocolate Chip CS and once in the patterned paper.  I glued the paper to the CS and applied Dimensionals just at the bottom and sides and popped it up inside to form a pocket to slide the gift card into.   What a sweet way to package a gift card! 


I'm relieved to say that was the last Christmas project I needed to make!  I still have some Christmassy bits to show on the blog but I at least got everything made in good time this year!


I wish you all much happiness and a wonderful festive season!  I hope Santa leaves some lovely crafty gifts under the tree for you!  Eat, drink, be merry - and hope you can get inky too!

Supplies:
Stamps: SU! Just Believe set
CS: SU! Chocolate Chip, Wild Wasabi & Riding Hood Red
Patterned paper: SU! Holly Berry Bouquet DSP pack
Ink: SU! Chocolate Chip & Riding Hood Red
Tools: SU! Top Note die, plain and scalloped circle dies, SU! Ornament & Word Window punches, SU! Vintage Wallpaper embossing folder, paper piercing tool, sponge dauber
Embellishments & accessories: SU! Early Espresso 1/8" taffeta ribbon, Basic Rhinestones & Dimensionals

Photobucket

Friday 23 December 2011

Telescoping Circles Snowman Card

I saw a fab telescoping circles snowman card on this blog post a while ago and knew I wanted to make one myself but then it slipped out of my mind.  Well, after I'd written out and posted or delivered all my cards I came across this card again in my faves folder and was disappointed that I hadn't got round to making one this year.  However, I always leave my hubby's Christmas card 'til last and I hadn't made it yet so I decided he would get a telescoping circles snowman card!

I used circle Nestie dies for the snowman, a square Nestie die for the hat - trimmed and top corners rounded, a Labels Trio die for the hat brim, a trimmed Petite Pennant shape for the nose and small circle punches for the eyes and mouth.  This photo shows him telescoped up ready to be popped into the envelope.


This photo shows him open ready to be hung up.  I sponged each white circle with Baja Breeze ink, added some Pretty in Pink sponging to give him rosy cheeks and I sponged the edges of the nose with Cajun Craze ink.  For his twiggy arms, I used a Marianne die cut, trimmed the shapes and glued them behind the white circle before gluing that down to the black circle.  I added ribbon and punched snowflakes with a rhinestone to dress up his hat.  I gave him red buttons and stamped the bottom circle with snowflakes and the sweet "snowmen fall from heaven unassembled" sentiment.  I formed a loop out of silver cord, punched two 3/4" black circles, sandwiched the cord between the circles and glued it to the back of the hat so we could hang the card up for display.  Alternatively, you could add some magnet tape to the back for another display option.


I glued a white scalloped circle behind the black one so I could stamp a sentiment and write my message there.


Of course, I had to stamp the envelope!  I also added some snowflakes punched from brushed silver CS to finish off.  I had so much fun putting this card together!  It certainly isn't the most sophisticated card I've made for Owen, I did think it was probably more suited to a child than a grown man - but I love it anyway and so does Owen!


Supplies:
Stamps: Stampendous 'Heavenly Snowmen', PSX Snowflake Medley, SU! Button Button, Four Frames & Best Yet sets
CS: SU! Basic Black, Whisper White, Riding Hood Red & Pumpkin Pie
Ink: SU! Baja Breeze, Cajun Craze & Pretty in Pink, Memento Tuxedo Black, white gel pen
Tools: Circle & square Nestabilities dies, Spellbinder's Labels Trio die, Marianne garden branch die, SU!  Petite Pennants punch, small circle punches, Woodware snowflake punches, Crop-A-Dile Corner Chomper, paper piercer, sponge daubers
Embellishments & accessories: SU! Real Red grosgrain ribbon, rhinestone,  brads


Photobucket

Thursday 22 December 2011

Pine Cones Peaceful Wishes Stepper Card

This is the Christmas stepper card I made for Jan and Alan using the gorgeous SU! Peaceful Wishes set.  For me, this set is right up there with Lovely as a Tree in being a set that is just classic, timeless, versatile  and  never to be parted with!   I used a 6" x 6" stepper card and remembered what a struggle it was to get the last one I made into the envelope so I cut a tad off the side!  I covered the front and back panels with Three Bugs in a Rug patterned papers.  I added a Riding Hood Red strip at the top that I die cut with my Sizzix Brackets die and I tied Very Vanilla ribbon around.  For the stamped panel, I inked the pine bough with Wild Wasabi ink, stamped that randomly onto the Very Vanilla CS, some full strength and some stamped off and I added red berries and the sentiment.  I stamped the pine cones on a separate piece of Vanilla CS, inking in Ginger ink, stamping off once and then rock and rolling in Early Espresso ink.  I cut each pine cone out, added Dazzling Diamonds and popped them up.  I used a ticket corner punch on the Vanilla panel, edged it with Riding Hood Red ink and popped it up on the Wasabi layer and added red metal nailheads.  The Wasabi mat is layered onto a Riding Hood Red mat.


I glued a Vanilla panel to the back, inked the edges and added a strip of patterned paper and a sentiment square.  The red square was cut with a Lacy Square Nestie die.  I used markers and a blender pen to colour in the holly.


I punched patterned paper holly for the envelope and added red nailhead berries. Lastly, I stamped and punched the dotty frame from the Four Frames set.  


Supplies:
Stamps: SU! Peaceful Wishes & Four Frames sets, Stampendous Christmas Cheer
CS: PaperMania 6" x 6" stepper card blank, SU! Wild Wasabi, Riding Hood Red & Very Vanilla
Patterned paper: Three Bugs in a Rug Deck the Halls papers

Ink: SU! Wild Wasabi, Riding Hood Red & Early Espresso, Adirondack Ginger
Tools: Sizzix 'Brackets' On the Edge die, Nestabilities square & Lacy Square dies, Woodware Ticket Corner punch, SU! Decorative Label punch, Martha Stewart Holly Branch punch, Stamp-a-ma-jig, blender pen, sponge dauber
Embellishments & accessories: SU! Very Vanilla grosgrain ribbon, red metal nailheads, 3d foam pads


Photobucket

Tuesday 20 December 2011

Two Velvet Christmas Stocking Cards

Here are two Christmas cards I made with the fab Sizzix stocking die with matching embossing folder.  I just love using velvet papers with this die, you end up with such a fuzzy stocking!  First up is the card I made for Alan for him to give to his wife Jan.  The card is 7" x 5" and was made with Wild Wasabi CS with a Real Red layer plus a mat of Holly Berry Bouquet paper.  I die cut the stocking from CS and then cut again using the green and cream velvet papers, embossed them and I glued the velvet paper pieces to the CS stocking.  The embellishment I used is from a pair of Christmas earrings.  They're rather large and I decided to re-purpose them as craft embellishments rather than keep them as earrings as I haven't worn them in ages.  So the great thing is that I have another of these embellishments in my stash waiting to be used next year!  I sewed the embellishment on before popping the stocking up with 3d foam tape.  I added photo corners and a flat bow to the ribbon strip and popped on some rhinestones.


Inside I stamped the lovely Stampendous 'Snow Brackets' sentiment and added a strip of the holly paper with part of a punched Lace Ribbon Border peeking out over the edge.  I added another flat bow to the strip on the front of the envelope to finish off.


This next card is much more CAS and contemporary and I chose purple velvet paper for the stocking as the card was made for Michelle from the Card Grotto and I know she loves purple!  The 5 3/4" card base was made from SU! Brushed Silver CS.  I sewed a pale purple felt snowflake onto the stocking and added three tiny jingle bells.  The other snowflakes on the card are also felt and I added rhinestones to the centres.  I faffed about for ages with different ribbons and in the end decided on narrow Eggplant ribbon tied in a knot over a wider strip of white.


I stamped a sentiment and snowflakes inside and added a circle element to the envelope flap.

 
I also stamped the front of the envelope.  I really like using a frame from the Four Frames set for the recipients name!


I sent a little package to Michelle along with the card and wrapped it in silver tissue paper and added a tag tied onto Eggplant ribbon.  I used the SU! Two Tags die for the tag, stamping snowflakes as a background and then I added the sentiment oval.  This tag folds in half and tucks into a little slot - I added a white panel inside for me to write my message on.


Supplies for Jan's card:
Stamps: Stampendous 'Snow Brackets'
CS: SU! Wild Wasabi, Real Red & Very Vanilla, dark green & cream velvet papers
Patterned paper: SU! Holly Berry Bouquet DSP pack
Ink: SU! Real Red
Tools:  Sizzix Stocking die with matching embossing folder, SU! Photo Corners punch
Embellishments & accessories: red grosgrain ribbon, SU! Basic Rhinestones, earring for embellishment, 3d foam tape


Supplies for Michelle's card & gift:
Stamps: Hero Arts Very Merry Christmas clear set, SU! Patterned Pines, Four Frames & So Many Scallops sets, Rollagraph Snowflakes wheel stamp, PSX Snowflake Medley
CS: SU! Brushed Silver, Elegant Eggplant & Whisper White, purple & white velvet papers
Ink: SU! Elegant Eggplant
Tools: Sizzix Stocking die with matching embossing folder, SU! Two Tags die, SU! plain & scalloped circle punches, SU! plain & scalloped oval punches,  SU! Decorative Label punch
Embellishments & accessories: Hero Arts felt snowflakes, mini metal jingle bells, white grosgrain ribbon, SU! Elegant Eggplant ribbon, SU! Basic Rhinestones, 3d foam tape


Photobucket

Monday 19 December 2011

Pine Cones & Poinsettias Stepper Card

This is the Christmas card I made for our fab friends Debbie and Mike.  I know Debbie loves pine cones and I wanted to try out the SU! Pines & Poinsettias set so I asked Jan if I could borrow her stamp set to make this card.  Jan very kindly lent me the stamps and it is a beautiful set.   I was pleased how the card turned out!

I started off with a 7" x 5" white stepper card base and I covered the back panel with some Holly Berry Bouquet patterned paper.  For the front panel, I stamped a background using the holly flourish image from the set onto Wild Wasabi CS in Wasabi ink.  I then got out the stamps and markers and got inky!  I used Wild Wasabi, Always Artichoke, Riding Hood Red, Cherry Cobbler and Chocolate Chip markers to ink the images.  I stamped the poinsettia and rose on a separate piece of CS, cut them out and popped them up and I added Dazzling Diamonds to the pine cones.  I stamped the Christmas banner and then added the 'merry merry' label which I attached with brads.  I layered the Vanilla panel onto a Cherry Cobbler mat and layered that onto a Vanilla mat.  The stamped Vanilla panel is popped up.  To finish off the front I taped down a strip of Very Vanilla ribbon, tied a separate bow and attached that to the strip with a glue dot.


Here's a close up photo of the stamped panel.  It's a real  labour of love inking these stamps with the markers but absolutely worth the effort when you see the finished result!  I couldn't make a lot of these cards though, this set is to make cards only for very special people who would appreciate the effort!  I have to say Debbie and Mike showed due reverence and appreciation LOL!


I added a Very Vanilla panel to the back of the card, stamped the pine cone cluster a couple of times and added a stamped sentiment panel.


Lastly, here's the envelope, with another pine cone cluster and strips of patterned paper and Wasabi CS..


Supplies:
Stamps: SU! Pines & Poinsettias set, 'merry' from Pennant Parade set, sentiment on back from Stampendous
CS: PaperMania 7" x 5" white stepper card blank, SU! Wild Wasabi, Cherry Cobbler & Very Vanilla
Patterned paper: SU! Holly Berry Bouquet DSP pack
Ink: SU! Wild Wasabi, Always Artichoke, Riding Hood Red, Cherry Cobbler & Chocolate Chip

Tools:  Stamp-a-ma-jig, Spellbinders Labels Trio die, square Nestabilities dies
Embellishments & accessories: SU! Very Vanilla grosgrain ribbon, Real Red brads, Dazzling Diamonds & Dimensionals, glue dot


Photobucket

Sunday 18 December 2011

Inky Snowflake Merry Christmas Card

Another aqua and purple Christmas card!  I had great fun getting inky with my distress inks to make this card.  I started off by patting Tumbled Glass, Broken China and Dusty Concord inks onto my craft sheet, spritzed the inks really well with water and then smooshed my piece of white CS into the inky mess to make a coloured background.  I gave the CS a blast with my heat gun to dry it, stamped the music background stamp over the top and inked the edges of the panel with Dusty Concord ink.  I stamped the large snowflake with VersaMark ink, heat embossed it with white embossing powder and then spritzed the whole panel with Perfect Pearl mist.  I attached a die cut snowflake to the centre of the stamped snowflake with a silver glimmer brad.  I couldn't decide what to do about adding a sentiment and I pondered for some time.  Then  I remembered my alphabet embossing folder which I bought a couple of months ago but hadn't got around to using.  So I dug the folder out, embossed Pool Party CS with the lower case letters to spell 'merry christmas', punched them out and attached them to the panel in a higgledy piggledy fashion.  I then mounted the inky panel to a Pool Party A6 sized card blank.


Here's the inside and the envelope.


Supplies:
Stamps: Hero Arts Big Snowflake & Music Background, Stampendous 'Snow Brackets', SU! Patterned pines set
CS: SU! Pool Party & Whisper White, medium weight white CS
Ink: Tim Holtz Tumbled Glass, Broken China & Dusty Concord Distress inks, VersaMark, SU! Pool Party
Tools: Crafts Too 'Small Alphabet' embossing folder, Sizzix Sizzlits snowflake die, circle punches, Crafts Too craft mat, Ranger mini mister, sponge dauber
Embellishments & accessories: Perfect Pearls 'Perfect Pearl' Mist, SU! glimmer brad


Photobucket

Saturday 17 December 2011

Vintage Vogue Best Wishes Easel Card - Simply Stampin' Challenge #38

This week's Simply Stampin' challenge is a colour combo.  These are the colours: 
Great colours for a Christmas card but I really wanted a break from Christmas stuff so I made a Best Wishes easel card instead.  It's been far too long since I inked up the gorgeous Vintage Vogue set, it's one of my favourite stamp sets, I love it!  I also used the matching Very Vintage wheel stamp.

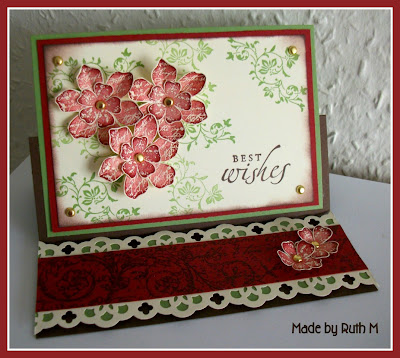
My Chocolate Chip easel card base is A6 sized.  I used Cherry Cobbler and Wild Wasabi CS as layers for my Very Vanilla stamped panel.  I stamped the leafy flourish in Wild Wasabi , some full strength and some stamped off.  I used Cherry Cobbler ink for the flowers, I stamped off twice and then rock and rolled in Cherry Cobbler ink.  I cut the flowers out, added some shaping and put gold brads in the centres.  The sentiment was stamped in Choc Chip ink, I edged the Vanilla panel in Choc Chip ink and added gold brads to the corners.  For the bottom of the card I inked the Very Vintage wheel stamp with VersaMark ink followed by Cherry Cobbler ink so that I could heat emboss the image with clear embossing powder.  I punched a Lace Ribbon Border from Vanilla CS, cut it in half and attached it to the Cherry Cobbler embossed strip.  I added punched Wasabi circles behind the border and then popped the whole strip up to act as the stop for the easel.  I added two small flowers to the strip.


I added a Vanilla message panel to the back of the card and stamped the Very Vintage wheel in Cherry Cobbler ink on the front of the envelope to finish off.  I really like this colour combo, it's so warm and rich.  I hope you play along too as I'd love to come and see what you create!


Supplies:
Stamps: SU! Vintage Vogue & Sincere Salutations sets, Very Vintage wheel
CS: SU! Cherry Cobbler, Chocolate Chip, Wild Wasabi & Very Vanilla
Ink: SU! Cherry Cobbler, Chocolate Chip & Wild Wasabi, VersaMark
Tools: SU! Lace Ribbon Border punch, SU! Mat Pack & Paper Piercing Tool
Embellishments & accessories: SU! Clear Stampin' Emboss Powder, SU! gold brads, SU! Dimensionals


Photobucket

Thursday 15 December 2011

Snowflake Twisted Easel Card

Another Christmas card using my new fave colour combo of aqua and purple.  This time I've made an A6 size twisted easel card.  The card base was made with Elegant Eggplant CS.  I brayered a snowflakes embossing folder with Elegant Eggplant ink and then embossed a piece of Pool Party CS.  I stamped the large snowflake in silver pigment ink and heat embossed it using Star Dust embossing powder and it is incredibly sparkly!   I attached a pale purple felt snowflake to the centre using an aqua shimmer brad.  I used the SU! Modern Label punch for the sentiment.  I popped up a circle element to act as a stop for the easel and added some Elegant Eggplant ribbon.


I glued a white panel to the bottom of the card and added a sentiment.  I stamped a snowflake 'celebrate the season' circle element for the envelope flap to finish off.


Supplies:
Stamps: Hero Arts Big Snowflake, Hero Arts Warm Wishes to You, 'Season's Greetings' from Personal Impressions Christmas Messages clear set
CS: SU! Elegant Eggplant, Pool Party & Whisper White
Ink: SU! Elegant Eggplant & Pool Party, Encore silver pigment ink
Tools: Circle Nestabilities dies, circle punches, SU! Modern label punch, snowflakes embossing folder from Cuttlebug Winter Wonderland set, Scor-Pal
Embellishments & accessories: Stamp 'n Stuff Star Dust embossing powder, SU! Elegant Eggplant grosgrain ribbon, Hero Arts felt snowflakes, PaperMania shimmer brad, gem, 3d foam pads


Photobucket

Wednesday 14 December 2011

Sparkly Trees Merry Christmas Stepper Card

This is the card I made for our good friends Gill and Brett. A while ago Gill rummaged in my Christmas card box and told me which cards she liked and her fave card was a blue sparkly tree card.  She wasn't backward at coming forward at telling me the cards she didn't like either LOL!   So I knew  a blue sparkly tree card was what I'd make for their card this year.  I bought a couple of packs of PaperMania stepper cards a while ago and I thought it was time to break one out.

I covered the front stepper panel with a piece of white CS I'd embossed with snowflakes and I covered the back panel with Pool Party dotty paper.  For the main image panel, I stamped the bare trees in Pool Party ink and the pine tree in Night of Navy ink, patted VersaMark over the image, applied Heat and Stick powder, heated it, sprinkled on Dazzling Diamonds and lightly heated the panel again to set the glitter.  I didn't have any Night of Navy ribbon but I'd kept the ribbon bookmark that fell out of our 2011 diary a few weeks ago - I knew I'd be able to use it at some point!  I taped a strip to the corner, tied a bow, added a rhinestone brad and attached the bow to the strip with a glue dot.  The white panel is popped up.  I used a bookplate die cut for the 'Merry Christmas' sentiment and added two more rhinestone brads.


For the back of the card, I stamped a row of bare trees and the pine tree and added a sentiment panel.  I stamped the bare trees only on the envelope front.  These stepper cards come with gusseted envelopes which is great 'cos the cards are fairly bulky.  I think PaperMania should have made the envies for the square steppers a tad larger - oof, it was a tight squeeze getting this card inside the envelope!  Next time I use a square stepper card I hope I remember to chop a tad off.


Supplies:
Stamps: SU! Lovely as a Tree set, 'Merry Christmas' from SU! Four the Holidays set, Woodware Wishing You clear stamp
CS: PaperMania white square stepper card, SU! Pool Party, Night of Navy & Whisper White
Patterned paper: SU! Pool Party dotty paper from In Color DSP stack
Ink: SU! Pool Party & Night of Navy, VersaMark
Tools: Sizzix Bookplates die, SU! Ticket Corner punch, Stamp-a-ma-jig
Embellishments & accessories: Navy blue ribbon, SU! Heat & Stick powder, Dazzling Diamonds & rhinestone brads, 3d foam tape


Photobucket
01 09 10