Monday 28 February 2011

CAS Tree, Birds & Deer Birthday Wishes

Today's CAS108 challenge on Splitcoast Stampers was the Great Outdoors.  The outdoors theme seemed a  great opportunity for me to make a card for my card group.  We're getting together on Thursday and we'll be making masculine cards.

I love this large Inkadinkado image.  I inked it up using three different colours of chalk inks and stamped onto SU! Crumb Cake CS.    I've layered onto an Always Artichoke panel with a decorative punched edge and I added the sentiment and two Choc Chip strips.  I then added 1/4" Choc Chip dots to the Crumb Cake panel. 


Supplies:
Stamps: Inkadinkado Utopiary clear set, sentiment from SU! Wow Flowers set
CS: Anita's A6 cream card blank, SU! Always Artichoke & Chocolate Chip
Ink: VersaMagic Gingerbread, Jumbo Java & Spanish Olive chalk inks, SU! Chocolate Chip
Tools: EK Success Dotted Wave border punch, 1/4" circle, Stamp-A-Ma-Jig

Photobucket

Sunday 27 February 2011

Rosy CandleLights

The postie delivered my SU! A Rose is a Rose set a couple of days ago and I've been itching to play with it.  We had some friends round last night and I thought I'd take some time to dress up our Philips Imageo CandleLights with some sparkly roses.  They were finished just minutes before our first guests rang the doorbell!

I spent a bit of time trying out colour combos and I eventually decided to stamp the solid roses in Apricot Appeal ink and the outline in Regal Rose ink, stamped off once.  Apart from the rose bud where I stamped the outline in Regal Rose full strength ink so it stood out just a tad more.  For the leaves I used Certainly Celery and Old Olive inks, both stamped off once.  I cut out all the images, glued them together and added Dazzling Diamonds glitter to the roses.  I simply wrapped a strip of Certainly Celery ribbon around each glass holder and then attached the roses to the ribbon with large 3d glue dots.  I'm very happy with my pretty roses!

Now I've really got to knuckle down and make cards for my March card group and make a birthday card for a friend - all masculine cards.  So no more playing with pretty flowers for a while - but at least I had a rose fix yesterday!


Supplies:
Stamps: SU! A Rose is a Rose set
CS: SU! Whisper White
Ink: SU! Apricot Appeal, Regal Rose, Certainly Celery & Old Olive
Tools: SU! Stamp-A-Ma-Jig
Embellishments & accessories: SU! Certainly Celery ribbon, SU! Dazzling Diamonds glitter, 3d glue dots

Photobucket

Saturday 26 February 2011

Blooms Best Wishes Shaped Card

Another shaped card made with the Labels Ten Nestability dies.  I came across these Prima hydrangea flowers in my stash the other day and I realised I haven't used them in ages.  Time to get them out and put some on a card! 

I cut the Labels Ten shapes in Regal Rose CS and I stamped the SU! Bella Toile background stamp over the entire front, stamping with Regal Rose ink stamped off once.  I then stamped the Bella Toile stamp on white CS in Pear Pizzazz ink after stamping off once, cut it out with a petite oval Nestie die and layered it on an Early Espresso oval.  I've sponged the edges of the white oval with Old Olive ink.  I attached the blooms to the oval with small pale pink gem brads and then glued punched leaves behind the blooms.  I used the X Cut Beech Leaf punch which also embosses the leaf veining detail, it's a fab punch.  The sentiment stamped in Early Espresso ink finished the card front.


Then I worked on the envelope and the inside of the card.  Lots of stamping with the gorgeous Bella Toile stamp!  A useful card to keep in my stash as it could be used for a variety of occasions.


Supplies:
Stamps: SU! Bella Toile, SU! Sincere Salutations set, Hero Arts Everything Wonderful
CS: SU! Regal Rose, Early Espresso & Whisper White
Ink: SU! Regal Rose, Pear Pizzazz, Old Olive & Early Espresso
Tools: Labels Ten & petite oval Nestabilities dies, X Cut Beech Leaf punch
Embellishments & accessories:  Prima hydrangea flowers, pink gem brads


Photobucket

Friday 25 February 2011

Vintage Vogue For You Birthday Card

As I said in this earlier post, I'm in love with my SU! Blossoms Abound lilac stamp set.  It occurred to me the other day that the stem in the set would work brilliantly as a stem for an individual flower.  So I've tried that out on this card - I love that I can use it in other ways, more bang for your buck as our US friends say! 

Oooh, the postie has just delivered my latest eBay purchase - a used, retired SU! A Rose is a Rose set, how exciting!  I loved the set when it was available for purchase as a current catalogue set but I was never keen on the £32.95 price tag!  I'm so glad I could get it from eBay at a good price and the set is in fabulous, as new, condition.  So things will be coming up roses in my craft room over the next few days!

Anyway, onto the card - I started off with a Rose Red A6 card which has the fold at the top.  I've used Always Artichoke and Mellow Moss as my accent colours.  I stamped the stem and cut the panel and mat out with Label Ten Nestie dies - I also embossed both shapes.  I've sponged the white panel with So Saffron ink and then added the large flower from the Vintage Vogue set.  I stamped all the flowers in Regal Rose ink, stamping off once, and then rock and rolled in Rose Red ink.  After cutting the flowers out, I popped a green button in the centre of the large flower and clear gems to the small flower centres.  I haven't done paper tearing for a while so I did that on the Moss and Artichoke panels. The 'for you' is stamped in Artichoke ink.

I used the gorgeous Victorian Fleur embossing folder on the Mellow Moss panel and I also punched the small photo corner out of the embossed Moss CS.  Would you like a chance to win this lovely embossing folder?  If so, please leave a comment on my giveaway post here.  The draw will take place next Wednesday, 2nd March.


Then I stamped the envelope flap and the inside of the card.


Supplies:
Stamps: SU! Vintage Vogue, Fresh Cuts & Blossoms Abound sets, Hero Arts Fabulous Birthday
CS: SU! Rose Red, Mellow Moss, Always Artichoke & Whisper White
Ink: SU! Regal Rose, Rose Red, Mellow Moss, Always Artichoke & So Saffron
Tools: Labels Ten Nestabilities dies, PaperMania Victorian Fleur embossing folder, SU! Photo Corners punch
Embellishments & accessories: American Crafts button, clear gems

Photobucket

Thursday 24 February 2011

Fresh Cuts Flowers Thinking Of You Card

I'm making a determined effort to use some of my neglected SU! sets.  It has been a long time since I've used my Fresh Cuts set so I pulled that out for this card.  I started with a Rose Red A6 card base and an embossed Pear Pizzazz panel.  Before gluing the Pear panel, I attached the black grosgrain ribbon.  The embossing folder is on loan to me from my friend Jan.  I really like it but I will use it a couple more times before deciding if I have to buy it too!  For the image panel, I stamped the background stamp from the set in Pear ink after stamping off once and cut out the oval shape.  I then stamped the foliage stamp repeatedly round the oval using Old Olive ink, added the sentiment in black ink and matted the white oval on black and Rose Red ovals.  I then inked the flowers with Regal Rose ink, rock and rolled in Rose Red ink, cut them out, added a bit of shaping and glued them to the oval.  I then placed black gems in each flower centre.


I made a circle element for the envelope flap and stamped an inside panel.  I stamped the foliage stamp repeatedly around the panel, re-inking after two stampings.  I haven't used the oblong shadow stamp in years but I thought it would work well to highlight a sentiment.  I stamped the two flowers on the right direct to the panel but the flower placed over the shadow stamped rectangle is cut out.  I placed black brads in the centre of these flowers before gluing the white panel inside the card.


Supplies:
Stamps: SU! Fresh Cuts, Sincere Salutations & Sweet Little Sentiments sets, Hero Arts Little Greeting Background
CS: SU! Rose Red, Pear Pizzazz, Basic Black & Whisper White
Ink: SU! Regal Rose, Rose Red, Pear Pizzazz & Old Olive, Memento Tuxedo Black
Tools: Petite oval Nestabilities dies, Crafts Too Daisy Flourish embossing folder, SU! circle punches
Embellishments & accessories: Black grosgrain ribbon, self adhesive black gems, SU! black brads


Photobucket

Wednesday 23 February 2011

Round Petal Pizzazz Birthday Wishes Card

I think shaped cards are really fun and I love using Nestabilities dies to make shaped cards.  I find the circles a tad small though and wanted to make larger circle cards.  I definitely don't want to invest in the Grand Caliber machine and the Grand Nestie dies though!  I just wanted to be able to cut out circles up to 6", I don't think I'd use larger sizes than that.  So I've recently bought an EK Success Circle Scissor Pro and this is the first card I've made using it.  There's a bit of a learning curve and I found taping your CS to a glass mat gives the best results.  Now I've got the hang of it, I find it easy and fab! 

The Circle Scissor cuts circles from 1" up to 6" and goes up in 1/16" increments.  I cut two 5 7/8" Rich Razzleberry circles for my card and will put it in an envelope measuring a tad over 6" square.  I scored a line on the circle at the back, glued the two pieces together to form the card and then cut a piece off the bottom of the back circle so the card stands up nicely.  I then cut 4 more circles of CS and patterned paper for my layers.  On the Pale Plum layer, I've stamped a Hero Arts background stamp in Pale Plum ink. 

I used the lovely Petal Pizzazz set for my flower, stamping in Razzleberry, Pale Plum and Old Olive.  I stamped off the Razzleberry ink once first as it's a very intense colour and I also stamped off a couple of the leaves.  I glued the leaves behind the flower and have popped the flower up.  The smallest flower with the jewelled embellishment centre is also popped up.  I used oval Nestie dies for the sentiment and I've added olive crystals on either side of the words.  I absolutely love this colour combo inspired by the gorgeous Cottage Wall DSP pack and I love the Petal Pizzazz stamp set so this card was a complete joy to make!  Kelly at Kelly's Craftin' Corner is making a series of cards using the Cottage Wall DSP pack this week and she is also having a draw for one lucky person to win a £10 SU! voucher so go and check out her blog!

Flower stamps are a joy for me to stamp with, they make me happy.  I love the contemporary flowers in sets like Petal Pizzazz but I also love the two step stamping floral sets where you get more realistic flowers.  I am so smitten with the SU! lilac stamp set (Blossoms Abound) that I bought recently that I'm busy tracking down a few more retired SU! floral two step stamping sets.  You'll definitely be seeing cards made with them here at Flower Sparkle in the future!


Here's the inside of the card and the envelope.


There will be a little something offered as a Flower Sparkle giveaway so do please pop back later to see the details!

Supplies:
Stamps: SU! Petal Pizzazz & Sincere Salutations sets, Hero Arts Design Block Flourish, inside sentiment also Hero Arts
CS: SU! Rich Razzleberry, Old Olive, Pale Plum & Whisper White
Patterned paper: SU! Cottage Wall Designer Series Paper pack
Ink: SU! Rich Razzleberry, Old Olive & Pale Plum
Tools: EK Success Circle Scissor Pro, petite oval Nestie dies
Embellishments & accessories: PaperMania metal flower embellishment, olive crystals, 3d foam pads


Photobucket

Monday 21 February 2011

Soft Summer For You BRAK Card

This is one of the Birthday RAK cards I will be sending out in March.  I am trying to keep these BRAK cards flat for ease of posting.  I embossed the front of the Elegant Eggplant A6 card with my Victorian Fleur folder - definitely one of my fave folders!  For my main image I used a stamp from the SU! Soft Summer set.  I inked it in Perfect Plum, stamped off once and then rock and rolled in Eggplant ink.  I coloured the stem with an Old Olive marker pen.  I added stamped speckles and Tea Dye distress ink sponging around the panel.  I sprinkled some glitter and fixed the panel to my Perfect Plum Lacy Square with brads.  Some white grosgrain ribbon and a die cut corner finished the card front.


This is how I stamped the envelope and decorated inside the card.


Supplies:
Stamps: SU! Soft Summer, Itty Bitty Backgrounds, Fresh Cuts & Sincere Salutations sets
CS: SU! Elegant Eggplant, Perfect Plum, Old Olive & Whisper White
Ink: SU! Elegant Eggplant, Perfect Plum & Old Olive, Tim Holtz Tea Dye distress ink
Tools: Square, Lacy Square & Petite Oval Nestabilities dies, Vintage Cuttlebug die, PaperMania Victorian Fleur embossing folder
Embellishments & accessories: White grosgrain ribbon, SU! Vintage brads, SU! Dazzling Diamonds glitter


Photobucket

Saturday 19 February 2011

Tree Masculine Notecard

I needed to send some vouchers through the post to my friend Brett and I decided to make a card  to accompany them.  Any excuse to use my new Inkadinkado Fall Season clear set!  I love that a lot of the images in Inkadinkado sets are flourishy and have a lot of movement to them.  I love the reasonable price of these sets too!

I inked the tree with three colours of chalk ink, added torn Old Olive CS as grass and sponged the panel with Old Olive ink.  I edged the Early Espresso strip with the SU! Spiral Border punch.  I forget I have this punch, I really need to make an effort to use it more often.  I stamped my woodgrain stamp on Crumb Cake CS in Early Espresso ink and punched out 3 circles and a photo corner.  The 'just for you' sentiment from the SU! Just Believe set finished off the card.  I inked the leafy border stamp from the Inkadinkado set with two different green chalk inks and stamped the front of the envelope.


Supplies:
Stamps: Inkadinkado Fall Season clear set, Hero Arts Woodgrain background stamp, SU! Just Believe set
CS: SU! Old Olive, Early Espresso, Crumb Cake & Very Vanilla
Ink: VersaMagic Tea Leaves, Spanish Olive & Jumbo Java chalk inks, SU! Old Olive
Tools: Square Nestabilities dies, SU! Spiral Border, Photo Corners & 1/2" circle punches

Photobucket
 

Friday 18 February 2011

Leafy Medallion Twisted Easel Card

This is a square twisted easel card I made to send to my sweet friend Dawn across the pond.  I was very remiss and missed her birthday so I sent this best wishes card and stamped a 'happiness always' sentiment on the bottom.  I used the lovely SU! Day of Gratitude set and an earthy colour palette.

I made the card in Pear Pizzazz CS, added a Crumb Cake embossed panel on the front and an olive patterned paper panel on the bottom.  I inked the medallion with Pear Pizzazz, Old Olive and Crumb Cake inks.  I cut it out and placed a flower charm brad in the centre.  I stamped and cut out three leaves and the acorn and I sponged the edges in a darker ink to add some definition.  A couple of the leaves and the oval sentiment are popped up.


This is how I decorated the bottom of the card where I wrote my message.


Supplies:
Stamps: SU! Day of Gratitude, Ovals All & Whimsical Words sets
CS: SU! Pear Pizzazz, Crumb Cake, Chocolate Chip & Whisper White
Patterned paper: SU! Sweet Pea Designer Series Paper
Ink: SU! Pear Pizzazz, Old Olive, Crumb Cake, Really Rust & Chocolate Chip
Tools: SU! plain oval punch
Embellishments & accessories: Dovecraft charm brad, 3d foam pads

Photobucket

Wednesday 16 February 2011

In Love With Lilacs

I've just bought an old, retired SU! two step stamping set called Blossoms Abound from eBay.  Oh my word, it's a beautiful set and I'm in love with it, completely smitten!  I got the set on Saturday and it hasn't moved from my desk since, I've made three cards and re-decorated my candle jar. 

Card one was made using Labels Ten Nestie die shapes and the colour combo of Old Olive, Elegant Eggplant and Very Vanilla.  I embossed each Labels Ten shape.  I stamped the lilacs in Perfect Plum first and the overstamping was done with Elegant Eggplant - I stamped off once first each time.  The leaves are Pear Pizzazz and Old Olive.  I've added stamped speckles and sponging using Crumb Cake ink and I sprinkled sparkle on the flowers in the form of Dazzling Diamonds glitter.  I finished the card off with a circle sentiment and purple crystals.  I kept the card flat as it was sent in the post.  I needed to send a cheque to my SU! demo Joanne and I sent it with this card.


I decided to use my Elzybells Stamp and Scrap Sentiments set to add a humorous touch to the envelope.  I thought Joanne might get a chuckle from it!  Here's the front (you can click the picture to get a larger view).


Here's the back.  LOL!


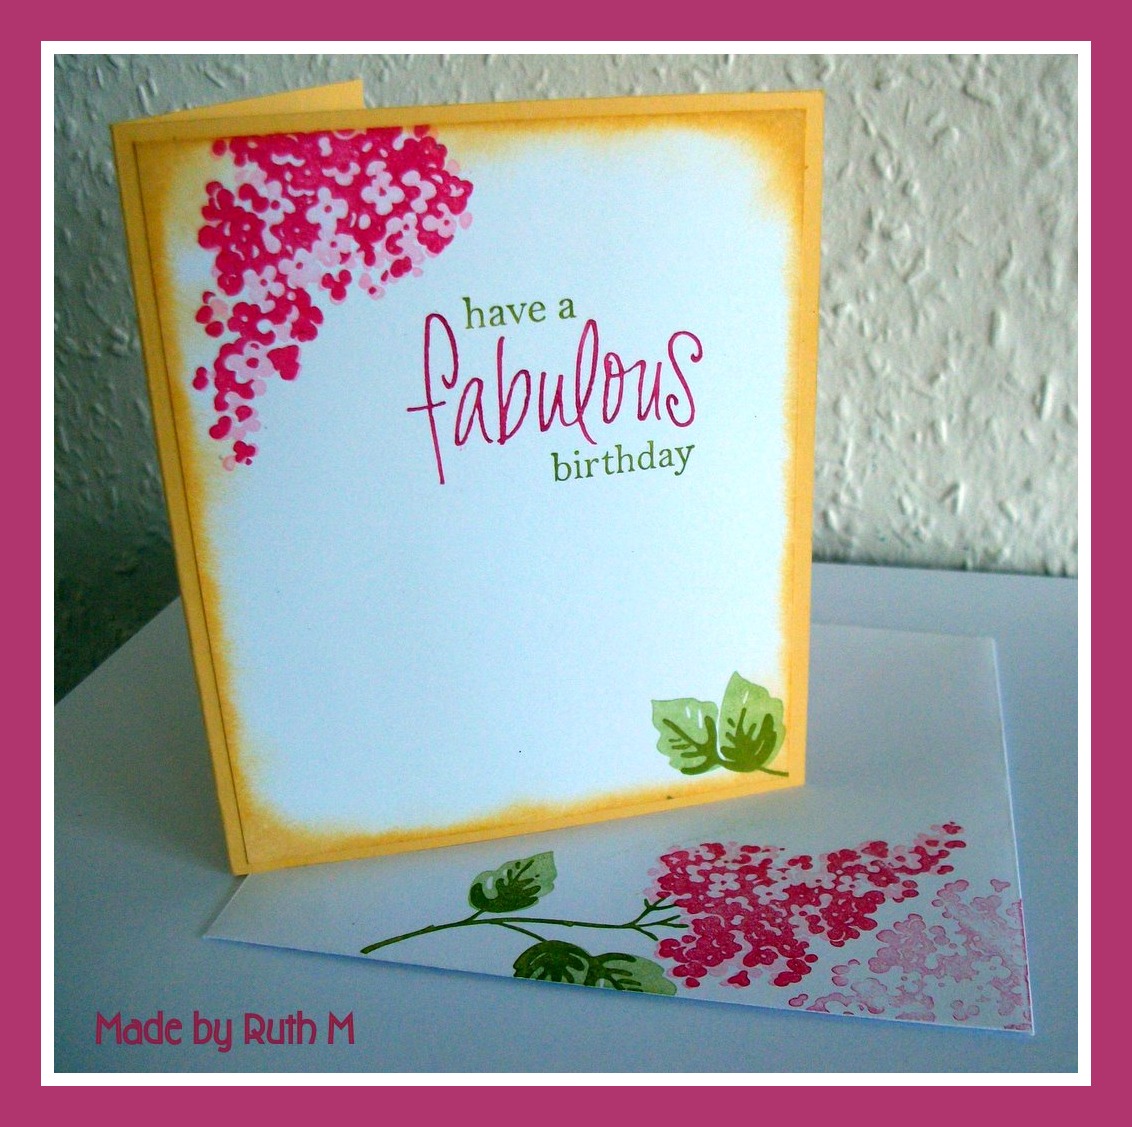
Card two uses a brighter colour combo of So Saffron, Rose Red and a touch of Pear Pizzazz.  After I'd assembled the square panel I realised it was a tad large for an A6 size card which is what I'd planned.  So I cut the So Saffron card to measure 4 1/8" x 4 7/8" and hung the lacy square Nestie shape over the edge.  The card fits in a 5" square envelope.

I embossed the card front with the Leafy Branch Cuttlebug folder.  I stamped the flowers in Pretty in Pink and Rose Red - I stamped the Rose Red off once.  I kept with pear and olive for the leaves.  I sponged So Saffron ink around the panel, added the sentiment and green brads.  Again I added Dazzling Diamonds to the flowers.  I will use this card as a birthday RAK card so I kept it flat so it can be posted.


Then I stamped the envelope and the inside of the card.


Having stamped the lilacs in purple and pink I decided blue was the next choice.  I've used Baja Breeze and Not Quite Navy inks for the flowers and pear and olive again for the leaves.  The card is a side opening A6 size card made with Baja Breeze CS.  I've added Bella Bleu patterned paper to the bottom.  On this panel I used Antique Linen distress ink to stamp a woven fabric background over the lilac and sentiment and to sponge the edges.  I love that look!  I also stamped and edged the vanilla strip and photo corners.  This card will be hand delivered so I could add some dimension.  I've popped up the Baja Breeze oval and added punched butterflies which I edged with the distress ink.  No glitter on this one, I finished off by adding blue crystals to the butterflies and the Not Quite Navy Labels Ten shape.


Then I stamped the envelope front and the inside of the card.


I so love these stamps that I wanted to stamp something for me that I'm going to be able to keep and see on display.  I thought it was time for my candle jar to get a makeover.  The candle is fragranced with cherry and almond - such a delicious smell! - and the wax is red so I paired Cherry Cobbler with olive and vanilla.  For the flowers I used Regal Rose and Cherry Cobbler inks and pear and olive for the leaves.  I stamped two lilacs for the jar front oval and for the lid I stamped the flowers and a cluster of leaves.  The Stamp-A-Ma-Jig gets a real workout with this set!  I really loved the look of the woven fabric background I stamped on the blue card so I repeated that here but this time I used Crumb Cake ink.  I've added Dazzling Diamonds glitter to the flowers. 


My lovely neighbour Kath has just bought over some freshly baked Bakewell slices for us - how scrummy to eat those tonight with the candle burning, can't wait!  There is just something about stamping with these gorgeous stamps that makes me happy.  I'm so glad I got them!

Photobucket

Tuesday 15 February 2011

Oval Flower Bookmark Card - WMSC34

When I saw the Waltzingmouse Stamps sketch WMSC34 this week I thought it would be fun to cut a slot in the card front and insert an oval bookmark.  Here's the sketch.


I started off with an A6 card made with SU! Not Quite Navy CS.  I cut two slits 3/4" apart as a slot for my bookmark to slide into.  For the bookmark I cut Petite Oval Nestie die shapes in Whisper White and Pacific Point CS and Blueberry Crisp patterned paper.  I used the WMS Say It With Style set, stamping the flowers and leaves in VersaMark on Pacific Point and Sahara Sand CS and heat embossing with white powder.  I also embossed the sentiment in white.

I put a contrasting piece of Blueberry Crisp paper on the bottom of the card.  I cut out the images and assembled them with glue dots.  I haven't popped anything up, I kept it flat so the oval will function well as a bookmark  To finish the card front, I added two Cuttlebug Vintage die cut shapes and silver nailheads to the flower centre and sentiment strip.


Then I decorated the envelope front and the inside of the card.  I love that patterned paper!  I used my Eyelet Lace border punch on the Pacific Point strip.  This card will be posted to a distant friend I keep in touch with solely by snail mail.


Supplies:
Stamps: WMS Say It With Style set
CS: SU! Not Quite Navy, Pacific Point, Sahara Sand & Whisper White
Patterned paper: SU! Blueberry Crisp Designer Series Paper pack
Ink: VersaMark, SU! Not Quite Navy
Tools: Petite Oval Nestabilities dies, Cuttlebug Vintage die, Martha Stewart Eyelet Lace border punch, Crop-A-Dile
Embellishments & accessories: white grosgrain ribbon, SU! Pewter Jumbo Eyelet, self adhesive silver nailheads

Photobucket

Monday 14 February 2011

Perfect Coffee Valentine Card For Hubby

This is the coffee themed Valentine's card I gave to Owen today.  The idea to use cups from my Elzybells Tea For Two set came from Curt's lovely, inspiring Valentine card on this blog post.  Owen and I both love our coffee, it has to be proper coffee too, no instant for us two! I made a side opening A6 landscape card from Cherry Cobbler CS.  I embossed the turquoise panel with a Texturz folder and added a white strip edged with a decorative punch.  I've sponged all the white edges with Chocolate Chip ink.

I stamped the cups on white CS and also stamped them again on a Post It Note to create masks so I could stamp the oval.  That grounded the cups and stopped them from looking as if they were floating.  I stamped the solid cup colours -  pink for my cup of course! - and added hearts which I stamped on the cherry CS and cut out.  The cups are popped up.  I added a touch of colour to the cappuccino foam with ink and a blender pen.  I punched photo corners for the image panel to which I've added tiny gold heart shaped brads.  For the sentiment, I die cut two Labels Trio shapes and offset them.  I decided on a skewhiff main image panel (or Casey Court as my friend Jan always says!) and I've popped it up.


This is the inside of the card.  I embossed the heart with the same Texturz plate I used on the card front.  I used two different sentiments, added more tiny gold heart brads and popped the oval up.


Then I decorated the envelope front.  I thought the swirl stamp echoed the swirls on the embossed pieces I'd used on the card.  I added punched hearts and an oval element for me to write hubby's name on.


I'm very happy to report he loved his card!

Supplies:
Stamps: Elzybells Tea For Two clear set, 'with love' by PSX, 'Happy Valentine's Day' from SU! Seasonal Wishes set, heart from Hero Arts Sending Smiles Messages clear set, A Muse Essential Ovals clear set, swirl from UM set from unknown source
CS: SU! Cherry Cobbler, Tempting Turquoise & Whisper White
Ink: Memento Rich Cocoa, Bahama Blue & Rose Bud, SU! Chocolate Chip & Cherry Cobbler, Tim Holtz Antique Linen Distress Ink
Tools: Oval & rectangle Nestabilities dies, Labels Trio die, Sizzix Ivy Flourishes Texturz plate, EK Success Dotted Wave border punch, Sizzix Sizzlits Heart Funky # 2 die, small heart punch, blender pen
Embellishments & accessories: Tiny gold heart brads, 3d foam pads


Photobucket

Friday 11 February 2011

Stencil Flower Just For You Birthday RAK Card

This is a Splitcoast Stampers BRAK group card I'll be sending out later this month.  It's a side opening A6 landscape card made with Pear Pizzazz CS.  I stamped the Little Stencil Flower in black ink, cut the panel out with a rectangle Nestie die, rounded the corners and edged it with Pear Pizzazz ink.  We've used the SU! Colour Spritzer tool a couple of times at Joanne's Make and Take evenings and I quite like the look but I don't really want to buy the tool. I decided to get the speckled look by using a toothbrush.  I dampened the brush, rubbed it over my black ink pad and then flicked the brush with my finger.  Not high tech and I got inky fingers but it worked!

I love the look of the SU! Scallop Trim Border and Corner punches but I had a feeling I'd find them difficult to line up to make decorative edged squares and rectangles.  Yep, I used the punches at Joanne's last month and made a right hash of it and got very frustrated!  I'm all about easy and I want my crafting to be fun and not frustrating.  So I've bought the Lacy Square Nestability dies instead.  Even though the dies are square, I reckoned I'd be able to make rectangles as well.  I cut two square shapes, trimmed the ends and glued the two shapes together to make a rectangle.  I'm so chuffed how it turned out!  The image panel and sentiment oval are both popped up.


When I bought this Stencil Flower stamp I also got the matching background stamp.  I stamped that on the side of the envelope front.  I stamped my sentiment and inked the edges of the white panel.  Then I cut two Melon Mambo Lacy Squares, trimmed the ends and glued both halves inside the card.  The join was more noticeable on this panel than on the one on the front of the card.  No problem, a punched flower top and bottom sorted that.  Then I decided to add a flower at each side as well.  Yay, perfect decorative rectangles without the frustration!


Supplies:
Stamps: Hero Arts Little Stencil Flower, Paper Art (background stamp) & Sending Smiles Messages clear set, SU! Ovals All set
CS: SU! Pear Pizzazz, Melon Mambo, Basic Black & Whisper White
Patterned paper: SU! Night & Day Designer Series Paper pack
Ink: VersaFine Onyx Black, SU! Pear Pizzazz & Melon Mambo
Tools: Lacy Square Nestabilities dies, SU! plain oval punch, X Cut mini flower punch, Crop-A-Dile (to make flower centres)
Embellishments & accessories: Toothbrush, 3d foam pads


Photobucket


Thursday 10 February 2011

Leafy Medallion Thinking Of You - Craft For Life Card

This is a card I made for the Cancer Research UK Craft For Life campaign.  I used the gorgeous leafy medallion stamp from the Day of Gratitude set, inking it first in Pear Pizzazz and then rock and rolling the stamp in Crumb Cake.  I then edged lightly with Choc Chip ink.  I just love, love love this stamp!  I also stamped the medallion a few times as a background with VersaMark Dazzle ink so the background stamping has a subtle shimmer.  I added a Choc Chip strip, some Pumpkin Pie ribbon and a Pumpkin Pie strip edged with a border punch.  I placed a felt flower with a brad in the centre of the medallion and popped it up.


Supplies:
Stamps: SU! Day of Gratitude & Trendy Trees sets
CS: SU! Old Olive, Pumpkin Pie, Chocolate Chip & Whisper White
Ink: SU! Pear Pizzazz, Crumb Cake, Old Olive & Chocolate Chip, VersaMark Dazzle Frost
Tools: Martha Stewart Eyelet Lace border punch
Embellishments & accessories: SU! Pumpkin Pie grosgrain ribbon, SU! Felt Fusion felt flower, brad, 3d foam pads


Photobucket

Tuesday 8 February 2011

Two Masculine Cards

New stamps are definitely helping me to make more masculine cards for my stash LOL!  I've liked the SU!  Autumn Days set for a while but I like the foliage elements much more than the pheasant and so I've never bought it.  A used set recently appeared on eBay and I thought I'd go for it if I could get it at a good price - which I did!  Those poor stamps sure needed some TLC, they were rather grimy!  I've taken before and after photos.  Here's what the stamps were like when I got them.


The next photo shows them after being lovingly restored.  I sanded the wood blocks and gave them a thorough clean.  I love Ultra Clean stamp cleaner, it's a miracle worker!


Here's the card I created - and I made myself use the pheasant stamp in addition to the lovely wheat stamp!  I stamped a stems stamp from a Hero Arts set first in Pear Pizzazz and then Old Olive inks.  Then I added the wheat in Crumb Cake ink.  I lightly sponged So Saffron ink at the bottom and some Bashful Blue towards the top and I edged the panel with Old Olive ink.  I inked the pheasant with More Mustard ink but then used markers to add colour here and there on the stamp - Always Artichoke for the head, some Really Rust for the body and tail and Chocolate Chip for the legs and the tail markings.  I cut him out and I've popped him up with thin pop dots.    I stamped the flock of birds and added the sentiment oval with vintage brads.


My great friend Debbie came to play in my craft room yesterday and she stamped all the images from my Inkadinkado Utopiary set.  I loved how she inked the oriental tree and pagoda image using different coloured inks and I just had to have a go myself today.  I do like to create different shaped cards from time to time and I haven't made a card like this, where an element hangs over the side, for a while.  The Creamy Caramel card base measures 5 3/4" x 3 1/4".  The Labels Ten shape hangs over the side but the card still fits in a C6 envelope.

I inked the stamp with various chalk ink colours and I've edged the image and sentiment ovals with Tea Dye Distress Ink.  I also used this to edge the patterned paper and I also added a touch of Chocolate Chip ink.  I wrapped some linen thread around the paper and then I've added a button with a gold brad centre.  I layered two punched photo corners and popped up the image and sentiment ovals.  I finished off by adding gold nailheads to the Labels Ten shape.


Supplies for thinking of you card:
Stamps: SU! Autumn Days & Sincere Salutations sets, Hero Arts Earth Flowers clear set, Hobby Art Flock of Birds
CS: SU! Crumb Cake, Old Olive & Confetti White
Ink: SU! Pear Pizzazz, Old Olive, Crumb Cake, So Saffron, Bashful Blue, More Mustard & Chocolate Chip, SU! markers in Really Rust, Always Artichoke & Chocolate Chip
Tools: Petite oval Nestabilities dies
Embellishments & accessories: SU! Vintage brads, sponge daubers,3d foam pads


Supplies for birthday wishes card:
Stamps: Inkadinkado Utopiary clear set, sentiment from Waltzingmouse Stamps Asian Gardens clear set
CS: SU! Creamy Caramel, Old Olive, Chocolate Chip & Confetti White
Patterned paper: Basic Grey Sayuri from the Kioshi line
Ink: VersaMagic Tea Leaves, Spanish Olive, Pumpkin Spice, Gingerbread & Jumbo Java chalk inks, Tim Holtz Tea Dye Distress Ink
Tools: Petite oval & Labels Ten Nestabilities dies, SU! Photo Corners punch
Embellishments & accessories: SU! Linen Thread, button, gold brad, gold self adhesive nailheads, sponge dauber, 3d foam pads


Photobucket
01 09 10