Sunday 30 May 2021

Floral Vertical Trifold Window Card

Splitcoast Stampers have this fab Vertical Trifold Window card tutorial on YouTube. I really liked the look of this very pretty card so I made my version of Wendy Lee's card.  Here's my card and envelope.


Here's the card front.  After adhering the patterned paper to the card front I cut out the large floral die shape.  I've used Magenta Madness and Basic White CS for my sentiment element.  I punched a hole in the flagged banner and added a gold cord bow.  I embellished the front with three gold Gilded Gems.


Here's what you see when you open the card.  Basically, a Magenta Madness card base is glued onto a larger Thick Basic White card base with the fold of the Magenta card at the bottom.  Patterned paper was adhered to the front of the Magenta card and the gold foil die cut shape was adhered to the patterned paper - positioned through the die cut aperture cut out from the front of the card. 


Here's a closer look at the panel.


Here's what you see when you flip the third panel down - a white sentiment and message panel and the floral die cut that was cut from the patterned paper from the first panel.  It couldn't go to waste!


Here's a closer look at the sentiment message panel.


Here's the front of the envelope decorated with more of that gorgeous pink and gold paper and a fancy die cut name label element.


Certainly not a quick card to make but I think it's rather special.  I've earmarked it for a friend's birthday anyway!

Supplies:
Stamps: SU! 'Artistically Inked' & 'Happiest of Birthdays' sets
CS: SU! Magenta Madness, Basic White & Thick Basic White, Gold Foil Sheet 
Patterned paper: SU! 'Expressions in Ink' Specialty DSP
Ink: SU! Magenta Madness 
Tools: SU! 'Artistic' & 'Tasteful Labels' die sets, 'Messages' die, Crop-A-Dile
Embellishments & Accessories: SU! gold cord, Gilded Gems & Dimensionals

Ruth

Tuesday 25 May 2021

Green Tealights Box

Mary, a lovely colleague at work, agreed to do a shift swap with me which allowed me to get together with friends on Saturday.  I thought I'd give her a little gift to say thank you.  The boxes are  straightforward to put together thanks to the excellent instructions from Sam at Pootles.  Sam's blog post is HERE and the post contains a link to the YouTube video.

I've used Mint Macaron and Just Jade for my colour combo.  Mint Macaron is the perfect colour to go with the Wilko Ocean Breeze scented tealights I placed in the box!  The Mint Macaron gingham paper is from a 'Subtles' DSP pack from a couple of years back.


The aperture in the front was made using the SU! 'Decorative Label' punch and you punch through the top and front at the same time so you get a finger hole to make the box easier to open.


Here's the box containing the twelve tealights with the tag and ribbon all ready to be tied on.  I stamped my sentiment on Mint Macaron CS using Just Jade ink, punched it out with the 'Decorative Label' punch and the label is popped up on a rectangle cut using a 'Stitched So Sweetly' die.  I decorated the tag with die cut tiny flowers using a die from the SU! 'Hydrangea' die set.  I added rhinestone jewels to the flower centres as a finishing touch.


Supplies:
Stamps: SU! 'Fancy Phrases' set
CS: SU! Just Jade & Mint Macaron 
Patterned paper: SU! 'Subtles' DSP pack (retired)
Ink: SU! Just Jade 
Tools: SU! Score Board, 'Decorative Label' punch, 'Hydrangea' & 'Stitched So Sweetly' die sets, Crop-A-Dile, 
Embellishments & Accessories: SU! Mint Macaron linen ribbon, Rhinestone Jewels & Dimensionals

Ruth

Sunday 23 May 2021

Poppies Thank You Card

I've only recently got the SU! 'Painted Poppies' stamp set even though I've had the 'Poppy Moments' die set for ages.  I wanted to make a thank you card and I had a layout I wanted to use so I thought I'd ink up my poppy stamps for this card. Here's the card and envelope together.


Here's the card.  I used Basic White thick CS to make the card base, I cut 1" off the front of the card and glued a strip of the dotty paper on the inside of the card.  I embossed a panel of Fresh Freesia CS with a 'Greenery' embossing folder and glued that to the front of the card.  I die cut a white circle and a scalloped Blackberry Bliss circle, stamped the sentiment and popped up my poppies and leaves.


Here's a closer look at the poppies and leaves.  I used the splatter images in the 'Painted Poppies' set to add colour to the stamped outline images which was a novel way to colour in images but I really enjoyed it!  


Here's the card open.


Here's the inside of the card.


Here's the envelope decorated with dotty paper on the flap.


Supplies:
Stamps: SU! 'Painted Poppies' & 'Peaceful Moments' sets
CS: SU! Blackberry Bliss, Fresh Freesia & Basic White regular & thick
Patterned paper: SU! 'Peaceful Poppies' DSP pack
Ink: SU! Blackberry Bliss, Fresh Freesia, Granny Apple Green & Mossy Meadow
Tools: SU! 'Greenery' embossing folder set, 'Layering Circles' die set 
Embellishments & Accessories: SU! Dimensionals

Ruth

Saturday 22 May 2021

Artistic Floral Hello Card

When I saw the front cover of the new Stampin' Up! annual catalogue I loved what I saw and the 'Expressions in Ink' suite of products went to the top of my wish list!  I just love the style of these products, it's so clever that they mimic the look of alcohol ink work!  I bought the stamp set, die set and the patterned paper but forgot the ephemera pack so that will be ordered next time!

While Lesley and Wendy were working on this card during our crafty afternoon...


...I decided to make a card using the same layout but using the 'Expressions in Ink' products.  I started work on it but didn't get it completed until the next day.  Here's the card and envelope together.


I've used four of the new In Colours and I love this batch of In Colours.  I haven't always liked every colour offered with In Colours in previous years but this batch is definitely my favourite so far!  I used Soft Succulent CS for the card base and sentiment label and I used Soft Succulent ink for my stamped leaves.  I used Polished Pink and Pale Papaya inks for the flower and I used Evening Evergreen for the narrow CS strips, the die cut leaves and to stamp the 'hello'.  Pale Papaya is the colour of the beautiful patterned paper from the 'Expressions in Ink' DSP pack.  Evening Evergreen is such a deep, rich colour, it's going to be a great alternative to black to add a touch of contrast and drama.  The white die cut label, sentiment label and flower are all popped up on Dimensionals.  I added a double white twine bow to finish the front.


Here's the inside of the card.


Here's the envelope.


Supplies:
Stamps: SU! 'Expressions in Ink' set
CS: SU! Evening Evergreen, Soft Succulent & Basic White
Ink: SU! Evening Evergreen, Pale Papaya, Polished Pink & Soft Succulent 
Tools: SU! 'Artistic' & 'Tasteful Labels' die sets, 'Messages' die
Embellishments & Accessories: SU! white baker's twine, Dimensionals

Ruth

Thursday 20 May 2021

Goldfish Shadow Box Card

I designed two shadow box cards for my online crafty get together with friends so I'd been thinking about them quite a bit and I'd been thinking about creating scenes in particular.  I had a light bulb moment when I remembered my SU! 'Make a Splash' stamp set and I thought it would work well.  While Lesley and Wendy were working on their hot air balloon cards I made my goldfish card.


Here's the card made with Calypso Coral CS and sized to fit in a standard C6 envelope.  I cut two quarter sheets of A4 CS and scored both sides of both pieces (on the long side) at 1/2" and 1" to form the shadow box shape.  I cut a circle aperture and added an Early Espresso frame. I used a blending brush to apply Balmy Blue ink to a piece of Basic White CS, stamped some weeds towards the bottom and glued the panel in place.  I stamped my fish in Calypso Coral ink, fussy cut them and arranged them without adhering them so I could stamp the bubbles.  Then I popped each fish up on Dimensionals.  I masked part of a sentiment stamp to only get the 'Just for you' words and cut that out with a shape from the SU! 'Messages' die.  I'm loving this die for small shapes, it's really useful!  To finish the front I sprinkled a few rhinestone jewels on the sentiment label.


Here's the back of the card with a fish and a 'Just keep swimming!' sentiment.  This card is going to a friend who is feeling very down due to having some medical issues.  I thought a little card to give her some cheer and encouragement to keep going was in order.  


Here's the envelope with a stamped mini scene.


This was such fun to make, I had a goofy grin on my face the whole time I think!  Every now and then I ask myself "is this what a grown woman should be doing?!"  Then I think "who cares?!" and carry on!

Supplies:
Stamps: SU! 'Make a Splash' & 'Fancy Phrases' sets
CS: SU! Calypso Coral, Early Espresso & Basic White
Ink: SU! Balmy Blue, Calypso Coral, Early Espresso, Granny Apple Green & Old Olive
Tools: SU! 'Messages' die, Spellbinders circle Nestabilities die set, blending brush
Embellishments & Accessories: SU! Dimensionals & Rhinestone Jewels

Ruth

Wednesday 19 May 2021

Dangly Butterfly Shadow Box Birthday Card

Last Saturday afternoon I crafted online with my lovely friends Lesley and Wendy.  I designed three cards for them to make and made up card packs for them.  While they were working with their card packs to create their cards I worked on cards of my own.  My friends had asked to make a shadow box card and while designing for the online class I had an idea pop into my head that I had to try!  I wanted to make a shadow box with a dangly element and this dangly butterfly card is what I came up with.  I did start work on this card the day before but I finished it while the girls were working on their butterfly shadow box card.


First I'll share one of the items I used for this card.  An empty tissue box!  I couldn't throw this box away and it's been sitting on a shelf in my craft room for a couple of weeks.  When I hit upon the idea of a dangly butterfly in a shadow box card I knew I could use card from the box for my card.


Here's the card.  Pool Party and Cherry Cobbler seemed a good match colour wise so I went with those.  I glued a panel of the butterfly card to the back of the shadow box card and I die cut the solid butterfly from the patterned card as well.  After I'd cut the circle aperture I sandwiched metallic thread between two solid die cut butterfly shapes and added the Cherry Cobbler outline butterfly to the front.  I attached the thread with strong tape and added the Cherry Cobbler frame.  I added Cherry Cobbler leaves cut using a die from the SU! 'Artistic' die set and flowers cut from the 'Strawberry' builder punch.  I snipped between the petals and circled an embossing tool in the flower centres to give the flowers some shaping and dimension.  After gluing them in place I added a rhinestone jewel to each flower centre and added jewels to the butterfly body.


Here's the back of the card with a stamped birthday sentiment and a strip of the tissue box card.  After I'd glued the card in place I added lines with my Cherry Cobbler Stampin' Write marker.


For the envelope I simply used circle punches to decorate the flap.


Supplies:
Stamps: SU! 'Fancy Phrases' set
CS: SU! Cherry Cobbler, Pool Party & Basic White, patterned card from a tissue box
Ink: SU! Cherry Cobbler 
Tools: SU! 'Brilliant Wings' & 'Artistic' die sets, Spellbinders Nestabilities Circle die set, SU! 'Strawberry' builder punch & circle punches, ball embossing tool
Embellishments & Accessories: metallic thread, SU! Rhinestone Jewels

Ruth

Tuesday 18 May 2021

Wild Rose Hello Card - Online Meeting Project

My third card for our crafty afternoon online is a pretty floral number featuring the SU! 'To a Wild Rose' stamp set.  I always liked the look of this set and when I found out it was retiring I decided to get it before it was gone.  There is a matching die set but I thought I could manage without that as I don't mind a bit of fussy cutting every now and then!  Here's the card and envelope.


Here's the card.  Julie Davison has been inspiring me yet again!  Her pretty cards can be seen on her blog post HERE.  The card base is Highland Heather and I embossed a panel of Purple Posy CS with the beautiful 'Parisian Flourish' embossing folder.  Once I'd glued the embossed panel to the card front I added thin strips of black CS.  I stamped the flowers and leaves in Memento Tuxedo Black ink and used Highland Heather ink to colour the flower and stamped off once Granny Apple Green ink to add colour to the leaves.  Leaving some white space in the rose was what really struck me about Julie's cards, I really liked that look and l found my triple stamped images a tad heavy by comparison.  I popped up a die cut label from the 'Tasteful Labels' die set and popped up my fussy cut rose and leaves.  I stamped 'hello' on a scrap of Granny Apple Green CS, cut that out with a shape in the 'Messages' die and popped that up also.  To finish off I fixed a white baker's twine bow in place with a mini glue dot.  I did a double length of twine and it took ages to get the bow looking right, the final touch on a card can end up taking the longest time!


Here's the inside of the card with a strip of embossed Purple Posy CS added to a white panel.  After gluing down the embossed strip I added a line with a black Sharpie marker.  Simple but elegant I think.


Here's the envelope with another strip of embossed CS and the black Sharpie marker trick.


Supplies:
Stamps: SU! 'To a Wild Rose' set
CS: SU! Basic Black, Granny Apple Green, Highland Heather, Purple Posy & Basic White
Ink: SU! Memento Tuxedo Black, SU! Granny Apple Green, Highland Heather, black Sharpie marker
Tools: SU! 'Parisian Flourish' 3D embossing folder, 'Tasteful Labels' die set, 'Messages' die
Embellishments & Accessories: SU! white baker's twine, mini glue dot, Dimensionals

Ruth

Monday 17 May 2021

Hot Air Balloons Shadow Box Card - Online Meeting Project

Onto my second card for the online crafty meeting and I thought I'd make a second shadow box card - this time a landscape oriented card to fit in a standard C6 envelope.  This card is bright and fun, quite a bit different from the butterflies and flowers card that came before!  The SU! 'Lift Me Up' hot air balloon stamp set and 'Up & Away' die set are long retired but this is one of my favourite ever bundles and the stamps and dies won't be leaving my stash just yet!  Here's the card and envelope.


Here's the card.  I used Poppy Parade CS for the card base and Pacific Point CS for the frame around the circle aperture.  I used a blending brush to sweep Balmy Blue ink onto a panel of Basic White CS to represent the sky and I stamped birds (from the 'High Tide' stamp set) a few times in black ink.  I stamped the balloons in Granny Apple Green, Poppy Parade and Pacific Point inks.  I popped up the Poppy Parade and Pacific Point balloons.  I die cut three white clouds, edged each one with Balmy Blue ink applied with a sponge dauber. and attached them to the card front.  I stamped the sentiment, die cut it and popped it up.


Here's a closer look inside the aperture.  Scenes like this work so well with shadow box cards.


Here's the back of the card.  The 'Happy Birthday' from the front of the card and 'Hope Your Day Is On Cloud Nine' words were on one stamp originally but I performed stamp surgery and cut the words apart!  This means it's easier to stamp the words separately without the need for masking, a bonus in my book!  In fact the birds I stamped on the back panel are also cut apart from a larger group of birds in the 'High Tide' set.  I'm very willing to cut images apart if they are easier for me to use that way!


Here's the envelope.  I stamped a few clouds direct on the flap and then glued a stamped and die cut balloon over the top.


Supplies:
Stamps: SU! 'Lift Me Up' & 'High Tide' sets
CS: SU! Pacific Point, Poppy Parade & Basic White
Ink: SU! Balmy Blue, Granny Apple Green, Pacific Point & Poppy Parade, Memento Tuxedo Black
Tools: SU! 'Up & Away' & 'Stitched Rectangles' die sets, Spellbinders circle Nestabilities die sets, blender brush, sponge dauber
Embellishments & Accessories: SU! Dimensionals

Ruth

Saturday 15 May 2021

Butterfly Wishes Shadow Box Card - Online Meeting Project

It's time for another online crafty get together with my good friends Lesley and Wendy today and I had been asked to include a shadow box card in my designs.  I was very happy to oblige!  This is my first card for our crafty afternoon and it's a portrait orientated shadow box card that fits in a standard C6 envelope.  I thought it would be fun to play around with layouts as you can make shadow box cards in any size and format really.  Here's the card and envelope together.


Here's the card with a Night of Navy and Pool Party colour combo.  I've used the beautiful SU! 'Butterfly Wishes' stamp set which is a 'Distinktive' set which means you get lovely variation and detail in the stamped images.  I often add a frame to an aperture cut out from the front of a shadow box card but by using a die from the SU! 'Stitched Rectangles' die set I got lovely stitched detailing around the aperture and didn't need to add a frame


Here's a closer look at the aperture.  I fussy cut the flowers and butterfly and popped them up on Dimensionals.


Here's the back of the card where I added a white panel as a place to write a birthday message.


Here's the envelope.


Supplies:
Stamps: SU! 'Butterfly Wishes' & 'Fancy Phrases' sets
CS: SU! Night of Navy & Basic White
Ink: SU! Night of Navy & Pool Party
Tools: SU! 'Stitched Rectangles' die set 
Embellishments & Accessories: SU! Dimensionals

Ruth

Friday 14 May 2021

Tropical Window Tri Panel Birthday Card

Recently I came across a window tri panel card and I was thinking for a few days about what I could do with this type of card.  I decided on a tropical themed birthday card made by mixing a fair few stamp sets!  Here's the card and envelope together.


Here's the card front with a scene showing through the window aperture.  The card base is made from SU! Flirty Flamingo CS and I cut the window aperture using a die from the SU! 'Stitched Rectangles' die set.  I stamped the flowers on the bottom of the card base using Flirty Flamingo ink for that lovely tone on tone look.  I stamped the flowers in Soft Suede ink onto Basic White CS and used blender brushes to add colour.  On one flower I added Daffodil Delight ink and sponged the edge with Calypso Coral ink using a sponge dauber.  On the second flower I added Flirty Flamingo ink quite lightly with a blender brush and then added Flirty Flamingo ink around the edge with a sponge dauber.  I stamped the leaf in Garden Green ink, added Granny Apple Green ink with a blender brush and added a touch of Garden Green ink around the edge with a dauber.  I popped up the leaf and flowers and added a rhinestone jewel to each flower centre that I coloured with a Soft Suede Dark Stampin' Blends marker.


Here's the second panel of the card.  I inked the top of the palm trees with Granny Apple Green ink and added some Garden Green ink with a dauber.  I used a Soft Suede marker to ink the tree trunks.  I grounded the trees with part of an image from the Waterfront stamp set stamped in Crumb Cake ink.  I inked the sun with Daffodil Delight ink and added Calypso Coral ink with a dauber.  I added birds stamped in Soft Suede and coloured the tree trunks in lightly with a Crumb Cake marker.  I stamped the sentiment in Soft Suede on Crumb Cake CS, die cut using a shape from the 'Messages' die and popped the sentiment label up.


Here's the card fully open with the third panel revealed.  Basically this card design is a card base with a window aperture cut out of the front and a second white card, slightly smaller than the base card,  glued on the inside.  Simple but it's something a bit different.


Here's a closer look at the third panel.  I continued the tropical theme by adding a flamingo, water and plants.  The water and plant stamps aren't from the 'Friendly Flamingo' set, I used images from the 'High Tide' set inside as I thought they worked better.  It's great when you can mix and match stamp sets and I managed to use four different sets on this card!  I finished off inside by stamping the birthday sentiment in Soft Suede ink.


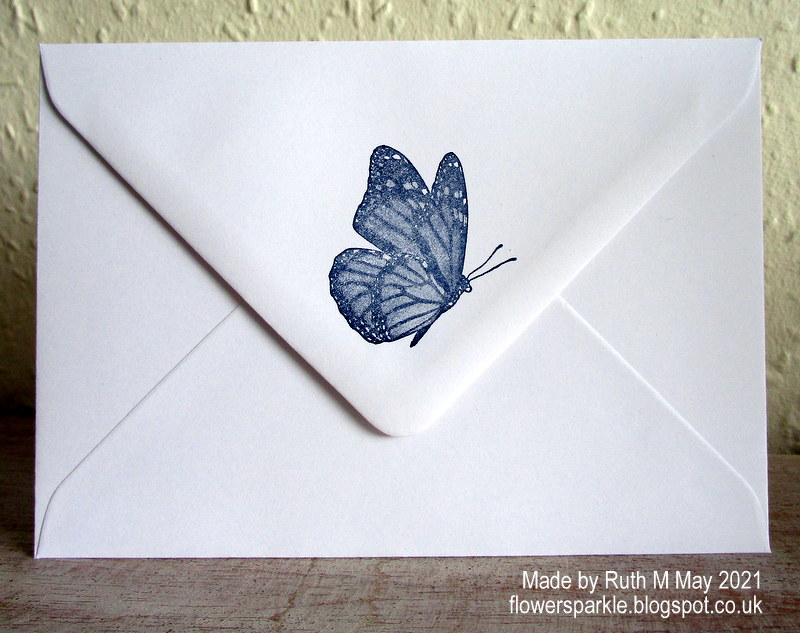
For the envelope I used a blender brush to sweep Flirty Flamingo ink onto the envelope flap and then I stamped the tropical flowers over the top in Flirty Flamingo ink.


I created this card on a day off from work and it was lovely to take time to enjoy the process of making a card like this.  It certainly wasn't a quick card to make and I had a very messy desk at the end of it with lots of supplies to put away but cleaning up after creating is never fun!  I definitely wouldn't make multiples of a card like this but I really enjoyed my crafty time that day!

Supplies:
Stamps: SU! 'Friendly Flamingo', 'High Tide', 'Timeless Tropical' & 'Waterfront' sets
CS: SU! Crumb Cake, Flirty Flamingo & Basic White
Ink: SU! Balmy Blue, Calypso Coral, Crumb Cake, Daffodil Delight, Flirty Flamingo, Garden Green, Granny Apple Green & Soft Suede ink pads, Crumb Cake & Soft Suede Stampin' Write markers, Soft Suede Dark Stampin' Blends marker
Tools: SU! 'In the Tropics' & 'Stitched Rectangles' die sets, 'Messages' die, blender brushes, sponge daubers
Embellishments & Accessories: SU! Dimensionals & Basic Rhinestone Jewels

Ruth

01 09 10