Tuesday 24 December 2013

Winter Neighbourhood Merry Christmas Stepper Card

This is one of the last Christmas cards I made this year, it's a stepper card made with the Cheery Lynn Winter Neighbourhood border die.  I designed it for Jan and Wendy to make when they came along for a card making morning a couple of weeks ago and I'm very happy to say the card was a hit!  I am having withdrawal symptoms as I haven't been able to craft or blog for ages - hopefully that situation will improve after tomorrow!

I used black, white and Pool Party CS plus sparkly silver glimmer paper.  The card fits inside a 6" square envelope.  I added some tiny pieces of yellow CS behind some of the windows so it looks like some of the lights are on.  I popped up the neighbourhood die cut shape, the sentiment and the star.


EDITED TO ADD:
I formed the stepper card by making a square card base with the fold at the top, cut and scored a second piece of CS and glued the two pieces together.

INSTRUCTIONS FOR A4 CS or 12" x 12" CS
  • Cut CS 11 1/2" x 5 3/4" and score at 5 3/4" to form a 5 3/4" square card base with the fold at the top.
  • Cut CS 7" x 5 3/4" and score at 1" and 4".
  • Valley fold the 1" score line and mountain fold the 4" score line.
  • Form the stepper card by joining the two pieces together, gluing the 1" tab of the smaller piece to the 5 3/4" square card base.

INSTRUCTIONS FOR 11" x 8 1/2" CS
  • Cut CS 11" x 5 1/2" and score at 5 1/2" to form a 5 1/2" square card base with the fold at the top.
  • Cut CS 6 1/2" x 5 1/2" and score at 1" and 3 3/4".
  • Valley fold the 1" score line and mountain fold the 3 3/4" score line.
  • Form the stepper card by joining the two pieces together, gluing the 1" tab of the smaller piece to the 5 1/2" square card base.

Here's a side view of the stepper card where you can see the square card base at the back and the smaller CS piece glued to the square card base. 


Here's the back of the card.


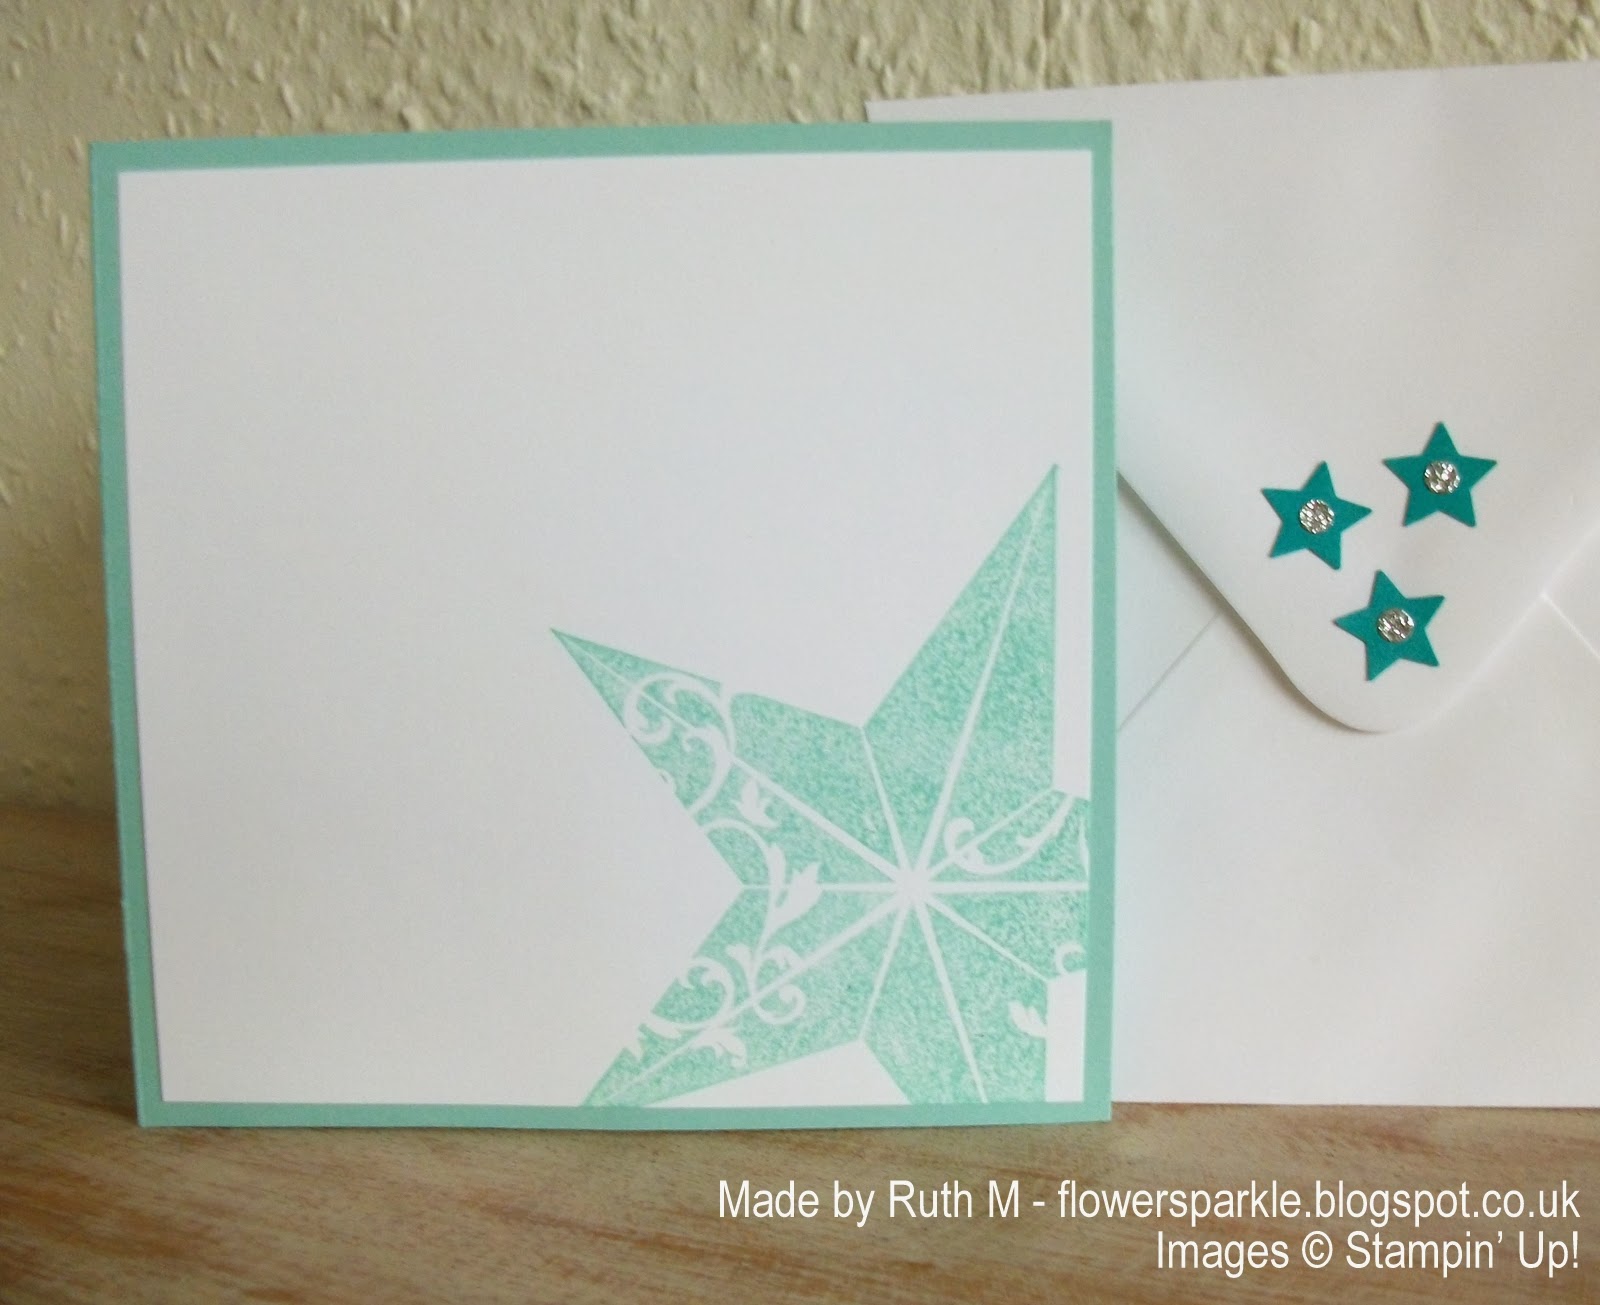
I had a piece of the die cut left over from trimming the shape to fit the card front so I used that to decorate the envelope flap.


That's all from me for now, it just remains for me to say many thanks for visiting my blog and...

 photo ruthSM3.gif

Monday 16 December 2013

70th Birthday Card For Carol

A little birdie told me that my friend Carol would be celebrating a milestone birthday - her 70th.  A great opportunity to use my SU! Memorable Moments set to mark the occasion!

I love this anniversary card made by Julie that I have pinned to my Cards to Case board on Pinterest and I based my design on Julie's lovely card.  I started off by making a Rose Red side opening A6 card and  I embossed a Very Vanilla CS panel with the Vintage Wallpaper folder.  I highlighted the embossing with gold gilding wax by using a muslin cloth to pick up some wax and then I gently rubbed and buffed over the raised areas.  I layered the Vanilla panel to a Brushed Gold CS mat and tied Rose Red seam binding ribbon around the mat before adhering it to the card front.  I stamped and die cut the sentiment label and die cut the leaves and flowers.  I glued the leafy stems to the embossed panel, popped up the label and added some shaping and dimension before attaching the flowers to the label.  I added  a butterfly and completed the card front by sprinkling on a few rhinestones.


Here's the inside and the envelope where I echoed the sentiment label, butterfly and leaves and flowers from the card front.  Thanks to Julie for the inspiration, I was happy how this card turned out.  I was also happy that Carol loved the card and still spoke to me after I'd drawn attention to her age LOL! 


Supplies:
Stamps: SU! 'Memorable Moments' set, Hobby Art 'Sentiments' clear set
CS: SU! Rose Red, Brushed Gold & Very Vanilla
Ink: SU! Rose Red & Early Espresso
Tools: SU! Labels Collection Framelits dies, Floral Fusion & Little Leaves Sizzlits dies, Beautiful Wings Embosslits die, Vintage Wallpaper embossing folder, Stamp-a-ma-jig
Embellishments & accessories: Creative Expressions 'Golden Light' gilding wax, muslin cloth, SU! rhinestone jewels & Dimensionals


 photo ruthlook.gif 


Sunday 15 December 2013

House Of Cards Blog Hop - Three Projects

PLEASE NOTE: this is a sticky post that will remain at the top until 15th December.  Please scroll down for my newer posts, thank you!

Welcome to the House of Cards Term One Blog Hop!  If you've come here from Mynnette's blog, then you are in the right place!  If you have just stumbled here and would like to participate, please hop over to the House of Cards challenge blog to get started!  We've got some fabulous sponsors that are providing prizes, so make sure to leave comments at each stop for a chance to win!

For the December HOC blog hop challenge we would like you to create projects using this inspiration photo. 

http://i42.photobucket.com/albums/e325/pballrsgirl/white%20christmas/bhg7.jpg


I've made three projects for the blog hop using images from our wonderful sponsors.

First up is a Cute and Fun style card.  The large snowflake is very, very sparkly as it's been heat embossed with Vintage Pink embossing tinsel.  Here is the card front...


 ...and here is the inside and the envelope.  Ta-dah, inside is a cute and fun pop up penguin!  The penguin is the adorable 'Penguin in Scarf' digi image from Dilly Beans - available HERE.


My second card is a Classic and Elegant style card and I've used the oh, so beautiful 'On a Winter's Day' digi image from Delicious Doodles at Stitchy Bear - available HERE.  Here's the card front.


Here is the inside and the envelope.


My final project for the blog hop is in the Shabby & Vintage style.  I've made a 2-4-6-8 gift box from Crumb Cake CS, added some cream lace, a shabby bloom and a tag with a very blinged up crown!


Inside the gift box are 6 very pretty vintage floral gift tags.  These (and the tag on the gift box) are freebie images available to download and print from Eclectic Anthology.  They are part of the 'Free Printable Romantic Gift Tags' download - available HERE.


Thanks for stopping by!  Please join in the fun of our hop and make your way over to Gale's blog!  Then please play along with us - make a project inspired by our photo and share it on the HOC blog for another chance to win a prize!

If you lose your way during the blog hop, please see the full blog hop list on THIS POST at the HOC Challenge blog.

 photo FlowerBoxRuth.gif

Wednesday 11 December 2013

Shiny Gold Sleigh Merry Christmas Card

This is the Christmas card that we sent to Owen's sister in Canada.  I just love the rich red and gold combo and the sleigh looks great embossed in gold!  The Cherry Cobbler card base is 5 3/4" square and I layered the Vanilla panel onto a gold mirri CS mat.  I heat embossed the sleigh and sentiment using gold embossing powder.  I added a die cut photo corner, a few punched gold mirri snowflakes and then sprinkled on some red crystals to finish the front. 


I'd just received the beautiful bauble garland stamp via eBay and was itching to try it out so I couldn't resist using it to decorate the inside and the envelope flap!  I've wanted this stamp ever since I saw this lovely card made by Louise and then a few months later I saw this lovely card made by Rocky.  It's been a long wait but I'm so happy to have this gorgeous stamp in my stash now!  Inside I stamped a sentiment and added gold nailheads to some of the baubles.


Supplies:
Stamps: PaperMania 'Sleigh' clear set, SU! 'Greetings of the Season' set, PaperMania 'Christmas Cheer'
CS: SU! Cherry Cobbler & Very Vanilla, gold mirri CS
Ink: SU! Cherry Cobbler, Encore Gold
Tools: MFT Die-Namics Photo Corners die, heat tool, Stamp-a-ma-jig
Embellishments & accessories: SU! gold embossing powder, red Swarovski crystals, gold nailheads


 photo ruthsnowman.gif 


Saturday 7 December 2013

Stockings & Dove Merry Christmas Card - 52 {C}CT Dec Pick Any Previous 2013 Challenge

December is such a busy time so at 52 {C}CT we're finishing off our year with a challenge that will run for two weeks.  We'd like you to choose ANY PREVIOUS 2013 52 {C}CT challenge.  We have sketches, colour combos, themes, techniques, recipes and embellishment challenges for you to select from so you're spoilt for choice!  Just make sure you choose a previous challenge from 2013 please. 

I've opted for a colour combo that I chose back in January 2013 when I was a challenge hostess. 


I wanted to use a newly acquired stamp and it's a large one so I made a 5" x 7" size card.  I joined two pieces of Elegant Eggplant CS together so I could have a card base that opens at the side.  I really don't like it when cards with the fold at the top sink downwards and don't stand up properly so joining two pieces of CS together to create a side opening card is my solution!  It's not a cost effective way to make card bases of this size but I only do it now and again so I don't worry about it.

I stamped the image in Elegant Eggplant ink onto Whisper White CS, trimmed the panel to size, punched the top two corners and added the punched border at the bottom.  I layered onto a mat of Brushed Silver CS and I adhered that to the card front.  I mixed some Pearl Moon gilding wax in a palette with solvent blending solution and used a paintbrush to colour in the dove so it has a lovely pearly shimmer.  I heat embossed the sentiment with silver embossing powder, cut it out with a label die and popped it up.  I sprinkled small and large metallic silver pearls here and there on the image and added two purple crystals to my notched corners


Here's the inside where I stamped a favourite sentiment that I've had in my stash for years.  I drew a line for a hanger, fussy cut a stocking, popped it up on thin 3D foam tape and added a small silver pearl.


I used circle dies to make the element to decorate the envelope flap to finish off.


I hope you'll join in with our final 52 {C}CT challenge of 2013 and I really hope you'll be back with us in January 2014 to start making festive cards all over again!  Also, if you fancy joining our friendly Design Team we're having a DT call so please put your name forward if you'd like to!

Supplies:
Stamps:  PaperMania Stockings clear set, 'Merry Christmas' from SU! 'Owl Occasions' set, inside sentiment from Inkadinkado
CS: SU! Elegant Eggplant & Whisper White, SU! Brushed Silver CS

Ink: SU! Elegant Eggplant, Encore silver
Tools: SU! Eyelet Border punch, SU! Ticket Corner punch, Spellbinder's Labels Trio die, circle Nestabilities dies, heat tool
Embellishments & accessories:  Creative Expressions Pearl Moon gilding wax & solvent blending solution, silver embossing powder, small & large silver pearls, purple crystals, 3D foam tape & SU! Dimensionals


 photo ruthSM2.gif 

Thursday 5 December 2013

December 2013 Card Group Projects

It was our last card making group meeting of 2013 this afternoon.  As I knew time would be taken up with exchanging Christmas cards, the Secret Santa gift giving, eating and other fun I only designed two projects for the ladies to make.

The first project is a gift bag.  I saw this lovely design on YouTube made by Sam from Pootles Papercraft.  Not only has Sam designed a great gift bag but she has also made tutorials for how to make them, the video tutorial can be found on YouTube HERE.  A written tutorial with photos can be found HERE on Sam's blog.  Sam used the plain large oval punch to make handles for her gift bag - but I don't have the new flat style oval punch and the old style punch doesn't fit in the bag to punch the ovals!  So in order to close my bag I punched holes using a Crop-A-Dile, threaded Island Indigo ribbon through and tied the ribbon in a loose knot.

The gift bag is made from Pear Pizzazz CS and the patterned paper is from the Twitterpated DSP pack.  I stamped the flower in Riding Hood Red ink onto Pink Pirouette CS, punched it out, snipped between the petals and placed a smaller punched Island Indigo flower topped with a red pearl in the centre.  The flower and sentiment oval are both popped up.


A side view of the gift bag.


The second card is a simple design using the SU! Magnificent Maple stamp and the fab colour combo of Pool Party, Island Indigo and white.  I made it a thank you card as they come in very handy after Christmas - but I did take the birthday and thinking of you sentiments from the Wetlands set as well so that the ladies could choose which one they wanted.  The card is A6 sized and I added a strip of patterned paper, a narrow Pool Party CS strip and I stamped the sentiment.  After stamping the maple leaf I used a square Nestabilities die to cut it out and I then punched the corners with my SU! Ticket Corner punch - which is now retired,  sadly.  I glued the white square to the Island Indigo square and popped that up onto the Pool Party square.  To complete the card front I added rhinestones to the Island Indigo square.  A nice, easy card to finish the year on!


What a wonderful afternoon was had by all!  After the crafting, cake and tea we played the mystery object game.  I took several objects from home, placed them in a pillow case one at a time and the ladies had to say what the object was just by touch and feel alone - great fun!  Then we opened our lovely Secret Santa gifts before heading home. 

Supplies for gift bag:
Stamps:  SU! 'Flower Shop' & 'Made for You' sets
CS: SU! Pear Pizzazz, Island Indigo, Pink Pirouette & Whisper White

Patterned paper:  SU! 'Twitterpated' DSP
Ink: SU! Riding Hood Red
Tools: SU! Plain Oval, Scalloped Oval, Pansy & Boho Blossoms punches, Crop-A-Dile, SU! Simply Scored

Embellishments & accessories: SU! Island Indigo satin ribbon, red pearl, Dimensionals

Supplies for thank you card:
Stamps: SU! 'Magnificent Maple' stamp, 'Wetlands' set
CS: PaperMania white A6 card blank, SU! Pool Party, Island Indigo & Whisper White

Patterned paper:  SU! 'Twitterpated' DSP
Ink: SU! Island Indigo
Tools: square Nestabilities dies, SU! Ticket Corner punch, Stamp-a-ma-jig
Embellishments & accessories: SU! Rhinestone Jewels, Dimensionals


 photo BlueBflyRuth.gif 


Tuesday 3 December 2013

Heart Flowers Anniversary Card

My friend Kath asked me to make a 2nd wedding anniversary card for her to give to her son and daughter-in-law.  My newly acquired heart flower dies seemed the perfect thing to use for an anniversary card together with the SU! Memorable Moments set.  I chose the pretty patterned paper first and chose the matching CS colours of Island Indigo, Baja Breeze, Riding Hood Red, Pink Pirouette and white.  The card measures 5 3/4" square.  The flowers and the '2nd' circle are all popped up and I sprinkled on a few rhinestones to complete the card front.


Here's the inside with a computer generated personal sentiment.


Here's the decorated envelope flap.


I really enjoyed making this and I'm happy to say Kath loved the card - I hope David and Marie liked it as well!

Supplies:
Stamps: SU! Memorable Moments set
CS: SU! Island Indigo, Baja Breeze, Riding Hood Red, Pink Pirouette & Whisper White

Patterned paper:  SU! 'Twitterpated' DSP
Ink: SU! Island Indigo & Riding Hood Red
Tools: Sizzix heart flower dies, SU! circle punches, MFT Fishtail Flags Stax die
Embellishments & accessories: SU! rhinestone jewels, Dimensionals


 photo ruthheart.gif 

Saturday 30 November 2013

Sparkly Ornaments Christmas Cheer Card - 52 {C}CT Nov Pick A Previous Challenge

As there is a 5th Saturday in November we have a Pick a Previous challenge for you at 52 {C}CT this week.  Louise is asking that players make a Christmas card using one of our previous theme challenges.  Please visit our Themes Archive page to view the great themes you can choose from!


I opted for the July 2013 'Christmas Ornaments' theme - 'cos I wanted to use my new ornaments stamp LOL!  I expanded on the Pick a Previous and also used a previous sketch (from May 2013) and a previous colour combo - Navy, Light Blue and White - (from April 2013) as well as the previous Christmas Ornaments theme. 

I embossed the Soft Sky panel with snowflakes, added the strips of white and navy ribbon and glued the panel to the front of a Night of Navy side opening A6 card base.  I stamped the ornaments image and cut it out with a label die.  It's hard to tell from the photo but the image panel is very, very sparkly.  I patted VersaMark ink over the label, sprinkled Stamp 'n Bond powder over it, heated it, sprinkled on glitter and heated again to set the glitter.  I popped the label, Night of Navy oval and the sentiment label up.  I punched two white snowflakes and added a pale blue gem to each snowflake centre to complete the card front.  


I cut a white panel for inside the card, stamped a sentiment with a lovely retro font and added punched snowflakes.  I used circle dies to make the element for the envelope flap. 


Please join us this week at 52 {C}CT, have fun choosing a theme and then go and create a fab  Christmas card!

Supplies:
Stamps:  PaperMania 'Christmas Cheer' stamp, Stampendous 'Christmas Wishes' clear set
CS: SU! Night of Navy, Soft Sky & Whisper White
Ink: SU! Night of Navy, VersaMark
Tools:  Cuttlebug snowflakes embossing folder, Spellbinder's Labels Four, Petite Oval & Classic Circle dies, X Cut snowflake punch, heat tool
Embellishments & accessories:  SU! white organza & Night of Navy grosgrain ribbons, Stamp 'n Bond powder, ultrafine crystal glitter, PaperMania gems, SU! Dimensionals


 photo CatonTowelsRuth.gif


Thursday 28 November 2013

Doily & Flower Thank You Card

My crafting and blogging time has been limited just lately and I'm not happy about it, grrr!  Anyway, today I'm sharing a thank you card I made for a friend a few weeks ago.  I started off by making a side opening A6 card base with Natural Composition Specialty DSP - it's lovely and thick, like CS so it's great for card bases and boxes.  I die cut and embossed the Rich Razzleberry scalloped border and added a narrow strip of Old Olive CS.  I die cut the doily and sponged the edges with Rich Razzleberry ink.  I stamped the flower in Crushed Curry ink, punched it out and inked the edges with Razzleberry ink and a sponge dauber.  The flower centre is made of clay - I mixed some Razzleberry ink into a piece of white clay before pressing the clay into the flower mould.   I stamped the leaves onto Old Olive CS, fussy cut them and sponged the edges with Old Olive ink.  The doily, flower and the sentiment circle are all popped up.


Here's the inside and the envelope.  I cut a Very Vanilla panel, inked the edges and stamped the sentiment.  I wanted to echo the music notes from the card front - I don't have the SU! Music Notes wheel but I do have the MDS digital stamp.  I printed that out onto Very Vanilla CS, trimmed it to size, sponged the edges and glued it over the top of the Vanilla panel.  Another flower went onto the envelope to finish off.


I gave this card to a friend back in October.  She has not been very well and I took a bunch of flowers round for her a few days ago.  I saw that the card is still out on display - that was so nice to see!

Supplies:
Stamps:  SU! 'Flower Shop', 'Gently Falling', 'Blooming with Kindness' & 'Simply Sketched' sets, SU! 'Music Notes' MDS digital stamp
CS: SU! Rich Razzleberry, Old Olive & Very Vanilla 

Patterned paper:  SU! Natural Composition Specialty DSP
Ink:  SU! Crushed Curry, Old Olive, Rich Razzleberry & Early Espresso
Tools:  SU! Delicate Doilies Sizzlits L die, Pansy & circle punches, Large Scallop Edgelits die, Delicate Designs embossing folder, sponge dauber
Embellishments & accessories:  SU! Simply Pressed Clay, Blossoms Simply Pressed Clay mould, Dimensionals


 photo FunkyBfly.gif 


Saturday 23 November 2013

Snowflake Winter's Butterfly Card - 52 {C}CT Nov Technique Challenge

Louise has set a fab technique challenge for us at 52 {C}CT this week, the acrylic block technique.  You ink up an acrylic block, mist it with water and press the block onto CS - so easy and a great way to create a background.


I cut a panel of Whisper White CS and used three different sized acrylic blocks with Pool Party and Smoky Slate inks to create my background.   I stamped the snowflakes and the sentiment and popped up the central elements of the two larger snowflakes.  I layered the white panel onto a Pool Party mat, added the silver ribbon and bow and mounted onto a Bermuda Bay A6 card base.  I punched two silver foil snowflakes to go next to the sentiment and sprinkled on some aqua gems to complete the card front.


Here's the inside - I do love layered stamping! 


 A flurry of snowflakes decorates the front of the envelope. 


I hope you'll play along with us at 52 {C}CT this week and make a Christmas card using the fun technique, I'd love to see what you make!

Supplies:
Stamps:  SU! 'Festive Flurry' & 'Snowflakes' sets, Hero Arts 'Winter's Butterfly', Penny Black 'A Merry...', PaperMania 'At Christmas Time' clear set
CS: SU! Bermuda Bay, Pool Party & Whisper White, Silver Foil sheet
Ink: SU! Pool Party, Bermuda Bay, Smoky Slate & Island Indigo
Tools:  SU! size A, B & D acrylic blocks, Fiskars Snowflake punch, Stamp-a-ma-jig
Embellishments & accessories:  SU! silver ribbon, PaperMania aqua gems, SU! Dimensionals


 photo DiamanteHeartsRuth.gif 


Friday 22 November 2013

Butterfly Just For You Z Fold Birthday Card

This is the card I designed for Angela and Janet to make when they came round yesterday afternoon.  The brief I had was "something simple they could do themselves at home".   I love Z fold cards, they're just that bit different but are so easy to make.  I kept to a simple, versatile layout - this design would work for any occasion with just a few changes.

I started off by making a Rich Razzleberry 5 1/4" square card and then I scored the front panel at 2 5/8" and folded it back to form the Z fold card.  I adhered patterned paper to the back panel and tied Pool Party satin ribbon around the card front.  I stamped the sentiment onto the clouds paper and used square Nestie dies to cut the paper and CS squares.  I popped the Rich Razzleberry layer up.  I folded the wings up of the die cut butterflies and placed half Dimensionals under the Razzleberry wings so they stay popped up.  I added a rhinestone to the Bermuda Bay butterfly to complete the card front.


Here's the inside of the card with a birthday sentiment and more pretty embossed butterflies. 


Of course, the butterfly motif had to be carried over on to the envelope flap!


We had such a nice, relaxing crafty afternoon and I'm pleased to say Angela and Janet both loved the card!

Supplies:
Stamps:  SU! 'Just Believe' & 'Wetlands' sets
CS: SU! Rich Razzleberry, Bermuda Bay, Pool Party & Whisper White

Patterned paper:  Doodlebug Flower Box 'Garden Garland'
Ink: SU! Rich Razzleberry
Tools: Square Nestabilities dies, SU! Beautiful Wings Embosslits die, Simply Scored
Embellishments & accessories:  SU! Pool Party satin ribbon, rhinestone jewels, Dimensionals


 photo ruth10.gif 

Thursday 21 November 2013

Two Star Thank You Cards

My friend Angela ordered the SU! Christmas Star stamp last month and when it arrived I wish I'd ordered it too!  Angela was very sweet and said I could borrow it until I got mine.  I've used the star stamp to make cards for Angela and Janet to thank them for their SU! orders - and to thank Angela for the loan of the star stamp!

For Janet's card I made a Midnight Muse A6 card base but because the star is dimensional and extends beyond the boundaries of the card front I cut a tad off the side and the bottom so that the card would still fit inside a standard envelope.  I stamped the star in Coastal Cabana ink, cut it out and scored along the lines to make the star dimensional.  I stacked 4 Dimensionals under the centre of the star, attached it to the card front and sneaked a tiny bit of PVA glue under the 3 arms of the star that were on the card front.  I attached the ribbon and popped up the sentiment oval.  I punched a small Midnight Muse star for the centre of the large star and punched 5 Coastal Cabana stars.  I glued the small stars in place, added rhinestones to the centres and added some larger rhinestones to the strip of ribbon. 


Here's the inside and the envelope.


For Angela's card I made a Pool Party 5" square card base.  I embossed a panel of Whisper White CS with the Fancy Fan folder and glued a piece of textured Smoky Slate CS underneath.  I covered the join with a strip of Bermuda Bay ribbon and added the sentiment banner.  I stamped the star in Island Indigo ink, and again I scored along the lines to make the star dimensional.  I stacked 4 Dimensionals under the centre of the star to adhere it to the card front.  To complete the front I adhered some small punched stars and added rhinestones to the centres.


Here's the inside and the envelope.


The star stamp is beautiful and I think it's versatile in that you don't have to use it for just Christmas cards.  I'll be giving Angela her stamp back today as she and Janet are coming round this afternoon to make a card.  I'm very happy to say I now have my own star stamp but I've had a very busy week with no crafty 'me' time and that is something I'm definitely not happy about!  I'm in desperate need of some crafty therapy - and soon!

Supplies for rectangular card:
Stamps: SU! 'Christmas Star', stamp, SU! 'Simply Sketched' set
CS: SU! Midnight Muse, Coastal Cabana & Whisper White
Ink: SU! Coastal Cabana & Midnight Muse
Tools: SU! large oval punch, small star punch, Simply Scored
Embellishments & accessories: SU! white organza ribbon, rhinestone jewels, Dimensionals


Supplies for square card:
Stamps: SU! 'Christmas Star' stamp, SU! 'Itty Bitty Banners' set
CS: SU! Pool Party & Whisper White, Smoky Slate textured CS
Ink: SU! Island Indigo & Bermuda Bay
Tools: SU! Fancy Fan embossing folder, small star punch, Simply Scored
Embellishments & accessories: SU! Bermuda Bay taffeta ribbon, rhinestone jewels, Dimensionals


 photo SparkleHeartRuth.gif


01 09 10