Tuesday 22 August 2017

Snowflake Trio Merry Christmas Card

Snowflakes are very much a favourite motif for me and I always enjoy creating snowflake Christmas cards.  I've used pretty snowflake dies and stamps plus some Dapper Denim ombre paper, all products from the SU! 'Color Theory' suite of products.  Some silver ribbon and rhinestones add a touch of sparkle too.

I started off by making a Dapper Denim A6 sized card base and adhered the Whisper White CS and ombre paper panels plus the ribbon and bow.  I cut out three snowflakes using dies from the 'Seasonal Layers' Thinlits die set, punched out small circles and glued those behind the snowflake centres.  I popped up the snowflakes and the stamped and die cut sentiment oval.  Whilst I had all the supplies out I decided to make another card the same.  I'm also planning to make more of this design but in different colours.  I'm really going to have to make multiples of cards as I definitely won't have the time to make my Christmas cards all different this year!


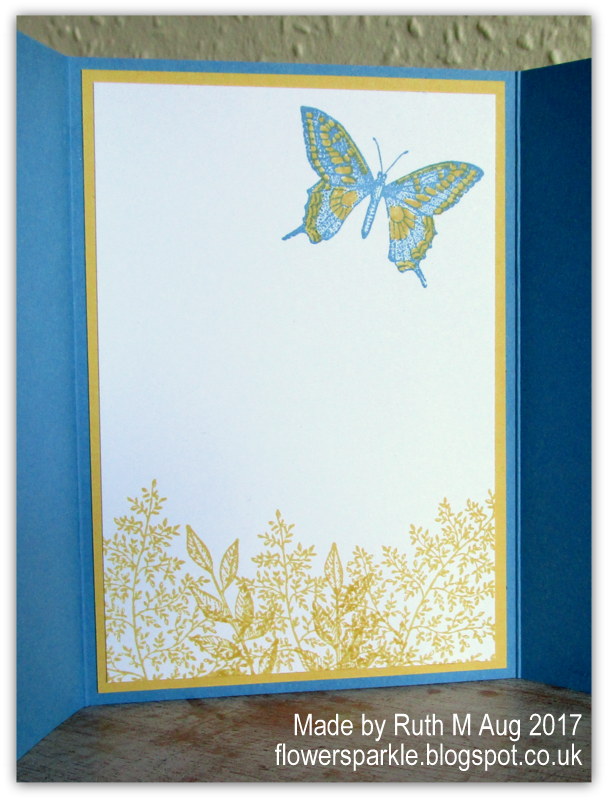
Here's the inside and the envelope.  The snowflakes and sentiment label were stamped using Dapper Denim ink full strength and stamped off once to tie in with the ombre design of the paper on the front of the card.

Supplies:
Stamps: SU! 'Colorful Seasons', 'Hang Your Stocking' & 'Labels to Love' sets
CS: SU! Dapper Denim & Whisper White (thick & regular)

Patterned paper: SU! 'Color Theory' DSP stack
Ink: SU! Dapper Denim
Tools: SU! 'Seasonal Layers' Thinlits & 'Stitched Shapes' Framelits die sets, 'Everyday Label' punch
Embellishments & accessories: SU! 1/8" silver ribbon, rhinestone jewels, Dimensionals

Ruth

Sunday 20 August 2017

Whitewashed Wood Background Tree Happy Christmas Card

This card is my CASEd version of a card shown on page 137 of the SU! 2017 - 2018 Annual Catalogue.  My friend Jan was part way through her version of this card when I called round to drop off her SU! order.  I thought it would be fun to also have a go at the design and then compare versions afterwards!

For the whitewashed wood background, I embossed a panel of Crumb Cake CS with the 'Pinewood Planks' embossing folder and applied Whisper White Craft ink over the top using a brayer.  I heat set the ink using a heat tool, added the ribbon and glued the panel to the front of an A6 sized Crumb Cake card base.  The catalogue card has a silver metallic doily but I substituted a fabulous silver foil snowflake - a new embellishment that will be available from the upcoming SU! 2017 Autumn/Winter catalogue - there's 24 snowflakes in a pack, 12 silver and 12 gold!

I cut the snowflake in half and adhered it to a die cut Whisper White circle so that the snowflake showed up better.  I stamped and heat embossed the tree with white embossing powder on a panel of Tranquil Tide CS, added some silver sequins and popped the Tranquil Tide panel up.  I stamped the sentiment and cut it out with an oval 'Stitched Shapes' die and popped that up to finish the front.


Here's the inside and the envelope.


Supplies:
Stamps: SU! 'Lovely as a Tree', 'Labels to Love' & 'Greetings of the Season' sets
CS: SU! Crumb Cake, Tranquil Tide & Whisper White
Ink: SU! Tranquil Tide & Whisper White Craft ink
Tools: SU! 'Pinewood Planks' Dynamic embossing folder, 'Stitched Shapes' Framelits die set, brayer, heat tool
Embellishments & accessories: SU! Whisper White embossing powder, Whisper White & silver metallic ribbon, Foil Snowflake, silver sequins, Dimensionals


Ruth

Friday 18 August 2017

Fluttery Butterfly For You Card

This is a thank you card I've made for my friend Jan using Lost Lagoon, Pool Party and Whisper White as my colour combo.  I demonstrated the SU! 'You Move Me' stamps and dies at card group and Jan loved the look.  As I'd got a stamped image already from the demo I'd done at card group I decided to use it to make a card for Jan.

I die cut a mini treat bag as an envelope, die cut the grid and embellished the bag. I die cut the 'For You' twice, once from Lost Lagoon CS and again from Whisper White CS and I offset the two shapes when I adhered them to give a shadow effect.


Here's the card and treat bag envelope side by side.


Here's just the card.  I secured a loop of ribbon behind the Lost Lagoon mat layer to make it easy to slide the card out of the bag.


Here's the inside of the card with a trio of sweet stamped butterflies.


Supplies:
Stamps: SU! 'You Move Me' & 'Rose Wonder' sets
CS: SU! Lost Lagoon, Pool Party & Whisper White
Ink: SU! Lost Lagoon & Pool Party
Tools: SU! 'Move Me', 'Mini Treat Bag' & 'Rose Garden' Thinlits die sets
Embellishments & accessories: SU! Lost Lagoon ribbon, rhinestone jewel

Ruth

Tuesday 15 August 2017

Wood, Burlap & Tulips Thank You Card

Finally I got some time to get inky in my craft room!  I took the chance to play with the gorgeous SU! hostess set called 'Tranquil Tulips' to make a thank you card for a good friend.  This is the first outing for the tulips set but the 'Pinewood Planks' embossing folder and the 'Burlap' background stamp are becoming firm favourites!

I stamped the tulip flowers in Berry Burst ink, full strength for the detailed images and stamped off once for the solid background images.  I stamped the stems and leaves in Lemon Lime Twist ink and the flower stamens in black ink.  I stamped the 'Burlap' background stamp over the top in Crumb Cake ink, trimmed the panel to size, inked the edges of the panel with Crumb Cake ink and layered it onto a mat of Basic Black CS.  I embossed a piece of Crumb Cake CS with the 'Pinewood Planks' embossing folder and dragged my Whisper White Craft ink pad down the CS piece a few times.  I heat set the craft ink with my heat tool and inked the edges of the wood panel with black ink.

After adhering the wood panel flat to the A6 Crumb Cake card base I popped up the tulips image layer.  I stamped and punched the sentiment label, giving that the burlap background look too and popped the label up.  The SU! 2017 Autumn/Winter catalogue has a fab new label punch and a couple of stamp sets that go with it and the punch and one of the stamp sets went on my pre-order wish list immediately!


Here's a closer look at the stamped image panel.


Here's the inside of the card and the envelope.  The striking black and white paper is from the SU! 'Merry Little Christmas' DSP pack - another 'must have' pre-order item for me!


Christmas will be upon us before we know it and I would've liked to have started creating my Christmas card stash a lot sooner.  I've made a start now though so I'll be sharing some Christmas cards here on the blog soon!

Supplies:
Stamps: SU! 'Tranquil Tulips', 'Flourishing Phrases' & 'Labels to Love' sets, 'Burlap' background stamp
CS: SU! Crumb Cake, Basic Black & Whisper White

Patterned paper: SU! 'Merry Little Christmas' DSP pack
Ink: SU! Crumb Cake, Berry Burst & Lemon Lime Twist, SU! Whisper White Craft ink, Tim Holtz Black Soot Distress Ink
Tools: SU! 'Pinewood Planks' Dynamic embossing folder, 'Everyday Label' punch, sponge daubers
Embellishments & accessories: SU! Dimensionals

Ruth


Sunday 13 August 2017

Butterfly Just For You Square Step Panel Card

UPDATED TO ADD A MESSAGE FOR Andrea H:
The label on the front of the envelope was made using the Tonic Studios 'Beautiful Banner Invite Insert' die set.  The set contains 3 dies, the plain background piece, the fancy overlay piece and the banner.  Thank you for your kind comment!

During weekends at Wilko we have some lovely young people working with us. I so admire their energy and all of them have a great sense of fun!  One of the girls, Olivia, turned 18 earlier this year.  We've recently started giving everyone a card on their birthday but Olivia had missed out.  When another girl received an 18th birthday card a few weeks ago Olivia 'had a bone to pick with us' and registered mock outrage that she hadn't received a card.  I asked her would she like me to make a card for her and she said she'd love that.

I asked Olivia if she had a favourite colour and she answered purple so I've used SU! Fresh Fig for the square step panel card together with Powder Pink and Whisper White.  I'm loving using multiple step watercolour look stamps at the moment and I chose the 'Watercolor Wings' set - plus a favourite new background, the SU! 'Burlap' stamp.

The Fresh Fig square panel is popped up, the butterfly body is glued flat to the card but there are half Dimensionals under each wing with the backing paper left on so that the wings stay popped up.  The small Fresh Fig dots were cut from a die in the 'Mini Treat Bag' die set.  I used a clear Wink of Stella pen to add some shimmer to the butterfly wings.


Here's the back of the card.  That fun sentiment is from Inkylicious, I couldn't resist it!  


Here's the back of the envelope.


On the front of the envelope I added a name label die cut using the Tonic Studios 'Beautiful Banner' die.


Olivia loved the card and said she would cherish it forever, such a sweet girl!

Supplies:
Stamps: SU! 'Watercolor Wings' set, 'Burlap' background stamp, Inkylicious 'Be Whatever'
CS: SU! Fresh Fig, Powder Pink & Whisper White

Patterned paper: SU! 'Fresh Florals' DSP
Ink: SU! Fresh Fig & Powder Pink
Tools: SU! Simply Scored, 'Bold Butterfly' Framelits, 'Butterflies' Thinlits, 'Stitched Shapes' Framelits, 'Layering Squares' Framelits & 'Mini Treat Bag' Thinlits die sets, Tonic Studios 'Beautiful Banner' die set
Embellishments & accessories: clear Wink of Stella pen, SU! Dimensionals

Ruth

Friday 11 August 2017

Oh So Eclectic Sending Wishes Your Way Card

I love the Happy Birthday card on the front cover of the SU! 2017 Annual Catalogue and since getting the 'Oh So Eclectic' set I've been wanting to CASE the card.  So here's my version - it's pretty similar, there's just a few tweaks.


There's a lovely cut out design die in the 'Eclectic Layers' Thinlits die set.  I stamped the birthday sentiment and then cut out the design from the Whisper White panel so that the Berry Burst card base colour shows through.  I added a few sequins to embellish.  I added leaves and a flower to the envelope flap to complete the project. 


I am really loving the watercolour look stamp sets and patterned papers at the moment.  I used the 'Watercolor Wings' set on Sunday and I inked up my new 'Tranquil Tulips' set on Wednesday.  I'll be sharing those cards soon!  

Supplies:
Stamps: SU! 'Oh So Eclectic' & 'Butterfly Basics' sets
CS: SU! Berry Burst, Night of Navy & Whisper White

Patterned paper: SU! 'Naturally Eclectic' DSP
Ink: SU! Berry Burst, Emerald Envy, Lemon Lime Twist, Night of Navy & Soft Sky
Tools: SU! 'Eclectic Layers' Thinlits die set, 'Pretty Label' punch
Embellishments & accessories: SU! Berry Burst Finely Woven Ribbon, 'Fancy Frost' sequins, Dimensionals

Ruth

Tuesday 8 August 2017

Butterfly Duo Thanks So Much Gate Fold Card

Last month at card group Wendy brought along some stamps and other crafty goodies that she no longer wanted and she very kindly let us choose whatever we wanted.  As soon as I saw some stamps from the old, retired SU! 'Touch of Nature' set I nabbed them!  I used to have that set but I sold it on eBay years ago and there have been a few times when I've missed it.  I remembered making a lovely blue and yellow gate fold card with the set during a Stamper's Ten Make and Take evening at Joanne's.  I mentioned the card but neither Jan nor Wendy could recall it.  I checked back and found the card on my blog and I decided it would be fun to remake the card using the stamps I nabbed from Wendy!

Here's the original card.


Blimey, it was made way back in July 2009! Here's the blog post for the original card.

Here's my August 2017 version of the card.  The original used Brocade Blue, a Stampin' Up! colour which has long retired, so I paired the So Saffron with Marina Mist.


Here's the card standing open.


Here's the inside.


I didn't decorate the envelopes of my cards back in 2009 but, of course, I had to make a matching envelope for my August 2017 version!  


I was going to give the card to Wendy at the August card group meeting but I forgot to take it with me so I'll give it to her next month.

Supplies:
Stamps: SU! 'Touch of Nature' & 'Sincere Salutations' sets
CS: SU! Marina Mist, So Saffron & Whisper White
Ink: SU! Marina Mist & So Saffron
Tools: SU! 'Ticket Corner' punch
Embellishments & accessories: SU! pearl jewels, Dimensionals

Ruth


Sunday 6 August 2017

August 2017 Card Group Projects

Finally, another blog post from me!  July was a hectic month plus I went on holiday so crafting was temporarily suspended.  I'm not working today and I was determined to spend some time creating and to also post on my blog.  My craft room was a complete and utter mess, I spent a few hours yesterday afternoon and evening tidying and cleaning so that I could get in there this morning and just create - fabulous!

Last Thursday it was our August card group meeting and I designed a tea bag sachet gift box and a matching card for the ladies to make.  See this blog post for instructions on how to make a tea bag sachet gift box.  It was a bit of a mad rush to get ready for card group and when I got there I realised I'd forgotten my SU! Simply Scored scoring board and tool so I had to go home and get those.  That made me feel stressed and I was already feeling very tired.  When I came to demonstrate how to make the box I made so many mistakes, I was mortified, so embarrassing!  I've made quite a few of these tea bag sachet gift boxes without any problems at all.  Typical that it all went pear shaped at card group but I think the ladies liked the fact that 'teacher' went wrong!  They are a very sweet and forgiving bunch luckily!

I started off by choosing the patterned papers, opting for two patterns from the SU! 'Blooms & Bliss' DSP pack.  I used SU! Sweet Sugarplum, Sahara Sand, Rich Razzleberry and Whisper White CS to match the papers.  Here is the box with the card and envelope.


Here is just the box.  The label and the circle are both popped up.


Here is the card.  When I decided to make a card to match the tea bag sachet box I knew I just had to use my tea cup stamp!  I paper pieced the drink portion, fussy cut the tea cup and popped it up.


Here's the inside and the envelope.


I had a trying afternoon and said it was time for me to book my place at the Twilight Home for the Bewildered!  The ladies made their boxes and cards without any incidents so they enjoyed themselves!  I'll have more time to prepare for next month's meeting so I'm hoping for everything to go swimmingly!

Supplies:
Stamps: SU! 'Label Me Pretty', 'Best Yet' & 'Blooms & Wishes' sets, Kanban 'Coffee Shop' set
CS: SU! Sweet Sugarplum, Sahara Sand, Rich Razzleberry & Whisper White

Patterned paper: SU! 'Blooms & Bliss' DSP
Ink: SU! Sweet Sugarplum, Sahara Sand & Rich Razzleberry
Tools: SU! 'Simply Scored', 'Pretty Label' punch, circle punches, Memory Box 'Grosgrain Ribbons' die set, Spellbinders 'Labels Trio' die set
Embellishments & accessories: SU! Dimensionals

Ruth


01 09 10