Showing posts with label Christmas. Show all posts

Wednesday, 24 November 2021

Painted Christmas Wallet Of Six Cards

Lesley and Wendy visited me on Saturday for a crafty get together and as usual we had a wonderful time!.  Last time they saw this card wallet I'd made and they suggested that as our next project.  I've used the absolutely beautiful SU! 'Painted Season' suite of products to make a wallet that holds six cards.  I added in a couple of Christmas sentiment sets, the 'Wintry' set of 3D embossing folders and some embellishments.

Here's the wallet filled and tied up ready to give as a gift.  I used Real Red CS for the wallet and matted the patterned paper panel onto Pear Pizzazz CS.  The large label is Evening Evergreen which is embossed with the spruce folder from the 'Wintry' embossing folder set.


Here are the six Christmas cards I made to go inside the wallet.  I really enjoyed making three each of two designs.


Here are the two card designs with their matching envelopes.


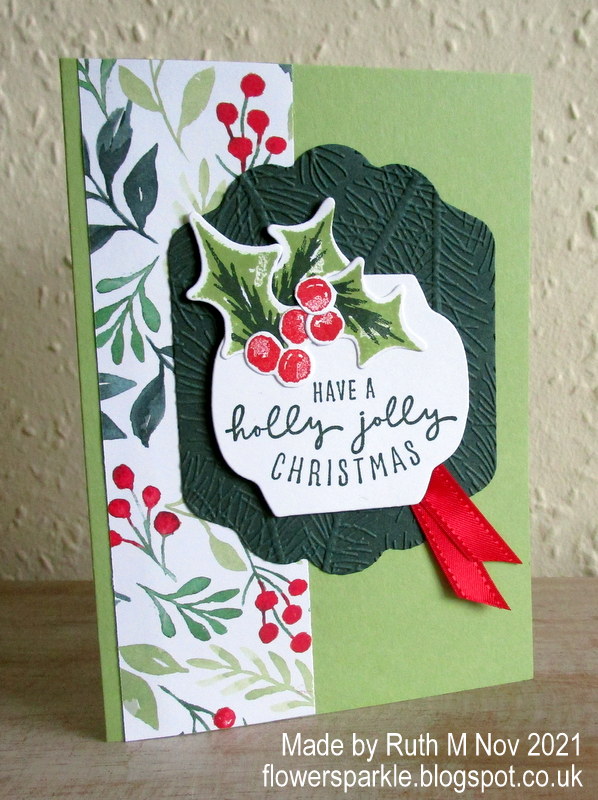
Here is the holly jolly Christmas card.  The card base is Pear Pizzazz and the large label is Evening Evergreen which is embossed with the spruce folder from the SU! 'Wintry' set of embossing folders. I used Pear Pizzazz and Evening Evergreen inks to stamp the holly leaves and the berries are stamped in Real Red ink. The white label is popped up on Dimensionals.  The red ribbon is a lovely festive embellishment.
 

Here's the inside of the holly jolly card.


Here's the Be of Good Cheer card.  The card base is Crumb Cake and the large label is Real Red which I embossed with the snowflakes folder from the 'Wintry' embossing folder set.  I used  Crumb Cake and Soft Suede inks to stamp the pine cones, Pear Pizzazz ink for the foliage at the top and Pear Pizzazz and Evening Evergreen for the leaves at the bottom.  The white label is popped up on Dimensionals - and I placed it lengthways on this card whereas it's widthways on the holly jolly card design.  The festive embellishment for this card is three red rhinestone jewels.


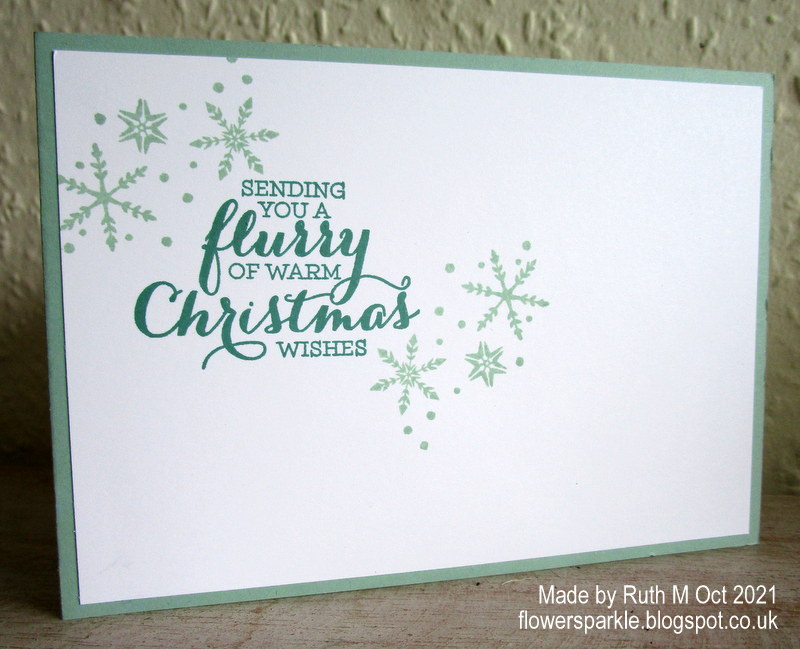
Here's the inside of the Be of  Good Cheer card.


Here are the six envelopes.


Here's the wallet ready to be filled with the cards.  To make the wallet I trimmed a Real Red A4 piece of CS to 11", scored the long side at 5" and 6" and scored  the short side at 6 3/4" and 7 1/4".  I cut slits to make the fold up tabs and as they only measured 1" and I wanted them to be deeper I cut two 4 1/2" x 2" pieces of CS, rounded the top corners and glued them to the smaller tabs.


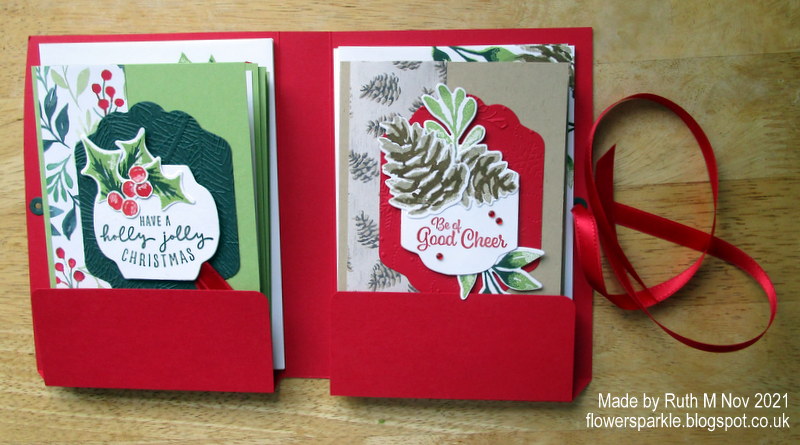
Here's the cards inside the wallet.  This size is perfect for six A6 cards and envelopes where one layer of Dimensionals has been used on each card.  If you didn't make dimensional cards you could fit eight cards and envelopes inside - maybe up to ten even.  I like my Dimensionals too much though!

Here's a view from the side.


Here's a closer look at the label on the front of the wallet.  I stamped a foliage background on the white label using stamped off once Pear Pizzazz ink and stamped the sentiment in Evening Evergreen ink.  I popped up the Evening Evergreen label, the white label and the holly berries.  I added gold holly leaf embellishments and red rhinestone jewels as a final finishing touch.


This was such a lovely project to work on, I really enjoyed spending some time in my craft room creating and prepping while on a week off from work!  I'm going to have a hard time giving this wallet of cards away!

Following my week off I've started a new job, a part time Customer Service role working in an office on the phones.  For the past six years at Wilko I've worked weekends and not always had a set schedule.  I'm excited that I won't be working weekends now and I have a set pattern of work days and shift times - how lovely!  Arranging crafty days with Lesley and Wendy will be SO much easier and I'll have more crafty me time as well, what a result!

Supplies:
Stamps: SU! 'Christmas Season', 'Christmas to Remember' & 'Holly Jolly Wishes' sets
CS: SU! Crumb Cake, Evening Evergreen, Pear Pizzazz, Real Red & Basic White
Patterned paper: SU! 'Painted Christmas' DSP
Ink: SU! Crumb Cake, Evening Evergreen, Pear Pizzazz, Real Red & Soft Suede 
Tools: SU! 'Seasonal Labels' & 'Tailor Made Tags' die sets, 'Wintry' set of 3D embossing folders, Crop-A-Dile, corner rounder punch
Embellishments & Accessories: SU! Real Red Double Stitched Satin ribbon, Red Rhinestone Basic Jewels, Gold Holly Leaves, Dimensionals

Ruth

Monday, 8 November 2021

Christmas Pinwheel Tower Card

This is the second Pinwheel Tower Christmas card I've made. Instructions to make a Pinwheel Tower card sized to fit in a UK sized C6 envelope can be found here on my Tutorials page.  I love the colour combo in the SU! 'Whimsy & Wonder' patterned paper, it's unusual but very pretty for Christmas cards.  Here's the card and envelope together.


Here's a view from the top so you can see how the card is put together.


Here's the first panel of the card.  I fussy cut the ornament from the patterned paper, added some Blushing Bride baker's twine and popped the ornament up.  I also popped the sentiment label up.


Here's the second panel.


Here's the third panel.


Here's the fourth panel where I will write my message.  I added some self adhesive snowflakes as a finishing touch.


Here's the envelope.  I love the rainbow iridescence on the silver stripes!


Supplies:
Stamps: SU! 'Arrange a Wreath' set 
CS: SU! Evening Evergreen & Mint Macaron 
Patterned paper: SU! 'Whimsy & Wonder' 
Ink: SU! Evening Evergreen 
Tools: SU! 'Rectangle Stitched' die set 
Embellishments & Accessories: SU! Blushing Bride baker's twine, self adhesive enowflakes, Dimensionals

Ruth

Sunday, 7 November 2021

Snowflake Peace On Earth Card

Just Jade, Mint Macaron and the Be Dazzling paper have become a favourite colour combo, especially for Christmas cards.  I couldn't resist die cutting a big snowflake from the beautiful, sparkly Be Dazzling paper!  Here's the card and envelope together.


Here's the card.  I die cut the patterned paper with a stitched rectangle die and glued the large snowflake in place.  I popped the Just Jade circle and the sentiment elements up on Dimensionals and added two smaller sparkly snowflakes. 


Here's the inside of the card.


Here's the envelope.


Supplies:
Stamps: SU! 'Peace & Joy' & 'Snowflake Wishes' sets, Clearly Besotted 'Eat, Drink & Be Merry' set
CS: SU! Just Jade & Basic White
Patterned paper: SU! 'Snowflake Splendor' DSP. 'Be Dazzling' 6" x 6" specialty DSP
Ink: SU! Just Jade & Mint Macaron 
Tools: SU! 'Joy' & 'Snowfall' die sets, Sweet Dixie 'Large Swirly Snowflake' die, Claina Palmer 'A6 Double Stitched Nested Dies' set, circle punches
Embellishments & Accessories: SU! Dimensionals

Ruth

Friday, 5 November 2021

Ornaments, Holly & Snowflakes Pinwheel Tower Card

Pinwheel Tower cards have been popping up online and I was keen to try one for myself.  I love that a Pinwheel Tower card has four panels and that it stands up beautifully for display but folds flat to go inside an envelope. Julie Davison has this blog post and I watched her fab YouTube video to find out how to make one.  I tweaked the measurements for a UK A6 sized card and I've given the information below.  Julie says in her video to make the tower using patterned paper rather than CS as that gives less bulk to the card so that's what I did.

Here's how I made an A6 sized Pinwheel Tower Card:

  • Cut CS or patterned paper 4 1/2" x 4 1/8.  On 4 1/2" side, score at 1", 2", 3" & 4". Glue the tab.
  • Cut four CS panels measuring 4 1/8" x 2 7/8".
  • Cut four patterned paper mat layers measuring 3 7/8" x 2 5/8" & glue to the CS panels.
  • Glue the four panels to the four tower sections.
  • Add any elements to decorate the card as desired.

I have added instructions to make a Pinwheel Tower card sized to fit in a UK sized C6 envelope here on my Tutorials page.

Here's the card and envelope together.


Here's a top view of the card so you can see how it's made.  Basically, you create a tower and adhere a panel to each of the four sides which gives the pinwheel shape.  I've used SU! Mint Macaron and Polished Pink CS with 'Whimsy & Wonder' specialty DSP to create my card.


Here's panel one.  I fussy cut the two ornaments and popped them up on Dimensionals.


Here's panel two.  I stamped holly from the 'Christmas Season' stamp set, die cut the shapes, snipped one holly berry off because I like three berries rather than four and popped up the leaves and berries.


Here's panel three.  The snowflake circle is popped up.  I added some iridescent self adhesive snowflake embellishments which go nicely with the holographic details in the patterned paper.


Here's panel four where I will write my message.  I die cut a tag with a hole re-inforcer, stamped the sentiment, fussy cut the present and ornament and popped those up.  I added Blushing Bride baker's twine to the tag and then popped up a Mint Macaron bow which I'd fussy cut from the patterned paper.


Here's the envelope.


What a fun card to put together, I enjoyed it so much I immediately made another one!

Supplies:
Stamps: SU! 'Christmas Season' & 'Itty Bitty Christmas' sets
CS: SU! Mint Macaron, Polished Pink & Basic White
Patterned paper: SU! 'Whimsy & Wonder' Specialty DSP
Ink: SU! Mint Macaron, Mossy Meadow & Polished Pink 
Tools: SU! 'Seasonal Labels' & 'Tailor Made Tags' die sets, circle punches
Embellishments & Accessories: SU! Blushing Bride baker's twine, Adhesive Backed Snowflakes, Dimensionals

Ruth

Sunday, 31 October 2021

Snowflakes Tag 'Tis The Season Card

I wanted to use my snowflakes 3D embossing folder again so that's why this card came about.  Here's the card and envelope together.


The snowflakes 3D embossing folder is designed to fit in the SU! Mini Die Cut & Embossing Machine so it's not wide enough to emboss a panel of CS which will cover a whole card front.  I couldn't get a design with a layout that I was happy with using just the narrow panel, I decided I needed to cover the whole card front.  Therefore, I embossed a second panel, cut it to size, glued the two panels in place and covered the join with a strip of sparkly silver CS.  

My idea was to add sparkly snowflakes to a dark coloured tag so I played with the idea a bit before choosing to apply a wash of colour to a panel of watercolour paper.  Using a wide flat water painter I wet the panel of watercolour paper and added Misty Moonlight and Gorgeous Grape inks.  I blasted my panel with a heat tool to dry it and die cut the largest label shape from the SU! 'Seasonal Labels' die set.  I die cut several snowflakes, glued them in place on the label and turned my label into a tag with a hole and hole re-inforcer.  I glued on the stamped sentiment, added Gorgeous Grape sheer ribbon to the tag and popped the tag up on Dimensionals.


Here's the inside of the card.  The 'May Your Season Sparkle' is such a fab sentiment and I always add a sparkle element when using it.  I die cut the snowflakes swirl from the sparkly silver paper.  The SU! 'Snowfall' die set is retired but I love the dies in this set and will continue to use it.  I must admit I have a lot of retired SU! snowflake stuff, I love snowflakes so much I just can't part with my favourites!


Here's the envelope with more dies from the 'Snowfall' die set.


Supplies:
Stamps: SU! 'Christmas To Remember' & 'Snowflake Wishes' sets
CS: SU! Gorgeous Grape, Misty Moonlight & Basic White, watercolour paper
Patterned paper: SU! 'Be Dazzling' 6" x 6" specialty DSP
Ink: SU! Gorgeous Grape & Misty Moonlight 
Tools: SU! 'Wintry' 3D embossing folders set, 'Seasonal Labels', 'Snowfall' & 'Tailor Made Tags' die sets, water painter brush
Embellishments & Accessories: SU! Gorgeous Grape sheer ribbon, Dimensionals

Ruth

Saturday, 30 October 2021

Snowflake Circle Merry Christmas Card

Snowflakes are one of my favourite motifs for Christmas and winter cards so it's hard for me to resist snowflake products!  I just got the SU! 'Wintry' set of 3D embossing folders which has a snowflakes folder and a pine boughs folder.  I've paired my new snowflakes embossing folder with one of the beautiful iridescent snowflake embellishments and added some sparkle for a festive touch.  Here's the card and envelope together.


Oh my word, the snowflakes embossing folder is so pretty and as it's a 3D folder the embossed detail is amazing! I glued the embossed strip across the front of the Mint Macaron card base and added strips of sparkly silver paper at the top and bottom.  I stamped the sentiment in Just Jade ink, die cut it out with a stitched rectangle die and slid it under the Mint Macaron die cut circle.  I punched out two circles - one  Mint Macaron CS circle and a smaller sparkly silver circle.  I glued the circles to the centre of the snowflake and popped the snowflake up on Dimensionals.


Here's the inside of the card.


Here's the envelope with a stamped and punched snowflakes element on the flap.


Supplies:
Stamps: SU! 'Flurry of Wishes' & 'Snowflake Wishes' sets 
CS: SU! Mint Macaron & Basic White
Patterned paper: SU! 'Be Dazzling' 6" x 6" specialty DSP
Ink: SU! Just Jade & Mint Macaron 
Tools: SU! 'Wintry' 3D embossing folders set, 'Layering Circles' & 'Rectangle Stitched' die sets, circle punches
Embellishments & Accessories: SU! 'Wonderful Snowflakes', Dimensionals

Ruth

Friday, 29 October 2021

Trees & Snowflakes Merry Christmas Card

I had some stamped trees left over from the baby wipe technique card  I made a while back so I created another card.  This time I made the card landscape oriented instead of portrait.  Here's the card and envelope together.


The A6 size card base is made with Just Jade CS.  I die cut a piece of patterned paper with a stitched rectangle die, stamped small snowflake clusters on top with Mint Macaron ink and matted that onto a layer of Shaded Spruce CS.  I die cut the snowbank, stamped the sentiment in Shaded Spruce ink and glued the snowbank in place.  I then applied glue to the die cut trees and tucked them underneath the snowbank.  To complete the card front I added three die cut sparkly snowflakes.


Here's the inside of the card with a sentiment and snowflakes.


Here's the envelope with some pretty snowflake patterned paper added to the flap.  This card doesn't have anything popped up on Dimensionals so will be a great card to send in the post.


Supplies:
Stamps: SU! 'Christmas to Remember', 'Holly Jolly Wishes', 'Snowflake Wishes' & 'Winter Woods' sets
CS: SU! Mint Macaron, Shaded Spruce & Basic White
Patterned paper: SU! 'Snowflake Splendor' DSP, 'Be Dazzling' 6" x 6" specialty DSP
Ink: SU! Just Jade, Mint Macaron & Shaded Spruce ink refills, Mint Macaron & Shaded Spruce ink pads
Tools: SU! 'In the Woods' & 'Snowfall' die sets, Claina Palmer 'A6 Double Stitched Nested Dies' set
Embellishments & Accessories: baby wipe

Ruth

Thursday, 28 October 2021

Bright & Joy Christmas Cards

Here are two Christmas cards using the SU! 'Peace & Joy' stamp set and dies.  I've used the same colour scheme but there are just a couple of differences between the two cards


Here's the Joy card.  I stamped a background of images direct to the card base and I matted the white layer onto a panel of 'Be Dazzling' sparkly paper.  The sentiment pieces are popped up on Dimensionals.


For the Bright card I opted to stamp the background images on a panel of Just Jade CS which I glued to the Just Jade card base.  I added Real Red CS strips to the top and bottom of the white panel.  The stamped words are glued flat to the card but the die cut Bright element is popped up on Dimensionals.


Here's the inside of the Joy card.


Here's the inside of the Bright card.


Here are the envelopes for both cards.


Supplies:
Stamps: SU! 'Peace & Joy' set, Hero Arts 'Joyful Christmas Season' & 'Holiday Cheer' sets 
CS: SU! Just Jade, Real Red & Basic White
Patterned paper: SU! 'Be Dazzling' 6" x 6" specialty DSP
Ink: SU! Just Jade & Real Red
Tools: SU! 'Joy' die set, circle punches
Embellishments & Accessories: SU! Real Red rhinestone jewel, Dimensionals

Ruth

Wednesday, 27 October 2021

Holly Deck The Halls Christmas Card

One afternoon I went into my craft room with no plan other than to tidy things away and to clear and clean my messy desk.  Unfortunately while tidying I got distracted when I came across a pile of patterned paper and some holly images stamped onto patterned paper.  Before I knew it I was creating a card and making more mess!

Here's the card and envelope together.


Here's the card.  I embossed the copper foil sheet with the 'Hammered Metal' 3D embossing folder.  The copper foil goes brilliantly with the foiled patterned paper!  I fussy cut the stamped holly leaves and berries and die cut some leaves using Old Olive CS and copper foil.  I stamped and die cut the sentiment element and then assembled the leaves and berries.  I adhered the patterned paper and Cherry Cobbler CS border at the bottom and added pinecone embellishments and a linen thread bow to my focal element to finish the front.


Here's a closer look at the focal element.


Here's the inside of the card.


Here's the envelope.


Supplies:
Stamps: SU! 'Christmas Gleaming' & 'Greatest Part of Christmas' sets
CS: SU! Cherry Cobbler, Mossy Meadow & Basic White
Patterned paper: SU! 'Brightly Gleaming' specialty DSP, 'Tis the Season' 6" x 6" DSP
Ink: SU! Cherry Cobbler & Mossy Meadow
Tools: SU! 'Hammered Metal' 3D embossing folder, 'Rectangle Stitched' & 'Forever Flourishing' die sets
Embellishments & Accessories: SU! linen thread, Mini Pinecone Embellishments, Dimensionals

Ruth

01 09 10