Showing posts with label Fancy Fold. Show all posts

Sunday, 27 February 2022

Bird Best Wishes Diorama/Shadow Box Card

I made this shadow box card last year and Lesley asked me to include it as a project for her and Wendy to make on one of our crafty get togethers.  I decided on a couple of design tweaks for this version of the card, just to mix things up a bit!  Here's the card and envelope together.


I used Just Jade CS for the card base and used the fancy circle die in the 'Birds & More' die set to cut an aperture from the card front.  I used two circle dies to create an Early Espresso CS frame to surround the aperture.  I stamped the 'best wishes' (from the Artistically Inked' stamp set) in Soft Suede ink, cut the label out using the 'Messages' die and I used the same die to cut out a Polished Pink shape to sit behind the white label.  

For the white layer inside the card, I used Soft Suede and Just Jade inks to stamp a background of branches and leaves.  I used three stamps for the bird, stamping first in Daffodil Delight ink, the second stamp was stamped in Soft Suede ink and the third stamp - the wing detail - was also stamped in Soft Suede ink.  I popped up the bird, stamped and die cut several Polished Pink flowers and  popped those up.  A gold Metallic Pearl was placed in the centre of each flower to finish the card front.


Here's a closer look through the aperture.  The Stampin' Up! 'Distinktive' style stamps are amazing, you get such great detail especially on the multi step stamped images!


Here's the back of the card with some Polished Pink flowers stamped on a white panel.


Here's the envelope.  I die cut the leafy border in Just Jade CS and glued a strip of Polished Pink CS next to it.


I have instructions on how to make a shadow box card on my Tutorials page.

Supplies:
Stamps: SU! ''Birds & Branches' & 'Artistically Inked' sets
CS: SU! Early Espresso, Just Jade, Polished Pink & Basic White
Ink: SU! Daffodil Delight, Just Jade, Polished Pink & Soft Suede 
Tools: SU! 'Birds & More' die set, 'Messages' die, Nestabilities circle dies
Embellishments & Accessories: SU! gold 'Metallic Pearls', Dimensionals

Ruth

Wednesday, 16 February 2022

Butterflies Hello Teepee Card

Kelly Acheson shared a teepee card fun fold card on this video and I've not made one before so I was keen to give it a go.  I tweaked the measurements slightly - I cut three squares of Basic White CS at 4 1/8" square and cut two pieces of patterned paper at 3 7/8" square.  The small triangular pieces I left the same, cutting two 1 1/2" squares.

 I've used the SU! 'Butterflies and Flowers' Layering Decorative Masks to create the butterfly.  I was really intrigued by these when I saw them in the January to June Mini Catalogue and had to get them.  Dena Rekow from the Creativity Cave has this wonderful video showing how she used some of the flower masks.  I tried those first and found the flowers easier to work with than the butterfly - only because I made it hard for myself by making the butterfly body a different colour to the wings!  Honestly, that's too much of a faff and I won't be doing that again!

Here's the card and envelope together.


Here's the card.  A teepee card is easy to put together, it's a case of scoring the three white squares in half diagonally, gluing those pieces together to form the card base and decorating with patterned paper squares you've cut in half diagonally.  Once I'd done that I started on the butterfly.  

Using Post It notes I masked off the wings on the background mask and applied Soft Suede ink to the body and antennae.  It did take me a few attempts to mask off thoroughly and not get brown ink where I didn't want it!  As I said, I won't be doing that again!  Then I masked that part off and applied Mint Macaron ink to the wings.  I placed the detail mask over the top and applied Bermuda Bay and Misty Moonlight inks.  I fussy cut the butterfly and applied Wink of Stella to the wings.  I glued the left wing in place and popped up the sentiment strip.  I added some Brushed Brass Butterflies as a finishing touch.


Here's  another view of the card on display.  My card is held in place with two small magnets but Kelly used small velcro dots.  I have a few slim, small magnets left but I'm going to see if I can find some slim velcro dots.  I have some velcro circle dots but they're too big and bulky.


Here's the card laid flat.  I covered both of my magnets with a patterned paper punched circle.  You'll see the second magnet on the next photo.


Here's the card laid flat flipped over.  I applied some pretty pink watercolour wash paper inside and that's where I'll write my message. 


The teepee card folds flat to go inside an envelope.  You have to be very careful positioning any elements, you don't want elements hanging off the edge as you want the card to fit inside an envelope.  I kept checking against the envelope before committing to gluing down the butterfly!


Here's the envelope with some pretty butterflies paper covering the flap.


Supplies:
Stamps: SU! 'Blossoms in Bloom' set
CS: SU! Thick Basic White
Patterned paper: SU! 'Butterfly Bijou' 6" x 6" DSP, MFT 'Watercolor Wash' 6" x 6" paper
Ink: SU! Bermuda Bay, Magenta Madness, Mint Macaron, Misty Moonlight & Soft Suede 
Tools: SU! 'Butterflies & Flowers' Layering Decorative Masks, 'Messages' die, paper trimmer with scoring blade, blending brushes, circle punch
Embellishments & Accessories: SU! Brushed Brass Butterflies, clear Wink of Stella pen, Dimensionals

Ruth

Monday, 31 January 2022

Flowers Of Friendship Bay Window Card

This is the second fancy fold card I made for Lesley and Wendy to make during our crafty day.  I've seen these bay window cards popping up all over and was keen to have a go myself.  I watched this fab video from Lisa Curcio to get the instructions and I then tweaked the measurements slightly to better suit UK A4 sized CS.  This blog post of Lisa's shows several designs of bay window cards - you'll see I CASEd Lisa's Flowers of Friendship card!

Here's the card and envelope together.  I used two patterned papers from the 'Pattern Party' DSP pack, the beautiful yellow floral damask and the pretty rainbow stripes.  Such a nice touch to add patterned paper to the envelope flap!


Here's the card folded flat ready to go in an envelope.  I love a dimensional fancy fold card that folds flat!  I used Stampin' Blends alcohol markers to colour in the flowers and leaves.  I used the matching 'Flowers & Leaves' punch to cut out the small flowers and leaves but I fussy cut the large floral image.  I popped all the images up and added rhinestone jewels to the flower centres and added two of the Brushed Brass Butterflies embellishments to the centre panel.   


Here's a side view.


Here's a front view.


Here's another side view.  The black square is popped up on Dimensionals and the lip of the card flap tucks underneath that so the card can be displayed with the bay window shape.  It's similar to an easel card mechanism where you have a 'stop'.  I placed more rhinestone jewels on the sentiment circle to add extra sparkle.   


Here's the inside of the card.  I used Flirty Flamingo CS for the sentiment rectangle.


Here's a view from the top.


We had a lovely day together and have already scheduled dates in for February, March and April!  It's so easy to arrange get togethers now I'm not working in retail and I don't have to work weekends!

Supplies:
Stamps: SU! 'Flowers of Friendship' & 'Peaceful Moments' sets
CS: SU! Basic Black, Flirty Flamingo & Basic White
Patterned paper: SU! 'Pattern Party' DSP
Ink: Memento Tuxedo Black, Stampin' Blends Light & Dark alcohol markers
Tools: SU! 'Stitched Shapes' & 'Stitched Rectangles' die sets, circle punch, paper trimmer with scoring blade
Embellishments & Accessories: SU! Brushed Brass Butterflies, Basic Rhinestone Jewels, Dimensionals

Ruth

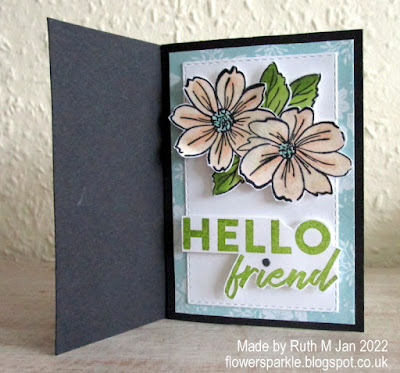
Hello Friend Pinwheel Tower Card

Last weekend Lesley and Wendy came over for a crafty day and I made two fancy fold cards for them to make.  The first was a Pinwheel Tower card featuring Sale-A-Bration goodies you can get for free with a qualifying SU! purchase - the 'Friendly Hello' stamp set and 12" x 12" DSP.  Here's the card and envelope together.


Here's a view from the top so you can see the pinwheel tower construction.  I have Pinwheel Tower Card instructions on my Tutorials page.


Here's the first pinwheel panel.  I used Petal Pink, Pool Party and Granny Apple Green Stampin' Blends alcohol markers to colour in the stamped images.  I fussy cut the flowers and leaves and popped them up.  I also fussy cut and popped up the Hello friend sentiment.  I used a Stampin' Blends marker to colour the dot above the i black.  It doesn't show up in the photo but the flowers are really shimmery because I added clear Wink of Stella to the petals.


Here's the second panel.


Here's the third panel.


Here's the last panel for the sentiment.  I coloured the small flowers with a Pool Party Stampin' Blends marker.


Supplies:
Stamps: SU! 'Friendly Hello' set
CS: SU! Basic Black & Basic White
Patterned paper: SU! 'Friendly Hello' DSP
Ink: SU! Granny Apple Green, Memento Tuxedo Black, Stampin' Blends alcohol markers
Tools: SU! 'Stitched Rectangles' die set, paper trimmer with scoring blade
Embellishments & Accessories: SU! clear Wink of Stella pDimensionals

Ruth
Sunday, 30 January 2022

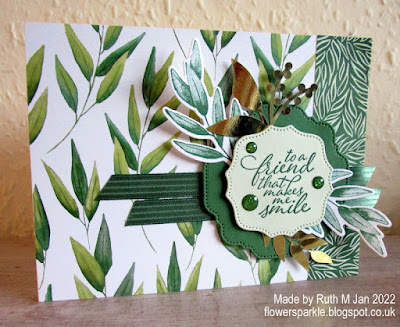
Leafy Simple Fancy Fold Friendship Card

Julie Davison made a simple fancy fold card using patterned paper on one of her wonderful videos and I loved it and had to make my own version.  Here's the card and envelope together.


Here's the card which is made from a long strip of double sided patterned paper with a contrasting pattern piece folded back.  I cut the patterned paper to 4 1/8" x 12", scored at 5 1/2" and 11",  folded the 1" flap back and glued it flat.  I used fancy labels from the 'Hippo & Friends' dies and used stamped and die cut leaves with some gold foil elements.  I tucked some Garden Green ribbon behind the labels, popped up the labels and added some Garden Green glitter dots. 


Here's  a closer look at the leafy labels element.


Here's the inside of the card and the envelope.  It's lovely to see the reverse pattern of the paper on the inside.  I needed to give two cards to friends so I made two cards to this design.


Supplies:
Stamps: SU! 'Forever Fern' & 'Sunny Sentiments' sets
CS: SU! Garden Green & Basic White
Patterned paper: SU! 'Forever Greenery' DSP, 'Forever Gold' laser-cut specialty paper & 'Expressions in Ink' Ephemera Pack
Ink: SU! Garden Green
Tools: SU! 'Hippo & Friends' & 'Forever Flourishing' die sets
Embellishments & Accessories: SU! Garden Green ribbon, Toile Tidings Glitter Enamel Dots, Dimensionals

Ruth

Snowflakes Thanks Snow Much Fancy Fold Card

After taking a long break I'm back to blogging again.  I'll share a few cards over the next couple of days and then posts will become more regular in February hopefully.

I love snowflakes and it's great to be able to use them after Christmas. Here is the fancy fold thanks card together with the envelope.


I used Pacific Point and Basic White CS with some 'Snowflake Splendor' DSP and some vellum.  When you emboss vellum with an embossing folder the design goes white which is a fab effect.  I added sparkly elements using the 'Be Dazzling' specialty DSP.


Here's the card slightly open.


Here's the card fully open.


Here's the front of the envelope.


Here's the back of the envelope.


Supplies:
Stamps: SU! 'Snowflake Wishes' set
CS: SU! Pacific Point, Basic White & Vellum
Patterned paper: SU! 'Snowflake Splendor' DSP, 'Be Dazzling' 6" x 6" Specialty DSP
Ink: SU! Pacific Point 
Tools: SU! 'Snowfall; 'So Many Snowflakes' & 'Hippo & Friends' die sets, circle punches, SU! 'Winter Snow' embossing folder
Embellishments & Accessories: SU! Dimensionals

Ruth

Friday, 19 November 2021

Baby Boy Pinwheel Tower Card

Baby cards are rare for me but when I needed to make one I thought a Pinwheel Tower card would be great fun!  Instructions for making a Pinwheel Tower card sized to fit in a UK C6 sized envelope can be found on my tutorials page.   Adding in a wobble spring rocking horse makes it even more fun!  Here's the card and envelope together.


Here's a view from the top so you can see why this fancy fold is called a Pinwheel Tower card.


I've used a Sizzix baby die set which gave me options for elements on three panels so that was perfect. I made the card base from SU! Seaside Spray CS and I decorated the panels with patterned paper from the 'Penguin Playmates' and 'Snowflake Splendor' DSP packs.  The 'baby' is from the SU! 'Well Said' die set and the hearts and stars are from the SU! 'Mini Treat Bag' die set. The first panel has a wobble spring mounted rocking horse.  While I was assembling the horse I remembered I had some wood veneer paper in my stash which was ideal as the rocker at the bottom of the horse!  Some blue glitter jewels was my finishing touch for the first panel.


Here's the second panel.  The bib and babygrow are both popped up.


Here's the third panel.  The dungarees are popped up.  I used dies from the SU! 'All Dressed Up' set for the buttons.


Here's the fourth panel where I wrote my message.  I love that sweet sentiment from the SU! 'Bundle of Love' set!


Here's the envelope.  Because the card was fairly bulky with the wobble spring and dimension I used a gusseted envelope.  I popped up the name label.


Supplies:
Stamps: SU! 'Bundle of Love' set
CS: SU! Crumb Cake, Daffodil Delight, Misty Moonlight, Poppy Parade, Seaside Spray, Soft Suede & Basic White, 
Patterned paper: SU! 'Penguin Playmates' & 'Snowflake Splendor' DSP packs
Ink: SU! Misty Moonlight 
Tools: Sizzix 'New Baby #2' die set, SU! 'All Dressed Up', 'Mini Treat Bag', 'Rectangle Stitched', 'Tasteful Labels' & 'Well Said' die sets
Embellishments & Accessories: SU! Dimensionals, PaperMania glitter jewels, action wobble spring

Ruth

Friday, 5 November 2021

Ornaments, Holly & Snowflakes Pinwheel Tower Card

Pinwheel Tower cards have been popping up online and I was keen to try one for myself.  I love that a Pinwheel Tower card has four panels and that it stands up beautifully for display but folds flat to go inside an envelope. Julie Davison has this blog post and I watched her fab YouTube video to find out how to make one.  I tweaked the measurements for a UK A6 sized card and I've given the information below.  Julie says in her video to make the tower using patterned paper rather than CS as that gives less bulk to the card so that's what I did.

Here's how I made an A6 sized Pinwheel Tower Card:

  • Cut CS or patterned paper 4 1/2" x 4 1/8.  On 4 1/2" side, score at 1", 2", 3" & 4". Glue the tab.
  • Cut four CS panels measuring 4 1/8" x 2 7/8".
  • Cut four patterned paper mat layers measuring 3 7/8" x 2 5/8" & glue to the CS panels.
  • Glue the four panels to the four tower sections.
  • Add any elements to decorate the card as desired.

I have added instructions to make a Pinwheel Tower card sized to fit in a UK sized C6 envelope here on my Tutorials page.

Here's the card and envelope together.


Here's a top view of the card so you can see how it's made.  Basically, you create a tower and adhere a panel to each of the four sides which gives the pinwheel shape.  I've used SU! Mint Macaron and Polished Pink CS with 'Whimsy & Wonder' specialty DSP to create my card.


Here's panel one.  I fussy cut the two ornaments and popped them up on Dimensionals.


Here's panel two.  I stamped holly from the 'Christmas Season' stamp set, die cut the shapes, snipped one holly berry off because I like three berries rather than four and popped up the leaves and berries.


Here's panel three.  The snowflake circle is popped up.  I added some iridescent self adhesive snowflake embellishments which go nicely with the holographic details in the patterned paper.


Here's panel four where I will write my message.  I die cut a tag with a hole re-inforcer, stamped the sentiment, fussy cut the present and ornament and popped those up.  I added Blushing Bride baker's twine to the tag and then popped up a Mint Macaron bow which I'd fussy cut from the patterned paper.


Here's the envelope.


What a fun card to put together, I enjoyed it so much I immediately made another one!

Supplies:
Stamps: SU! 'Christmas Season' & 'Itty Bitty Christmas' sets
CS: SU! Mint Macaron, Polished Pink & Basic White
Patterned paper: SU! 'Whimsy & Wonder' Specialty DSP
Ink: SU! Mint Macaron, Mossy Meadow & Polished Pink 
Tools: SU! 'Seasonal Labels' & 'Tailor Made Tags' die sets, circle punches
Embellishments & Accessories: SU! Blushing Bride baker's twine, Adhesive Backed Snowflakes, Dimensionals

Ruth

Thursday, 5 August 2021

Alcohol Ink Background Ornament Dangly Tent Card

Yes, another alcohol ink background card!  This time I tried traditional Christmassy colours and made a dangly tent card.  Here's the card and envelope together.


I made the card from Old Olive CS and cut a stitched rectangular aperture from the front.  I scribbled Dark Mango Melody, Dark Old Olive and Dark Real Red Stampin' Blends onto a panel of vellum and dabbed on 99% isopropyl alcohol with a flat paintbrush to create the background.  I taped the vellum to a sheet of Basic White CS, cut it to size and glued it to the back of my Old Olive tent card.  Although I'd used a Dark Real Red Stampin' Blend on the background, Real Red CS didn't look quite right so I used Polished Pink as my accent colour.  I die cut the solid ornament in Metallic Gold specialty paper and cut the fancy overlay ornament in Polished Pink.  I then added a gold topper and some gold cord and attached the ornament so it will dangle freely.  I stamped the sentiment in VersaMark and heat embossed with gold embossing powder, die cut it with a fishtail flag banner die and glued that in place.  To finish off the front I added some gold Gilded Gems.


Here's a closer look.


Here's a side view so you can see I added a W shaped CS piece which means the tent card will stand up better on display.


Here's the back of the card.  The sentiment stamps come from the SU! 'Peace & Joy' set.  I drew a line from the letter Y with a gold Sharpie, added an ornament, topper and a bow.  A bit busy for just a sentiment panel but at least it's fun!


Supplies:
Stamps: SU! 'Peace & Joy',& 'Tag Buffet' sets
CS: SU! Old Olive, Polished Pink & Basic White, Gold Metallic specialty paper, vellum
Ink: SU! Old Olive & Polished Pink, VersaMark, Dark Mango Melody, Dark Old Olive & Dark Real Red Stampin' Blends markers , gold Sharpie marker
Tools: SU! 'Delicate Ornament' & 'Mini Treat Bag' die sets, Claina Palmer 'A6 Double Stitched Nested Dies' set, MFT 'Fishtail Flags' Stax die set, SU! 1 3/4" circle punch, flat paintbrush
Embellishments & Accessories: 99% isopropyl alcohol, SU! gold embossing powder, gold cord & Gilded Gems

Ruth

01 09 10