Showing posts with label Diorama card. Show all posts

Sunday, 27 February 2022

Bird Best Wishes Diorama/Shadow Box Card

I made this shadow box card last year and Lesley asked me to include it as a project for her and Wendy to make on one of our crafty get togethers.  I decided on a couple of design tweaks for this version of the card, just to mix things up a bit!  Here's the card and envelope together.


I used Just Jade CS for the card base and used the fancy circle die in the 'Birds & More' die set to cut an aperture from the card front.  I used two circle dies to create an Early Espresso CS frame to surround the aperture.  I stamped the 'best wishes' (from the Artistically Inked' stamp set) in Soft Suede ink, cut the label out using the 'Messages' die and I used the same die to cut out a Polished Pink shape to sit behind the white label.  

For the white layer inside the card, I used Soft Suede and Just Jade inks to stamp a background of branches and leaves.  I used three stamps for the bird, stamping first in Daffodil Delight ink, the second stamp was stamped in Soft Suede ink and the third stamp - the wing detail - was also stamped in Soft Suede ink.  I popped up the bird, stamped and die cut several Polished Pink flowers and  popped those up.  A gold Metallic Pearl was placed in the centre of each flower to finish the card front.


Here's a closer look through the aperture.  The Stampin' Up! 'Distinktive' style stamps are amazing, you get such great detail especially on the multi step stamped images!


Here's the back of the card with some Polished Pink flowers stamped on a white panel.


Here's the envelope.  I die cut the leafy border in Just Jade CS and glued a strip of Polished Pink CS next to it.


I have instructions on how to make a shadow box card on my Tutorials page.

Supplies:
Stamps: SU! ''Birds & Branches' & 'Artistically Inked' sets
CS: SU! Early Espresso, Just Jade, Polished Pink & Basic White
Ink: SU! Daffodil Delight, Just Jade, Polished Pink & Soft Suede 
Tools: SU! 'Birds & More' die set, 'Messages' die, Nestabilities circle dies
Embellishments & Accessories: SU! gold 'Metallic Pearls', Dimensionals

Ruth

Thursday, 20 May 2021

Goldfish Shadow Box Card

I designed two shadow box cards for my online crafty get together with friends so I'd been thinking about them quite a bit and I'd been thinking about creating scenes in particular.  I had a light bulb moment when I remembered my SU! 'Make a Splash' stamp set and I thought it would work well.  While Lesley and Wendy were working on their hot air balloon cards I made my goldfish card.


Here's the card made with Calypso Coral CS and sized to fit in a standard C6 envelope.  I cut two quarter sheets of A4 CS and scored both sides of both pieces (on the long side) at 1/2" and 1" to form the shadow box shape.  I cut a circle aperture and added an Early Espresso frame. I used a blending brush to apply Balmy Blue ink to a piece of Basic White CS, stamped some weeds towards the bottom and glued the panel in place.  I stamped my fish in Calypso Coral ink, fussy cut them and arranged them without adhering them so I could stamp the bubbles.  Then I popped each fish up on Dimensionals.  I masked part of a sentiment stamp to only get the 'Just for you' words and cut that out with a shape from the SU! 'Messages' die.  I'm loving this die for small shapes, it's really useful!  To finish the front I sprinkled a few rhinestone jewels on the sentiment label.


Here's the back of the card with a fish and a 'Just keep swimming!' sentiment.  This card is going to a friend who is feeling very down due to having some medical issues.  I thought a little card to give her some cheer and encouragement to keep going was in order.  


Here's the envelope with a stamped mini scene.


This was such fun to make, I had a goofy grin on my face the whole time I think!  Every now and then I ask myself "is this what a grown woman should be doing?!"  Then I think "who cares?!" and carry on!

Supplies:
Stamps: SU! 'Make a Splash' & 'Fancy Phrases' sets
CS: SU! Calypso Coral, Early Espresso & Basic White
Ink: SU! Balmy Blue, Calypso Coral, Early Espresso, Granny Apple Green & Old Olive
Tools: SU! 'Messages' die, Spellbinders circle Nestabilities die set, blending brush
Embellishments & Accessories: SU! Dimensionals & Rhinestone Jewels

Ruth

Wednesday, 19 May 2021

Dangly Butterfly Shadow Box Birthday Card

Last Saturday afternoon I crafted online with my lovely friends Lesley and Wendy.  I designed three cards for them to make and made up card packs for them.  While they were working with their card packs to create their cards I worked on cards of my own.  My friends had asked to make a shadow box card and while designing for the online class I had an idea pop into my head that I had to try!  I wanted to make a shadow box with a dangly element and this dangly butterfly card is what I came up with.  I did start work on this card the day before but I finished it while the girls were working on their butterfly shadow box card.


First I'll share one of the items I used for this card.  An empty tissue box!  I couldn't throw this box away and it's been sitting on a shelf in my craft room for a couple of weeks.  When I hit upon the idea of a dangly butterfly in a shadow box card I knew I could use card from the box for my card.


Here's the card.  Pool Party and Cherry Cobbler seemed a good match colour wise so I went with those.  I glued a panel of the butterfly card to the back of the shadow box card and I die cut the solid butterfly from the patterned card as well.  After I'd cut the circle aperture I sandwiched metallic thread between two solid die cut butterfly shapes and added the Cherry Cobbler outline butterfly to the front.  I attached the thread with strong tape and added the Cherry Cobbler frame.  I added Cherry Cobbler leaves cut using a die from the SU! 'Artistic' die set and flowers cut from the 'Strawberry' builder punch.  I snipped between the petals and circled an embossing tool in the flower centres to give the flowers some shaping and dimension.  After gluing them in place I added a rhinestone jewel to each flower centre and added jewels to the butterfly body.


Here's the back of the card with a stamped birthday sentiment and a strip of the tissue box card.  After I'd glued the card in place I added lines with my Cherry Cobbler Stampin' Write marker.


For the envelope I simply used circle punches to decorate the flap.


Supplies:
Stamps: SU! 'Fancy Phrases' set
CS: SU! Cherry Cobbler, Pool Party & Basic White, patterned card from a tissue box
Ink: SU! Cherry Cobbler 
Tools: SU! 'Brilliant Wings' & 'Artistic' die sets, Spellbinders Nestabilities Circle die set, SU! 'Strawberry' builder punch & circle punches, ball embossing tool
Embellishments & Accessories: metallic thread, SU! Rhinestone Jewels

Ruth

Monday, 17 May 2021

Hot Air Balloons Shadow Box Card - Online Meeting Project

Onto my second card for the online crafty meeting and I thought I'd make a second shadow box card - this time a landscape oriented card to fit in a standard C6 envelope.  This card is bright and fun, quite a bit different from the butterflies and flowers card that came before!  The SU! 'Lift Me Up' hot air balloon stamp set and 'Up & Away' die set are long retired but this is one of my favourite ever bundles and the stamps and dies won't be leaving my stash just yet!  Here's the card and envelope.


Here's the card.  I used Poppy Parade CS for the card base and Pacific Point CS for the frame around the circle aperture.  I used a blending brush to sweep Balmy Blue ink onto a panel of Basic White CS to represent the sky and I stamped birds (from the 'High Tide' stamp set) a few times in black ink.  I stamped the balloons in Granny Apple Green, Poppy Parade and Pacific Point inks.  I popped up the Poppy Parade and Pacific Point balloons.  I die cut three white clouds, edged each one with Balmy Blue ink applied with a sponge dauber. and attached them to the card front.  I stamped the sentiment, die cut it and popped it up.


Here's a closer look inside the aperture.  Scenes like this work so well with shadow box cards.


Here's the back of the card.  The 'Happy Birthday' from the front of the card and 'Hope Your Day Is On Cloud Nine' words were on one stamp originally but I performed stamp surgery and cut the words apart!  This means it's easier to stamp the words separately without the need for masking, a bonus in my book!  In fact the birds I stamped on the back panel are also cut apart from a larger group of birds in the 'High Tide' set.  I'm very willing to cut images apart if they are easier for me to use that way!


Here's the envelope.  I stamped a few clouds direct on the flap and then glued a stamped and die cut balloon over the top.


Supplies:
Stamps: SU! 'Lift Me Up' & 'High Tide' sets
CS: SU! Pacific Point, Poppy Parade & Basic White
Ink: SU! Balmy Blue, Granny Apple Green, Pacific Point & Poppy Parade, Memento Tuxedo Black
Tools: SU! 'Up & Away' & 'Stitched Rectangles' die sets, Spellbinders circle Nestabilities die sets, blender brush, sponge dauber
Embellishments & Accessories: SU! Dimensionals

Ruth

Saturday, 15 May 2021

Butterfly Wishes Shadow Box Card - Online Meeting Project

It's time for another online crafty get together with my good friends Lesley and Wendy today and I had been asked to include a shadow box card in my designs.  I was very happy to oblige!  This is my first card for our crafty afternoon and it's a portrait orientated shadow box card that fits in a standard C6 envelope.  I thought it would be fun to play around with layouts as you can make shadow box cards in any size and format really.  Here's the card and envelope together.


Here's the card with a Night of Navy and Pool Party colour combo.  I've used the beautiful SU! 'Butterfly Wishes' stamp set which is a 'Distinktive' set which means you get lovely variation and detail in the stamped images.  I often add a frame to an aperture cut out from the front of a shadow box card but by using a die from the SU! 'Stitched Rectangles' die set I got lovely stitched detailing around the aperture and didn't need to add a frame


Here's a closer look at the aperture.  I fussy cut the flowers and butterfly and popped them up on Dimensionals.


Here's the back of the card where I added a white panel as a place to write a birthday message.


Here's the envelope.


Supplies:
Stamps: SU! 'Butterfly Wishes' & 'Fancy Phrases' sets
CS: SU! Night of Navy & Basic White
Ink: SU! Night of Navy & Pool Party
Tools: SU! 'Stitched Rectangles' die set 
Embellishments & Accessories: SU! Dimensionals

Ruth

Tuesday, 27 April 2021

Flowers & Bees Shadow Box/Diorama B.Day Card

On Monday it was my sweet friend Lesley's birthday and I know she likes shadow box cards and bees so I made a floral shadow box card featuring bees!  There were a few bee themed items included in her birthday gift too!  I wanted a gift bag to place the gifts in and I bought a really pretty floral bag.  When I came to make Lesley's card I took inspiration from the bag to select my colours.  Here's the gift bag.


Here's the shadow box card and envelope.


Here's the card sized to fit in a 6" square card sized envelope.  I used SU! 'Polished Pink' CS to create the card base.  What a beautiful and happy colour!  The gift bag had some gold foil detailing so I added some gold foil accents and some SU! Gilded Gems embellishments on the flower centres.  I stamped the bees in Soft Suede ink, added the body with Mango Melody ink and used clear Wink of Stella to give the bees shimmery wings.  I got busy stamping flowers, leaves and bees and then came the fussy cutting.  I've used the old, retired SU! 'Garden in Bloom' stamp set so there are no matching dies - but then I enjoy fussy cutting now and then!  

I stamped the flower outlines in Soft Suede ink and stamped the solid colours using Coastal Cabana, Daffodil Delight, Mango Melody, Polished Pink and stamped off once Pretty Peacock inks.  I stamped the flower centres in Granny Apple Green ink.  I stamped the leaf outlines in Soft Suede ink and the inside colour is Granny Apple Green.  I glued a panel of Granny Apple Green 'Oh So Ombre' patterned paper to the back portion of the card and then added the flowers, leaves and bees - some of the elements are popped up.


Here's a closer look.  As I was including bees I thought it would be fun to use hexagon dies to create the aperture and frame as a nod to honeycomb.  I also added some gold foil honeycomb accents cut from a die in the SU! 'Detailed Bee' die set.


Here's the back of the card with more flower, leaf and bee stamping and a sentiment stamped in Pretty Peacock ink.


Here's the back of the envelope.  


Here's the front of the envelope with a popped up name label element.  I do love adding a name label to the front of the envelope as a finishing touch!


Supplies:
Stamps: SU! 'Garden in Bloom' '& 'Happiest of Birthdays' sets
CS: SU! Coastal Cabana, Polished Pink & Basic White, Gold Brushed Metallic Foil Sheet
Ink: SU! Coastal Cabana, Daffodil Delight, Granny Apple Green, Mango Melody, Polished Pink, Pretty Peacock & Soft Suede
Tools: SU! 'Detailed Bee' & 'Stitched Rectangles' die sets, 'Messages' die, paper trimmer, Sizzix 'Hexagons' die set, Sizzix 'Card, Fancy Frame Flip-its #2' die set
Embellishments & Accessories: SU! clear Wink of Stella, Gilded Gems, Dimensionals

Ruth

Friday, 16 April 2021

Butterfly Thank You Shadow Box Card

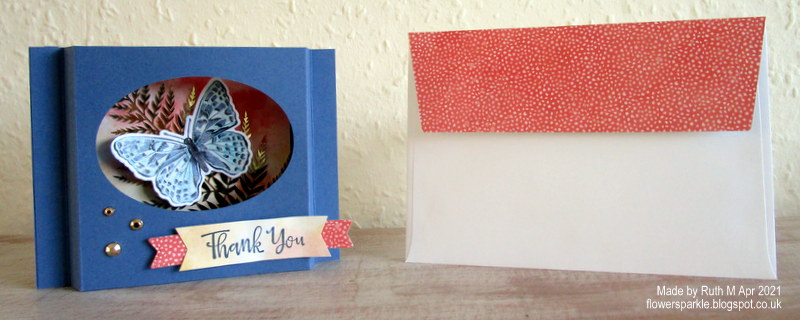
Here's a thank you shadow box card featuring one of the gorgeous butterflies die cut from the SU! 'Butterfly Bijou' patterned paper.  This card will go to a friend to say thank you for my birthday gifts.  Here is the card and envelope together.


Here's the card.  I've used Misty Moonlight CS, papers from the 'Butterfly Bijou' pack and a gorgeous gold foil fern element from the 'Forever Gold Laser-cut Specialty Paper' pack.  I used an oval die from the 'Stitched Shapes' die set to cut out the aperture.  I stamped the 'Thank You' from the 'Peaceful Moments' set in Misty Moonlight ink and used dies to cut out flagged banners.  I finished off by adding three Gilded Gems.


Here's a closer look inside the aperture.


Here's the back of the card with a popped up sentiment element.


Here's the envelope.  I cut the piece of patterned paper too small by mistake so I sliced a tad off the flap to make it fit!


Supplies:
Stamps: SU! 'Peaceful Moments' & 'So Sentimental' sets
CS: SU! Misty Moonlight & Basic White
Patterned paper: SU! 'Butterfly Bijou' 6" x 6" DSP pack, 'Forever Gold Laser-cut Specialty Paper' pack
Ink: SU! Misty Moonlight 
Tools: SU!  'Stitched Shapes' & 'Tasteful Labels' die sets, SU! paper trimmer 
Embellishments & Accessories: SU! Gilded Gems, Dimensionals

Ruth

Monday, 12 April 2021

Bird Thank You Diorama/Shadow Box Card

It's been a long time since I've made a shadow box card and Julie Davison made me want to put that right as soon as I came across her lovely card on Pinterest!  I just loved everything about Julie's card and I had to CASE it!  There is this wonderful video on Julie's YouTube channel where she shows how to make her lovely diorama or shadow box card.

Here's the card and envelope together.


Here's the card.  I've used Mint Macaron CS for the base.  I stamped the sentiment in Soft Suede ink on Sahara Sand CS and die cut a label.  I die cut another label shape from So Saffron CS and I popped up the three flowers I stamped in Flirty Flamingo ink.  For the background panel I stamped branch and leaf images and popped up the stamped and die cut bird.  As a finishing touch I added a silver metallic pearl to each flower centre.


Here's a closer look at the sweet bird inside the aperture.


Here's the back of the card.


Here's the envelope.  The 'Birds & More' die set contains a fancy leafy border die that co-ordinates with the circle die I used as the aperture on the card and I wanted to use it to decorate the envelope.  I cut out the design from the envelope flap and then backed the flap with a piece of Mint Macaron CS that I trimmed to shape.


Supplies:
Stamps: SU! 'Birds & Branches' & 'Peaceful Moments' sets
CS: SU! Mint Macaron, Sahara Sand, So Saffron & Basic White
Ink: SU! Basic Gray, Flirty Flamingo, Mint Macaron, Sahara Sand, So Saffron & Soft Suede
Tools: SU! 'Birds & More' die set, 'Messages' die, SU! paper trimmer
Embellishments & Accessories: SU! Metallic Pearls, Dimensionals

Ruth

Thursday, 21 April 2011

Easter Diorama Card Made By Jan

My friend Jan loved the diorama card we made at our card group a few months ago and she wanted to make an Easter version.   She came over to spend a crafty afternoon with me and this is the design we came up with.  It's such a sweet card!  The cute critter stamps are from Penny Black.  Jan coloured them, cut them out and arranged everything.  The sheep's face was stamped twice, cut out and is popped up.
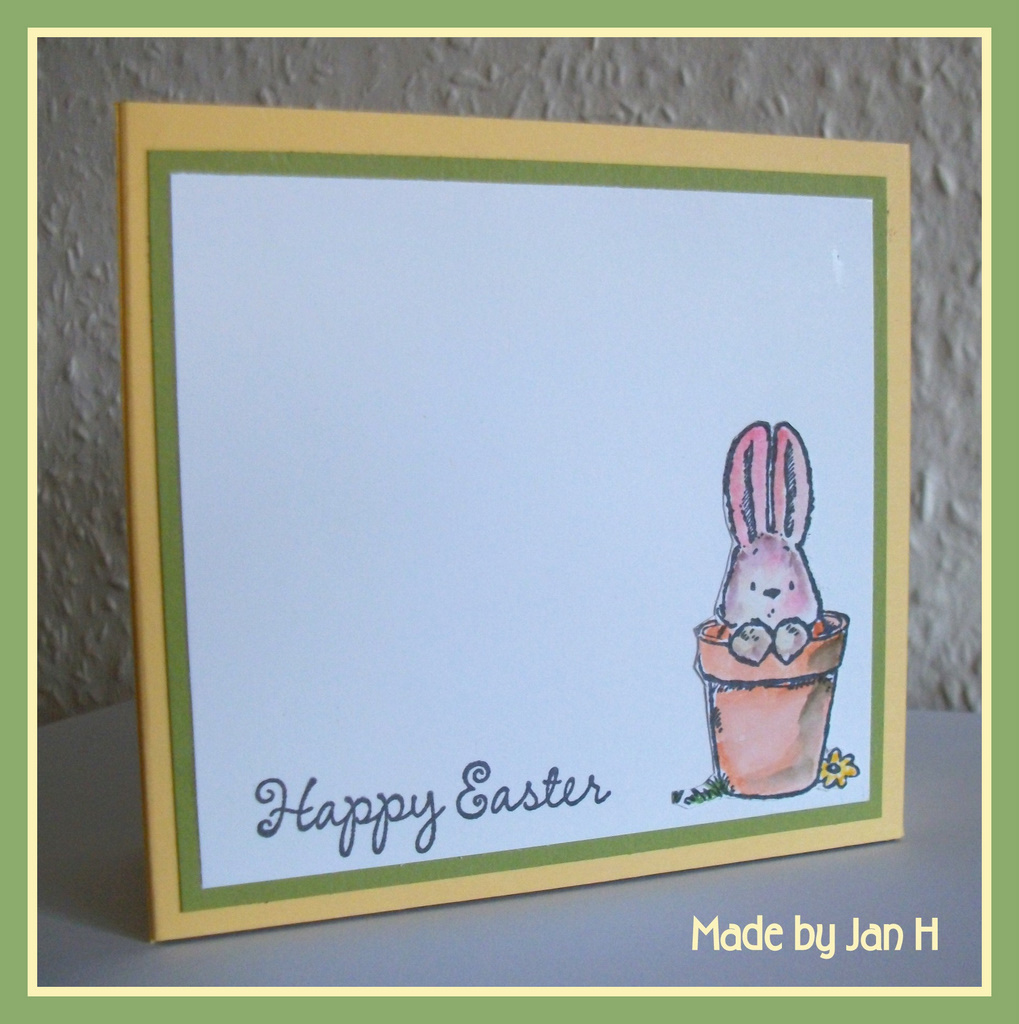

She then decorated the back of the card.  Are Penny Black bunnies cute or what?!  Jan was delighted with how her card turned out.


Supplies:
Stamps: Penny Black Bunny Friends and Ewe, for you from SU! Fresh Cuts set, Happy Easter from Hero Arts
CS: SU! So Saffron, Pear Pizzazz & Whisper WhitePretty in Pink, Whisper White, Chocolate Chip & Old Olive
Patterned paper: SU! Bashful Blue Prints Designer Series Paper pack
Ink: VersaFine Onyx Black, various colours of SU! ink for watercolouring

Tools: Labels Eight Nestabilities dies, Martha Stewart Grass border punch, Nellie scalloped oval die, Scor-Pal, waterbrush & ceramic tile
Embellishments & accessories: green brads, 3d foam pads


Photobucket

Monday, 27 December 2010

Snowmen Diorama Card For Owen

Owen has loved the diorama cards I've made this Christmas.  He has also loved any card where I've stamped the Santa and sleigh over a moon.  So I decided to make his Christmas card a diorama incorporating Santa's sleigh over a moon.  I'm so pleased how this card came out and Owen was delighted with it!

I stamped snowflakes randomly over the Marina Mist card base as a background.  Labels Eight dies were used again to cut the apertures.  I stamped my Hobby Art large and giant snowmen onto watercolour paper and coloured them with ink and a waterbrush.  I used red crystals for the holly berries on the hats and I added Stickles to the noses and snow on the hats.  For the back panel, I stamped the line of trees, made a moon mask with a 1" circle and sponged on Bashful Blue ink with a touch of Marina Mist also.  I masked off two reindeer from the sleigh stamp and stamped over the moon.  I added the sentiment and punched snowflakes with crystal centres to finish off the front.


Then I decorated the back of the card.   I stamped the sentiment in Marina Mist ink but wiped it off from 'heart' with a cotton bud and then inked the 'heart' with my Not Quite Navy marker pen.  Nellie oval dies were used for the sentiment.  I've sponged edges with Marina Mist ink and I added a silver heart brad to the sentiment oval.  At the bottom of the white panel I stamped the snowflake border from the My Cute Stamps Let It Snow set - what a gorgeous stamp that is!


Well, that's the last Christmas card I made for 2010.  Each year I've said I'll carry on making them in the New Year so I've got a good start for next year but it has never happened yet LOL!  However, I have a new set of snowman stamps that haven't been inked yet so that just might spur me on - we'll see!  I have some new non Christmas stamps that I'm itching to play with though so I'm not entirely hopeful!

I'm so chuffed to have received a Stylish Blogger award from Pauline - thanks so much hun!  Pauline makes fab creations so please visit her Craft Obsession blog to be inspired!


Supplies:
Stamps: Hobby Art Giant and Large Snowman stamps, SU! Lovely As A Tree set, All NIght Media Santa & Sleigh stamp, PSX Snowflake Medley stamp, Personal Impressions Christmas Messages clear set, back sentiment from Penny Black, My Cute Stamps Let It Snow clear set
CS: SU! Marina Mist, Not Quite Navy & Whisper White, watercolour paper
Ink: SU! Marina Mist, Bashful Blue & Not Quite Navy, VersaFine Onyx Black
Tools: Labels Eight Nestabilities dies, Labels Trio die, 1" circle punch, X Cut snowflake punch, Nellie Multiframe Oval dies, waterbrush
Embellishments & accessories: Crystals, Star Dust Stickles, Orange Peel Stickles, heart shaped brad


Photobucket

Friday, 24 December 2010

Diorama With Dangles!

I've loved making a few diorama cards this Christmas and I've been wanting to dangle something in the apertures.  I decided punched baubles would make the perfect dangles.  This is the card I made to give to our lovely friends Jan and Alan.

This card fit into a 6" square envelope.  EDITED TO ADD:  I've been asked for measurements for this card so I'm updating the post.  You need 2 pieces of 7 1/4" x 5 3/4" CS - score these at 1 1/2" on the left and right of the long sides.  These 2 pieces form the front, back and sides of the card.  For the middle piece (the Not Quite Navy panel on my card) you need 1 piece of 5 3/4" x 5 3/4"  CS - score this at 3/4" on the left and right sides.  Once you understand how a diorama card is constructed you can tweak the measurements to make different shape and size cards.  Just make sure you measure an envelope first and cut and score your CS accordingly so it will fit inside the envelope!  There is a diorama card tutorial here on Splitcoast Stampers.

Something else I've loved this Christmas is the Marina Mist with Not Quite Navy and Old Olive colour combo.   I stamped the tree bough and then added some glitter.  I sandwiched the green cord between two punched baubles, attaching the two shapes together with 3d foam pads.  You can't tell from the photo but I've added glitter to the dots on the baubles for a touch of sparkle.  I then taped the cords behind the apertures.  I then added the sentiment and the sweet little pine cone image.


You won't be entirely surprised to see that I decorated the back!


Supplies:
Stamps: SU! Contempo Christmas & Lovely As A Tree sets, Hero Arts Real Pine, back sentiment from Penny Black
CS: SU! Marina Mist, Not Quite Navy, Old Olive & Very Vanilla
Patterned paper: SU! Merry Moments Designer Series Paper pack
Ink: SU! Marina Mist, Not Quite Navy & Old Olive
Tools: Labels Eight Nestabilities dies, SU! Ornament punch
Embellishments & accessories: green cord, Crystal ultrafine glitter, 3d foam pads


Thank you so much for visiting and have a very...

Photobucket
01 09 10