Thursday 29 April 2021

Flower & Leaves Alcohol Background Best Wishes Card

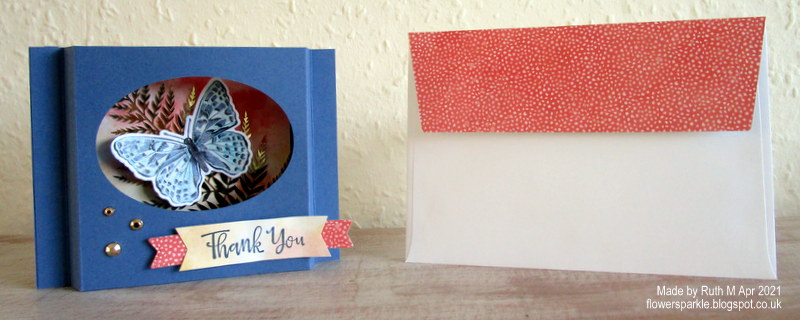
The alcohol marker background technique is just addictive, I love the effects you get and it's great fun trying out new colour combos!  I recommend this video by Linda Bedinger and this video by Kelly Acheson if you want to discover and use this technique yourself.  I've used the background on a floral Best Wishes card along with the SU! 'Pretty Perennials' stamp set and 'Perennial Petals' die set.  Here's the card and envelope together.


Here's the card.  I've used Dark Night of Navy, Dark Rich Razzleberry and Dark Seaside Spray Stampin' Blends markers with 99% isopropyl alcohol and vellum CS to create the background.  I adhered the vellum to the card front, added narrow strips of Rich Razzleberry CS and stamped the sentiment in Night of Navy ink.  I used Rich Razzleberry, Seaside Spray and Night of Navy inks to stamp the flowers.  I cut them out with the co-ordinating dies and cut out the leaves from Night of Navy CS.  I popped up the flower and added three Artistry Blooms Rich Razzleberry sequins.


Here's the inside of the card.  After stamping the sentiment on Seaside Spray CS I cut it out with a Stitched Rectangle die.  I stamped the flowers in Seaside Spray ink and added dots to the flower centres with a Dark Rich Razzleberry Stampin' Blends marker.  


Here's the envelope.  I stamped the sentiment in Night of Navy ink onto Basic White CS and fussy cut it out.  I then glued it to the envelope flap that I'd covered with Blackberry Bliss 'Oh So Ombre' patterned paper.


Supplies:
Stamps: SU! 'A Touch of Ink' & 'Pretty Perennials' sets
CS: SU! Night of Navy, Rich Razzleberry, Seaside Spray & Basic White, vellum
Patterned paper: SU! Blackberry Bliss 'Oh So Ombre' DSP
Ink: SU! Night of Navy, Rich Razzleberry & Seaside Spray, SU! Dark Night of Navy, Dark Rich Razzleberry & Dark Seaside Spray Stampin' Blends markers 
Tools: SU! 'Perennial Petals' & 'Stitched Rectangles' die sets, flat paintbrush
Embellishments & Accessories: 99% isopropyl alcohol, SU! Artistry Blooms Sequins, Dimensionals

Ruth

Wednesday 28 April 2021

Stampin' Up! Gift Voucher Card & Envelope

Monday was the birthday of my good friend Lesley and her husband asked me to make a Stampin' Up! gift voucher for him to give to her.  I'd already made one gift voucher for her where I placed the voucher in a pouch envelope.  I had to make something a bit different for this one.

Here's the card and envelope together.


Here's the card.  I glued the patterned paper panel - from the gorgeous 'Berry Delightful' DSP pack - to a piece of Granny Apple Green CS.  I stamped the sentiment in Rich Razzleberry ink onto vellum and heat embossed it with clear embossing powder.  I attached the vellum panel with some Rich Razzleberry brads I've had in my stash for years. I popped up the Granny Apple Green panel onto the square Rich Razzleberry CS.


Here's the inside of the card.  I cut a strip of Rich Razzleberry CS, punched out half a circle using a circle punch and glued the strip in place as a pocket.  I stamped the gift voucher with images from the SU! 'Berry Blessings' set, rounded the corners and slipped the voucher into the pocket.


Here's the envelope.  I used the Envelope Punch Board to make a square envelope from the pretty fruit patterned paper.  I added a strip of Granny Apple Green CS and a popped up die cut name label element.


Supplies:
Stamps: SU! 'Berry Blessings' & 'Happiest of Birthdays' sets
CS: SU! Granny Apple Green, Rich Razzleberry & Basic White
Patterned paper: SU! 'Berry Delightful' DSP pack
Ink: SU! Blackberry Bliss, Garden Green, Granny Apple Green & Rich Razzleberry 
Tools: SU! 'Tasteful Labels' die set, Envelope Punch Board, circle punch, X Cut corner rounder punch, heat tool, paper piercer
Embellishments & Accessories: SU! clear embossing powder, Rich Razzleberry brads, Dimensionals

Ruth

Tuesday 27 April 2021

Flowers & Bees Shadow Box/Diorama B.Day Card

On Monday it was my sweet friend Lesley's birthday and I know she likes shadow box cards and bees so I made a floral shadow box card featuring bees!  There were a few bee themed items included in her birthday gift too!  I wanted a gift bag to place the gifts in and I bought a really pretty floral bag.  When I came to make Lesley's card I took inspiration from the bag to select my colours.  Here's the gift bag.


Here's the shadow box card and envelope.


Here's the card sized to fit in a 6" square card sized envelope.  I used SU! 'Polished Pink' CS to create the card base.  What a beautiful and happy colour!  The gift bag had some gold foil detailing so I added some gold foil accents and some SU! Gilded Gems embellishments on the flower centres.  I stamped the bees in Soft Suede ink, added the body with Mango Melody ink and used clear Wink of Stella to give the bees shimmery wings.  I got busy stamping flowers, leaves and bees and then came the fussy cutting.  I've used the old, retired SU! 'Garden in Bloom' stamp set so there are no matching dies - but then I enjoy fussy cutting now and then!  

I stamped the flower outlines in Soft Suede ink and stamped the solid colours using Coastal Cabana, Daffodil Delight, Mango Melody, Polished Pink and stamped off once Pretty Peacock inks.  I stamped the flower centres in Granny Apple Green ink.  I stamped the leaf outlines in Soft Suede ink and the inside colour is Granny Apple Green.  I glued a panel of Granny Apple Green 'Oh So Ombre' patterned paper to the back portion of the card and then added the flowers, leaves and bees - some of the elements are popped up.


Here's a closer look.  As I was including bees I thought it would be fun to use hexagon dies to create the aperture and frame as a nod to honeycomb.  I also added some gold foil honeycomb accents cut from a die in the SU! 'Detailed Bee' die set.


Here's the back of the card with more flower, leaf and bee stamping and a sentiment stamped in Pretty Peacock ink.


Here's the back of the envelope.  


Here's the front of the envelope with a popped up name label element.  I do love adding a name label to the front of the envelope as a finishing touch!


Supplies:
Stamps: SU! 'Garden in Bloom' '& 'Happiest of Birthdays' sets
CS: SU! Coastal Cabana, Polished Pink & Basic White, Gold Brushed Metallic Foil Sheet
Ink: SU! Coastal Cabana, Daffodil Delight, Granny Apple Green, Mango Melody, Polished Pink, Pretty Peacock & Soft Suede
Tools: SU! 'Detailed Bee' & 'Stitched Rectangles' die sets, 'Messages' die, paper trimmer, Sizzix 'Hexagons' die set, Sizzix 'Card, Fancy Frame Flip-its #2' die set
Embellishments & Accessories: SU! clear Wink of Stella, Gilded Gems, Dimensionals

Ruth

Monday 26 April 2021

Floral Stampin' Up! Gift Voucher In Pouch Envelope

This is a floral Stampin' Up! gift voucher I made for a friend to give to another friend for her birthday.  I decided to decorate a gift voucher and place it in a pouch envelope.  Here's the pouch envelope made from Pool Party CS.  I popped up the label cut from the SU! 'Messages' die.   


Here's the pouch envelope with the voucher partially removed from the pouch.  I used Pool Party ink to stamp the flowers on the voucher but I used Coastal Cabana ink to stamp the flowers on the pouch envelope.


Here's the gift voucher.  I've used the SU! Pretty Perennials set to decorate the voucher.  After stamping I used circle punches to cut a hole and to add a hole reinforcer.  I added some Bermuda Bay ribbon as a pull so the voucher can be slid out of the pouch easily.


Flower stamps are definitely my favourite and I never get tired of stamping pretty blooms like these ones!  This is almost a SIP project - SIP standing for Stamps, Ink and Paper - but I did include punching, die cutting and ribbon.  Very simple to make but very satisfying also!

Supplies:
Stamps: SU! 'Pretty Perennials' set
CS: SU! Bermuda Bay, Pool Party & Basic White
Ink: SU! Bermuda Bay, Coastal Cabana, Granny Apple Green, Pool Party & Pumpkin Pie 
Tools: SU! 'Messages' die, circle punches 
Embellishments & Accessories: SU! Bermuda Bay ribbon, Dimensionals

Ruth

Friday 23 April 2021

Flower & Leaves Alcohol Background Thank You Card

Yet another alcohol ink background card, you can tell I am loving this technique!  I recommend this video by Linda Bedinger and this video by Kelly Acheson if you want to discover and use this technique yourself.  I gave butterflies a rest and went for a floral and foliage theme instead.  Here's the card and envelope together.


Here's the card.  I used Dark Flirty Flamingo, Dark Mango Melody and Dark Melon Mambo Stampin' Blends markers with 99% isopropyl alcohol to create the background.  I attached the vellum to a piece of Basic White CS with a piece of double sided tape in the centre, then added a silver brad to each corner and mounted the whole panel to a Melon Mambo card base.  I die cut the flower in three pieces using Melon Mambo, Mango Melody and Flirty Flamingo CS and attached the three layers together with a silver brad.  I die cut the leaves from silver foil CS, adhered that piece and popped the flower up over the top.  I tucked the sentiment label underneath the flower.


Here's the inside of the card.  I only had a small strip of vellum left over and I adhered that to the bottom of my white insert layer.


Here's the envelope with a stamped flower.


Supplies:
Stamps: SU! 'Pretty Perennials' & 'Sweet Strawberry' sets
CS: SU! Flirty Flamingo, Mango Melody, Melon Mambo & Basic White, vellum, silver foil sheet
Ink: SU! Mango Melody, Melon Mambo & Magenta Madness, Dark Flirty Flamingo, Dark Mango Melody & Dark Melon Mambo Stampin' Blends markers
Tools: SU! 'Perennial Petals' die set, paper piercer & piercing mat, flat paintbrush
Embellishments & Accessories: 99% isopropyl alcohol, silver brads, SU! Dimensionals

Ruth

Thursday 22 April 2021

Butterflies Thanks Inside Z Fold Aperture Card

Today I'm sharing my second Inside Z Fold Aperture Card.  I stuck with pink and black but swapped to Melon Mambo instead of Blushing Bride CS.  I stuck with a butterfly theme too because a butterfly card is always a good choice!

Here's the card and envelope together.  This is another alcohol ink background card.  I recommend this video by Linda Bedinger and this video by Kelly Acheson if you want to discover and use this technique yourself.


Here's the card.  The 'thanks' is cut using a die from the SU! 'Well Written' die set and the outline butterflies are from the 'Brilliant Wings' die set.  I added three Matte Black Dots as a finishing touch.


Here's a closer look at the alcohol background.  I've used Dark Daffodil Delight, Dark Flirty Flamingo and Dark Melon Mambo Stampin' Blends markers and 99% isopropyl alcohol dabbed onto vellum CS to create the background.  I adhered the vellum to a piece of Basic White CS and die cut the panel using a die from the SU! 'Stitched Rectangles' die set.


Here's the inside of the card with a strip of the vellum.  I also cut a solid butterfly from the vellum and added a black detailed butterfly over the top.  I stamped the sentiment onto Melon Mambo CS and cut it out with a 'Stitched So Sweetly' die.


Here's the envelope.  After adhering the strip of vellum I drew black lines using a Sharpie marker and added a die cut butterfly.


Supplies:
Stamps: SU! 'So Sentimental' set
CS: SU! Basic Black, Melon Mambo & Basic White, vellum
Ink: SU! Dark Daffodil Delight, Dark Flirty Flamingo & Dark Melon Mambo Stampin' Blends markers, VersaFine Onyx Black, black Sharpie marker
Tools: SU! 'Brilliant Wings', 'Well Written' & 'Stitched So Sweetly' die sets, Claina Palmer 'A6 Double Stitched Nested Dies' set, flat paintbrush
Embellishments & Accessories: 99% isopropyl alcohol, SU! Matte Black Dots

Ruth

Wednesday 21 April 2021

Butterfly Thank You Inside Z Fold Aperture Card

I received a lovely birthday card from a friend that was a fancy fold that I'd never come across before and I just had to make my own version.  I liked it so much I actually made two cards!

Here's the card and envelope together.  This is another alcohol background card, I just love the effects you achieve with this technique!  I recommend this video by Linda Bedinger and this video by Kelly Acheson if you want to discover and use this technique yourself.


Here's the card with a Blushing Bride and Basic Black colour combo.  I've added a black frame around the aperture.


Here's another view of the card.  I'm not sure what you'd call this fancy fold but there's an aperture cut out from the front of the card, a Z fold panel inside and a focal image panel is adhered to the Z fold that nestles inside the aperture.  An Inside Z Fold Aperture Card is what I've settled on to call this fancy fold!


Here's a closer look at the main focal image panel.  I scribbled Dark Daffodil Delight, Dark Flirty Flamingo and Dark Melon Mambo Stampin' Blends markers on a piece of vellum and dabbed on 99% isopropyl alcohol to make the background.  I've adhered the vellum background piece to a Basic White CS panel and cut it out with a Stitched Rectangle die.  I stamped the Thank you in VersaFine Onyx Black ink and heat embossed with clear embossing powder.  I added a die cut butterfly and three Matte Black Dots.


Here's a view of the card fully open.


Here's the inside panel.  I had enough of the alcohol background panel left over to cut a strip for inside and to cut out a solid butterfly.  This technique is wonderful for butterflies!  I added a black outline die cut butterfly over the top.  I stamped the sentiment on a piece of Blushing Bride CS and die cut it with a die from the SU! 'Stitched So Sweetly' die set.


Here's the envelope with another strip of the alcohol background vellum and a black outline die cut butterfly.


Supplies:
Stamps: SU! 'Sweet Strawberry' & 'So Sentimental' sets
CS: SU! Basic Black, Blushing Bride & Basic White, vellum
Ink: SU! Dark Daffodil Delight, Dark Flirty Flamingo & Dark Melon Mambo Stampin' Blends markers, VersaFine Onyx Black 
Tools: SU! 'Brilliant Wings' & 'Stitched So Sweetly' die sets, Claina Palmer 'A6 Double Stitched Nested Dies' set,  heat tool, flat paintbrush
Embellishments & Accessories: 99% isopropyl alcohol, SU! clear embossing powder, Matte Black Dots

Ruth

Friday 16 April 2021

Butterfly Thank You Shadow Box Card

Here's a thank you shadow box card featuring one of the gorgeous butterflies die cut from the SU! 'Butterfly Bijou' patterned paper.  This card will go to a friend to say thank you for my birthday gifts.  Here is the card and envelope together.


Here's the card.  I've used Misty Moonlight CS, papers from the 'Butterfly Bijou' pack and a gorgeous gold foil fern element from the 'Forever Gold Laser-cut Specialty Paper' pack.  I used an oval die from the 'Stitched Shapes' die set to cut out the aperture.  I stamped the 'Thank You' from the 'Peaceful Moments' set in Misty Moonlight ink and used dies to cut out flagged banners.  I finished off by adding three Gilded Gems.


Here's a closer look inside the aperture.


Here's the back of the card with a popped up sentiment element.


Here's the envelope.  I cut the piece of patterned paper too small by mistake so I sliced a tad off the flap to make it fit!


Supplies:
Stamps: SU! 'Peaceful Moments' & 'So Sentimental' sets
CS: SU! Misty Moonlight & Basic White
Patterned paper: SU! 'Butterfly Bijou' 6" x 6" DSP pack, 'Forever Gold Laser-cut Specialty Paper' pack
Ink: SU! Misty Moonlight 
Tools: SU!  'Stitched Shapes' & 'Tasteful Labels' die sets, SU! paper trimmer 
Embellishments & Accessories: SU! Gilded Gems, Dimensionals

Ruth

Thursday 15 April 2021

Fern So Special Alcohol Marker Background Card

Learning a new technique is always exciting and I'm so happy to have learned a technique that produces lovely backgrounds using vellum, alcohol ink markers and alcohol!  Linda Bedinger has this great video tutorial on YouTube demonstrating the technique.  Even better, I didn't need to buy a ton of stuff to get started with the technique - I just had to buy a bottle of 99% isopropyl alcohol.  I've never used alcohol inks before but I have used alcohol markers for colouring so to be able to use my markers to achieve the background effects is fabulous!

Kelly Acheson also has this fab video showing the technique and she shares some tips as well.  I learned from Kelly that the higher percentage alcohol is so much better to use because the vellum doesn't curl up.  I only had 70% alcohol and when Kelly used that the vellum curled up so much and couldn't be made to lie flat.  So I ordered a bottle of 99% isopropyl alcohol, impatiently awaited for it to arrive and the day it came I headed straight to my craft room to play!

Here's the card and envelope together.


Here's the card.  I used Bermuda Bay CS for the card base and the sentiment label.  For the alcohol ink background I scribbled Dark Bermuda Bay and Dark Highland Heather Stampin' Blends markers randomly on a piece of vellum CS using the brush tips.  I poured a small amount of alcohol into a jar and dabbed it onto the vellum using a small flat paintbrush.  This is my first attempt at the technique and I was chuffed to bits that it turned out so well!  I stamped the fern image from the SU! 'Positive Thoughts' set in VersaMark and heat embossed the image with silver embossing powder - and I did the same with the sentiment.  I zigzagged some Gorgeous Grape sheer ribbon and popped up the die cut label over the top.  To finish off I added three purple Glitter Enamel Dots to the label.


Here's the inside of the card.  I needed to trim my vellum piece for the front of the card and I had a leftover strip so I applied that to my white panel.  I stamped the sentiment in Highland Heather ink.


Here's the envelope simply stamped with the beautiful fern image.


I couldn't stop at just one card, I had to try using different colours. The alcohol I decanted into a small jar got discoloured with the inks so I thought I may as well use that to make more cards using similar colours so the alcohol wasn't wasted!  So far I've made four alcohol background cards and I'm itching to make more.  I could be obsessed and I may need to buy a bigger bottle of alcohol!

Supplies:
Stamps: SU! 'Positive Thoughts', 'Tasteful Touches' & 'So Sentimental' sets
CS: SU! Bermuda Bay & Basic White, vellum
Ink: SU! Highland Heather, VersaMark, Dark Bermuda Bay & Dark Highland Heather Stampin' Blends markers
Tools: SU! 'Tasteful Labels' die set 
Embellishments & Accessories: SU! silver embossing powder, Gorgeous Grape sheer ribbon, Glitter Enamel Dots, Dimensionals

Ruth

Monday 12 April 2021

Bird Thank You Diorama/Shadow Box Card

It's been a long time since I've made a shadow box card and Julie Davison made me want to put that right as soon as I came across her lovely card on Pinterest!  I just loved everything about Julie's card and I had to CASE it!  There is this wonderful video on Julie's YouTube channel where she shows how to make her lovely diorama or shadow box card.

Here's the card and envelope together.


Here's the card.  I've used Mint Macaron CS for the base.  I stamped the sentiment in Soft Suede ink on Sahara Sand CS and die cut a label.  I die cut another label shape from So Saffron CS and I popped up the three flowers I stamped in Flirty Flamingo ink.  For the background panel I stamped branch and leaf images and popped up the stamped and die cut bird.  As a finishing touch I added a silver metallic pearl to each flower centre.


Here's a closer look at the sweet bird inside the aperture.


Here's the back of the card.


Here's the envelope.  The 'Birds & More' die set contains a fancy leafy border die that co-ordinates with the circle die I used as the aperture on the card and I wanted to use it to decorate the envelope.  I cut out the design from the envelope flap and then backed the flap with a piece of Mint Macaron CS that I trimmed to shape.


Supplies:
Stamps: SU! 'Birds & Branches' & 'Peaceful Moments' sets
CS: SU! Mint Macaron, Sahara Sand, So Saffron & Basic White
Ink: SU! Basic Gray, Flirty Flamingo, Mint Macaron, Sahara Sand, So Saffron & Soft Suede
Tools: SU! 'Birds & More' die set, 'Messages' die, SU! paper trimmer
Embellishments & Accessories: SU! Metallic Pearls, Dimensionals

Ruth

Sunday 11 April 2021

Feather Thanks Impossible Card

Another fancy fold card - this time an impossible card - that I saw on this fab YouTube video made by Julie Davison.  I've received plenty of inspiration from Julie recently!  I hadn't seen one of these cards before and it looked interesting so I thought I'd give it a whirl.

Here's the card and envelope together.  I made the card for my husband Owen to thank him for my birthday gifts.  As the card was hand delivered I made a pouch envelope from patterned paper.


Here's the card made from a quarter sheet of Night of Navy A4 CS.  One score, three cuts and a twist and the card base is made.  I've used four pieces of patterned paper from the SU! 'In Good Taste' DSP pack to decorate the impossible card base.  In Julie's video she cuts her patterned paper pieces differently.  I did try to work out measurements for my A6 sized card base to do it the same way as Julie but I came to grief so decided to cut four pieces! 

I've used the SU! 'Tasteful Touches' stamp set and the 'Tasteful Labels' die set, both of which were part of my birthday gift from Owen.  I stamped the 'thanks' (from the 'Simple Succulents' set) in Night of Navy ink on some patterned paper from the 'In Good Taste' DSP pack and cut it out with a label die.  I randomly stamped the feather over the label in stamped off once Night of Navy ink and inked the edges of the label in navy ink using a sponge dauber.  I glued the stamped label to a larger Smoky Slate die cut label and popped that up on the card base.  I rounded the corners of the main panel and popped up a feather that I'd stamped in Night of Navy ink and fussy cut.  I cut a 1 1/8" strip of Night of Navy CS to act as a stabilising strip for the impossible card.  I cut a 1" strip of patterned paper, stamped the squares pattern a few times using stamped off once Night of Navy ink, inked the edges, glued the paper strip to the CS strip and adhered the whole strip in place.  I added some long hoarded, but never used, 'Urban Underground' metal embellishments to finish the front.


Here's a different view.


And a side view.


Here's the back of the card where I added a panel of patterned paper layered onto a mat of Smoky Slate CS as a place to write my message.


Here's the pouch envelope.  I've used two dies from the 'Tasteful Labels' die set to make a name label element.  I just love how that patterned paper really looks like fabric!


Supplies:
Stamps: SU! 'Tasteful Touches' & 'Simply Succulents' sets
CS: SU! Night of Navy & Smoky Slate
Patterned paper: SU! 'In Good Taste' DSP pack
Ink: SU! Night of Navy 
Tools: SU! 'Tasteful Labels' die set, SU! paper trimmer, SU! 3/4" circle punch, X Cut corner rounder punch, sponge dauber 
Embellishments & Accessories: SU! 'Urban Underground' metal embellishments, Dimensionals

Ruth

01 09 10