Thursday 31 December 2020

Floral Fab At 50 Card

This is the card I made for a friend's 50th birthday using some brand new Stampin' Up! supplies.  It's no secret I love flower stamps and the upcoming January to June 2021 Mini Catalogue has some beautiful flower stamps.  I pre-ordered the 'Pretty Perennials' stamp set with the matching 'Perennial Petals' die set.  The flowers have that lovely water coloured look to them.

Here's the card and envelope together.


The card measures 5 3/4" square and I've used a colour combo of Balmy Blue, Night of Navy and white with a hint of Garden Green provided by the leaves.  I inked the large flowers in Balmy Blue ink and then added some Night of Navy ink with a sponge dauber.  I die cut some flower shapes in vellum and layered those on top of the stamped flowers.  I die cut the '50' using Balmy Blue Glimmer Paper and I included some of the Glimmer Paper as a mat layer so there's a definite touch of sparkle to the card.  I used foam adhesive sheets with the Glimmer Paper so that the die cut numbers are dimensional.  I used the 'Playful Alphabet' dies to cut out 'Fab At' in Night of Navy CS.  I sprinkled on some iridescent blue gems to finish the front.


Here's the inside of the card.


Here's the envelope flap.


Here's the front of the envelope with a popped up name label.


Supplies: 
Stamps: SU! 'Pretty Perennials' & 'Fancy Phrases' sets
CS: SU! Balmy Blue, Night of Navy & Whisper White, Balmy Blue Glimmer Paper, vellum
Ink: SU! Balmy Blue, Garden Green & Night of Navy   
Tools: SU! 'Perennial Petals', 'Playful Alphabet', 'Large Numbers', 'Stitched Rectangles' & 'Stitched So Sweetly' die sets, sponge dauber
Embellishments & Accessories: SU! blue self adhesive gems, Dimensionals 

Ruth

Monday 28 December 2020

Partridge & Pears Wreath Merry Christmas Card

This is the last Christmas card I made in 2020 and it's for my hubby Owen.  I made way more Christmas cards than I needed so I have lots left in the stash all ready for next year.  Here's the card and envelope together.


I used a 6" x 6" kraft card base with matching envelope.  The SU! 'Poinsettia Place' DSP pack has some lovely papers that are perfect for masculine cards.  I cut a square of woodgrain paper and matted that onto layers of Soft Suede and Garden Green CS.  I die cut the berry wreath from Soft Suede CS and the leafy wreath from Garden Green CS and glued the two die cuts in place.  I stamped the partridge in Soft Suede ink, die cut and popped him up.  I inked the pears with Crushed Curry ink and applied some Cherry Cobbler ink to the stamps with a sponge dauber to add some extra colour and dimension.  The pears are also popped up.  I made a 'Merry Christmas' sign, added some linen thread, attached the sign with a metallic green brad and popped it up.


Here's the inside of the card.  After stamping that lovely sentiment I added a strip of patterned paper, drew a line with a Soft Suede marker and glued the stamped and die cut partridge in place.


More of that pine bough and cones patterned paper went on the envelope flap to finish.


Supplies:
Stamps: SU! 'Arrange a Wreath' & 'Frosted Foliage' sets
CS: Dovecraft 6" x 6" kraft card & envelope, SU! Garden Green, Soft Suede & Whisper White
Patterned paper: SU! 'Poinsettia Place' DSP pack
Ink: SU! Cherry Cobbler, Crumb Cake, Crushed Curry, Garden Green & Soft Suede, SU! Soft Suede Stampin' Write marker  
Tools: SU! 'Wreath Builder' die set, paper piercer, sponge dauber
Embellishments & Accessories: green metallic brad, SU! linen thread, Dimensionals 

Ruth

Saturday 26 December 2020

SU! Gift Voucher Wallet

A friend's husband contacted me and asked me to order some SU! goodies as a Christmas gift for his wife and he also wanted to give her a £50 SU! gift voucher.  After I'd printed the voucher I knew I wanted to present it in a pretty way and I set about making a wallet.

Here's the wallet and envelope together.


Here's the wallet.  I cut a 9" x 4 1/8" piece of  Highland Heather CS and scored at 3 3/8" and 7 1/2".  I adhered a panel of beautiful snowflakes patterned paper and added some iridescent ribbon.  I die cut Misty Moonlight snowflakes, added Highland Heather punched circles and popped the snowflakes up.  I added an iridescent snowflake embellishment to each snowflake centre.  I stamped snowflakes using stamped off once Highland Heather ink, stamped the sentiment over the top in Misty Moonlight ink, die cut a stitched square and popped that up.


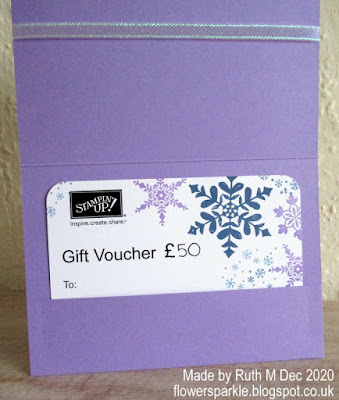
Here's the inside of the wallet.  I got the voucher printed onto Whisper White CS and I stamped snowflakes using Highland Heather and Misty Moonlight inks.  I rounded the corners with a punch before tucking the voucher inside the pocket.   


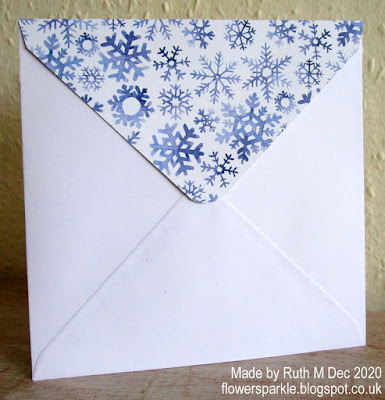
Here's the envelope flap.


Here's the front of the envelope with a popped up name label.


Supplies:
Stamps: SU! 'Snowflake Wishes' set, Woodware 'A Gift for You' stamp 
CS: SU! Highland Heather, Misty Moonlight & Whisper White
Patterned paper: SU! 'Snowflake Splendor' DSP pack
Ink: SU! Highland Heather & Misty Moonlight  
Tools: SU! 'Snowfall' & 'Stitched So Sweetly' die sets, Simply Scored, circle punches, X Cut corner rounder punch
Embellishments & Accessories: SU! 'Snowflake Splendor' ribbon, self adhesive snowflake embellishments, Dimensionals

Ruth

Thursday 24 December 2020

Two Gilded Faux Silk Background Snowflake Cards

The faux silk technique involves gluing crumpled tissue paper over the top of a piece of CS.  Often the tissue paper is glued over the top of a stamped image.  The technique is also great to create a textured background.  The gilded faux silk technique is where you highlight the textured tissue paper with embossing powder.  I saw a video a few months back and made a mental note to try it out.  

Here's one card with an envelope.


Here's the Highland Heather card.  To create the backgrounds I cut pieces of tissue paper and gently crumpled them into a ball, unfolding and recrumpling the pieces a few times.  The more crumpled the tissue paper is the more texture it has but tissue paper is delicate so gently is the way to go.  I glued the tissue paper pieces to panels of Whisper White CS and applied Balmy Blue, Highland Heather and Misty Moonlight inks to the panels using oval blending brushes.  Next I wiped my VersaMark ink pad all over the panels and sprinkled on silver embossing powder.  The powder should cover the wrinkles but the powder usually covers quite a bit of the surface area.  As I didn't want total coverage I wiped off some of the powder with a finger before I heat set with my heat tool.  


Here's a closer look at the background panel.


Here's the Misty Moonlight card.


Here are both cards.  The cards measure 5 3/4" square and I added a strip of CS that I'd embossed with the 'Winter Snow' embossing folder to the right side of the card.  I die cut three snowflake shapes from the SU! 'Snowfall' die set and assembled my main snowflake images - the smaller snowflake shapes are popped up.  I glued the background panels in place, popped up the snowflakes and popped up the stamped and die cut sentiment banners.  I added iridescent blue gems as a finishing touch to the card fronts.  


Here's the inside of the Highland Heather card.  I added three silver glimmer paper die cut snowflakes to play up the 'sparkle' sentiment.


Here's the inside of the Misty Moonlight card.


I used some gorgeous Misty Moonlight snowflake patterned paper to decorate the envelope flaps.


Supplies:
Stamps: SU! 'Snowflake Wishes' set
CS: SU! Highland Heather, Misty Moonlight & Whisper White, Silver Glimmer Paper
Patterned paper: SU! 'Snowflake Splendor' DSP
Ink: SU! Balmy Blue, Highland Heather & Misty Moonlight, VersaMark 
Tools: SU! 'Snowfall' die set, SU! 'Winter Snow' embossing folder, Claina Palmer 'A6 Double Stitched Nested Dies' set, MFT 'Fishtail Flags' Stax die set, oval blending brushes
Embellishments & Accessories: SU! silver embossing powder, self adhesive blue gems, Dimensionals 

Ruth

Wednesday 23 December 2020

Wobble Snowman Celebrate The Season Christmas Card

Making a few wobble Christmas cards this year has been great fun for me and people have loved receiving them too!  I felt it was high time I made a wobble snowman card and I've used a much loved old snowman stamp to create this cute little number.

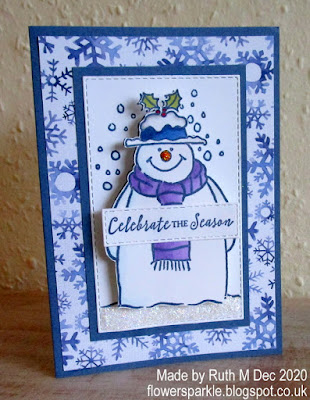
Here's the card and envelope together.  I love this particular paper from the SU! 'Snowflake Splendor' DSP pack, it looks like it has a linen texture to it when you look closely.


I made the card base with SU! Misty Moonlight CS and I added a panel of snowflake patterned paper.  I stamped the Hobby Art 'Giant Snowman' image in Misty Moonlight ink onto a panel of Whisper White CS, die cut a stitched rectangle and layered it onto a mat of Misty Moonlight CS.  I stamped a separate snowman which I coloured using SU! Stampin' Blends and I fussy cut that out.  I added Star Dust Stickles glitter glue to the snow on the bottom of the white panel and added Orange Peel Stickles to the snowman's nose.  I stamped the sentiment, die cut a stitched rectangle and popped that up on the snowman.  I mounted the snowman on a wobble spring to complete the card front.


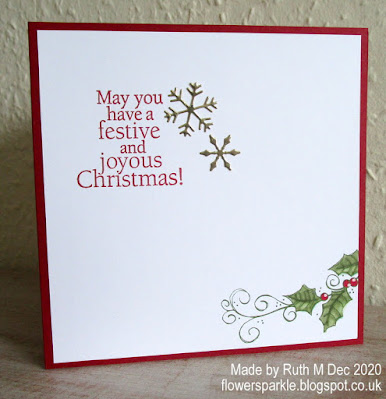
Here's the inside of the card.


Here's the envelope.


Supplies:
Stamps: Hobby Art 'Giant Snowman', SU! 'Itty Bitty Christmas' & 'Frosted Foliage' sets, Hero Arts 'Very Merry Christmas' set
CS: SU! Misty Moonlight & Whisper White
Patterned paper: SU! 'Snowflake Splendor' DSP pack
Ink: SU! Misty Moonlight, SU! Stampin' Blends  
Tools: Claina Palmer 'A6 Double Stitched Nested Dies' die set 
Embellishments & Accessories: Star Dust & Orange Peel Stickles, wobble spring 

Ruth

Monday 21 December 2020

Lighthouse & Snowflakes Christmas Card

This card was made especially for my friend Ryan at work.  We both love films and we've been to the cinema together a couple of times this year.  One of our favourite films from 2020 was the Robert Eggers directed film The Lighthouse.  I thought it would be fun to make Ryan a lighthouse themed Christmas card!  As the film was made in black and white I stuck to a palette of black, grey and white.  Here's the card and envelope together.


The card measures 5 3/4" square and I heat embossed the sentiment with white embossing powder.  I used Gray Granite, Smoky Slate and Memento Tuxedo Black inks to stamp the lighthouse scene.  I cut that out with a stitched rectangle die and layered that onto a mat of Smoky Slate CS which I popped up on Dimensionals.  I added white snowflakes that I cut using dies from the SU! 'Snowfall' die set.


Here's the inside of the card.


Here's the envelope.


It was great fun to make a seasonal card with an unusual theme and it was very gratifying that Ryan appreciated it!

Supplies: 
Stamps: SU! 'High Tide', 'Snowflake Wishes' & 'Frosted Foliage' sets, Penny Black 'A Merry...' stamp
CS: SU! Basic Black, Smoky Slate & Whisper White
Ink: SU! Gray Granite & Smoky Slate, Memento Tuxedo Black  
Tools: SU! 'Snowfall' die set, Claina Palmer 'A6 Double Stitched Nested Dies' die set
Embellishments & Accessories: SU! Dimensionals

Ruth

Sunday 20 December 2020

Two Christmas Gift Card Envelopes

I bought two gift cards as Christmas presents and I wanted to present them nicely so I used my envelope punch board to create envelopes using papers from the SU! 'Poinsettia Place' DSP pack.

Here are the two envelopes together.


Here's the larger envelope which I decorated to look like a present.  I used a stitched strip die to create faux ribbon, I stamped the bow on Old Olive CS using Soft Suede ink and punched it out.  I die cut a tag and popped the tag and the bow up.   


Here's the smaller envelope.  I added a Soft Suede faux ribbon strip and popped up a name label created with dies from the SU! 'Stitched So Sweetly' die set.  This gift card has been given to a male friend - even though it was a masculine project I couldn't resist adding the tiny pinecone embellishments tied onto an Old Olive linen thread bow!


Supplies:
Stamps: SU! 'Gift Wrapped' set 
CS: SU! Old Olive, Soft Suede & Whisper White
Patterned paper: SU! 'Poinsettia Place' DSP pack
Ink: SU! Soft Suede  
Tools: SU! Envelope Punch Board, strip die from 'All Dressed Up' die set, 'Stitched So Sweetly' die set, M&C Boutique tags die set, SU! 'Gift Bow' builder punch 
Embellishments & Accessories: SU! mini pinecone embellishments, Old Olive linen thread, Dimensionals, mini glue dot

Ruth

Friday 18 December 2020

Wobble Gingerbread Man Merry Christmas Card

Yet another wobble Christmas card - and another gingerbread man!  I have a drawer full of images, die cuts, embossed panels - all kinds of stuff that never made it onto a card but that I don't want to throw away.  I hadn't opened the drawer in a very long time and I finally got round to rummaging through the drawer and I found this gingerbread man, all assembled and ready to put on a card.  Perfect for a wobble spring I thought!  He's been languishing in the drawer for ages, I made him when I still owned the XCut 'Gingerbread Family' die set and I certainly haven't got that set now.  I sold the set on ebay and bought just one gingerbread man die - one die is much simpler than having a whole set!

Here's the card and envelope together.


I made a Cherry Cobbler 5 3/4" square card base and adhered a panel of candy cane patterned paper to a mat layer of Shaded Spruce CS.  I popped up the white circle and the sentiment and placed the gingerbread man on the circle with a wobble spring.


I used the candy cane paper to decorate the inside of the card and the envelope.


Supplies: 
Stamps: Penny Black 'Joyous Season' stamp 
CS: SU! Basic Black, Cherry Cobbler, Shaded Spruce & Whisper White, PaperMania kraft CS
Patterned paper: SU! 'Tis the Season' 6" x 6" DSP pack
Ink: SU! Shaded Spruce & Soft Suede  
Tools: XCut 'Gingerbread Family' die set, M&C Boutique stitched circle die set, Tonic Studios 'Slab Merry Christmas' die set, SU! circle punches, sponge dauber
Embellishments & Accessories: wobble spring, SU! Dimensionals

Ruth

Thursday 17 December 2020

Wobble Ornament Jolly Holly Card

I've had the Woodware 'Jolly Holly' stamp set in my stash for a long time but hadn't used it so I decided to rectify that.  I'm definitely on a wobble card kick!  Here's the card and envelope together.


The Cherry Cobbler card measures 5 3/4" square.  I stamped the images in SU! Mossy Meadow ink and used SU! Stampin' Blends to colour them in.  I embellished the circles on the ornament with gold Stickles and added white gel pen highlights to the holly berries.  I stamped, coloured and fussy cut a separate ornament which I mounted on a wobble spring.  I popped up the sentiment rectangle and added three gold foil die cut snowflakes to finish the front.


Here's the inside of the card.


Here's the envelope.


Supplies:
Stamps: Woodware 'Jolly Holly' set, Hero Arts 'Holiday Cheer' set
CS: SU! Cherry Cobbler, Whisper White, Gold Foil Sheet 
Ink: SU! Mossy Meadow & Cherry Cobbler, SU! Stampin' Blends - Mossy Meadow, Cherry Cobbler, Mango Melody & Colour Lifter, white gel pen
Tools: SU! 'Stitched Rectangles' die set, Poppystamps 'Valley Snowflakes' die, SU! circle punches
Embellishments & Accessories: wobble spring, gold Stickles, SU! Dimensionals

Ruth

Wednesday 16 December 2020

Feels Like Frost Paper Christmas Cards

I spent a lovely afternoon in my craft room on a day off from work making eight Christmas cards using Misty Moonlight CS and papers from the SU! 'Feels Like Frost' DSP pack.  I made two sets of cards - four cards featuring snowflakes and four cards featuring ornaments.

Here are the snowflake cards.


Here are the four snowflake cards.  I used a Sweet Dixie die to cut the large snowflakes, added a punched Misty Moonlight circle, placed a small white snowflake in the centre and finished off with a rhinestone jewel.


Here's how I decorated the insides of the cards and the envelopes.


Here are the ornament cards.


Here are the four ornament cards.  I stamped the ornaments in VersaMark,  heat embossed with silver embossing powder, added a die cut silver foil topper and a baker's twine bow and then popped up each ornament.


Here's how I decorated the insides of the cards and the envelopes.


Supplies for snowflake cards:
Stamps: SU! 'Itty Bitty Christmas' set, snowflake stamp from SU! 'Patterned Pines' set, Hero Arts 'Holiday Cheer' set 
CS: SU! Misty Moonlight & Whisper White
Patterned paper: Feels Like Frost 6" x 6" DSP pack
Ink: SU! Misty Moonlight 
Tools: Sweet Dixie 'Large Swirly Snowflake' die, SU! 'Snowfall' die set, circle punch
Embellishments & Accessories: SU! Rhinestone Jewels, Dimensionals

Supplies for ornament cards: 

Stamps: SU! 'Embellished Ornaments', 'Perfectly Plaid', 'Snowflake Wishes' & 'Joyful Holly' sets
CS: SU! Misty Moonlight & Whisper White
Patterned paper: SU! 'Feels Like Frost' 6" x 6" DSP pack
Ink: SU! Balmy Blue & Misty Moonlight  
Tools: SU! 'Delicate Ornament' die set 
Embellishments & Accessories: SU! silver embossing powder, Night of Navy baker's twine, Dimensionals

Ruth

Tuesday 15 December 2020

Snowflake Tag Merry Christmas Card

 Another snowflake themed Christmas card - I am partial to snowflakes!  Here's the card and envelope together.


I made a Highland Heather card base and adhered a white stitched rectangle that I embossed with the SU! 'Winter Snow' embossing folder.  When stamping the snowflakes for the tag and the envelope I inked first in Highland Heather ink and then applied some Misty Moonlight ink with a sponge dauber so that I got multi toned images.  I added some patterned paper and Seaside Spray ribbon to the tag.  I popped the snowflake circle up on the tag and also popped up the tag and sentiment on the card front.  I added a gem to the centre of the snowflake and sprinkled on a few iridescent snowflake embellishments to finish the front.


Here's a closer look at the snowflake on the tag.


Here's the inside of the card.


Here's the envelope.


Supplies:
Stamps: SU! 'Snowflake Wishes', 'Frosted Foliage' & 'Flurry of Wishes' sets
CS: SU! Highland Heather & Whisper White
Patterned paper: SU! 'Feels Like Frost' 6" x 6" DSP pack
Ink: SU! Highland Heather, Misty Moonlight & Seaside Spray
Tools: Claina Palmer 'A6 Nested Dies' set, SU! 'Winter Snow' embossing folder, circle punches, sponge dauber
Embellishments & Accessories: SU! Seaside Spray metallic ribbon, blue gems, snowflake embellishments & Dimensionals

Ruth

01 09 10