Showing posts with label Card Set. Show all posts

Wednesday, 24 November 2021

Painted Christmas Wallet Of Six Cards

Lesley and Wendy visited me on Saturday for a crafty get together and as usual we had a wonderful time!.  Last time they saw this card wallet I'd made and they suggested that as our next project.  I've used the absolutely beautiful SU! 'Painted Season' suite of products to make a wallet that holds six cards.  I added in a couple of Christmas sentiment sets, the 'Wintry' set of 3D embossing folders and some embellishments.

Here's the wallet filled and tied up ready to give as a gift.  I used Real Red CS for the wallet and matted the patterned paper panel onto Pear Pizzazz CS.  The large label is Evening Evergreen which is embossed with the spruce folder from the 'Wintry' embossing folder set.


Here are the six Christmas cards I made to go inside the wallet.  I really enjoyed making three each of two designs.


Here are the two card designs with their matching envelopes.


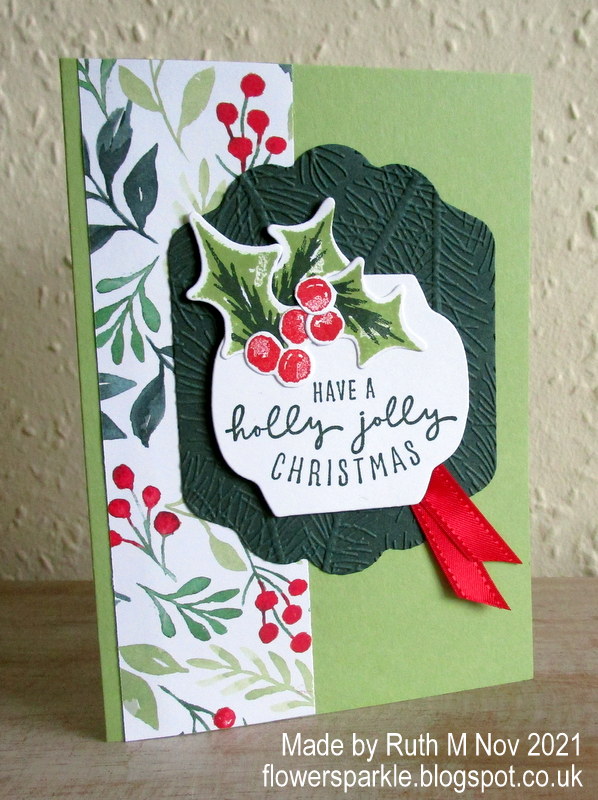
Here is the holly jolly Christmas card.  The card base is Pear Pizzazz and the large label is Evening Evergreen which is embossed with the spruce folder from the SU! 'Wintry' set of embossing folders. I used Pear Pizzazz and Evening Evergreen inks to stamp the holly leaves and the berries are stamped in Real Red ink. The white label is popped up on Dimensionals.  The red ribbon is a lovely festive embellishment.
 

Here's the inside of the holly jolly card.


Here's the Be of Good Cheer card.  The card base is Crumb Cake and the large label is Real Red which I embossed with the snowflakes folder from the 'Wintry' embossing folder set.  I used  Crumb Cake and Soft Suede inks to stamp the pine cones, Pear Pizzazz ink for the foliage at the top and Pear Pizzazz and Evening Evergreen for the leaves at the bottom.  The white label is popped up on Dimensionals - and I placed it lengthways on this card whereas it's widthways on the holly jolly card design.  The festive embellishment for this card is three red rhinestone jewels.


Here's the inside of the Be of  Good Cheer card.


Here are the six envelopes.


Here's the wallet ready to be filled with the cards.  To make the wallet I trimmed a Real Red A4 piece of CS to 11", scored the long side at 5" and 6" and scored  the short side at 6 3/4" and 7 1/4".  I cut slits to make the fold up tabs and as they only measured 1" and I wanted them to be deeper I cut two 4 1/2" x 2" pieces of CS, rounded the top corners and glued them to the smaller tabs.


Here's the cards inside the wallet.  This size is perfect for six A6 cards and envelopes where one layer of Dimensionals has been used on each card.  If you didn't make dimensional cards you could fit eight cards and envelopes inside - maybe up to ten even.  I like my Dimensionals too much though!
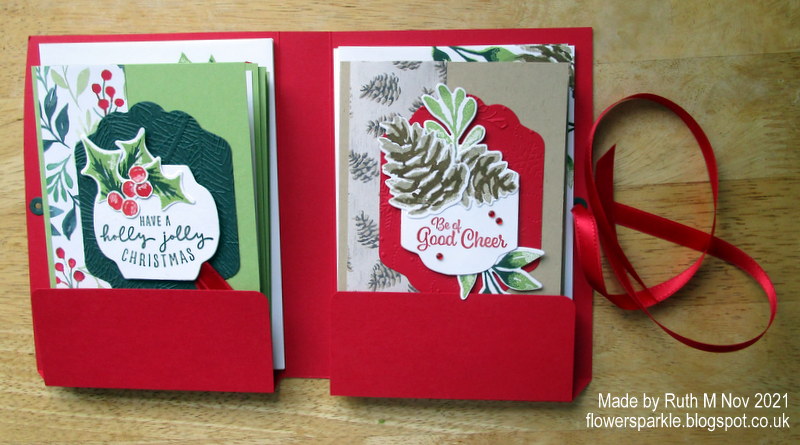

Here's a view from the side.


Here's a closer look at the label on the front of the wallet.  I stamped a foliage background on the white label using stamped off once Pear Pizzazz ink and stamped the sentiment in Evening Evergreen ink.  I popped up the Evening Evergreen label, the white label and the holly berries.  I added gold holly leaf embellishments and red rhinestone jewels as a final finishing touch.


This was such a lovely project to work on, I really enjoyed spending some time in my craft room creating and prepping while on a week off from work!  I'm going to have a hard time giving this wallet of cards away!

Following my week off I've started a new job, a part time Customer Service role working in an office on the phones.  For the past six years at Wilko I've worked weekends and not always had a set schedule.  I'm excited that I won't be working weekends now and I have a set pattern of work days and shift times - how lovely!  Arranging crafty days with Lesley and Wendy will be SO much easier and I'll have more crafty me time as well, what a result!

Supplies:
Stamps: SU! 'Christmas Season', 'Christmas to Remember' & 'Holly Jolly Wishes' sets
CS: SU! Crumb Cake, Evening Evergreen, Pear Pizzazz, Real Red & Basic White
Patterned paper: SU! 'Painted Christmas' DSP
Ink: SU! Crumb Cake, Evening Evergreen, Pear Pizzazz, Real Red & Soft Suede 
Tools: SU! 'Seasonal Labels' & 'Tailor Made Tags' die sets, 'Wintry' set of 3D embossing folders, Crop-A-Dile, corner rounder punch
Embellishments & Accessories: SU! Real Red Double Stitched Satin ribbon, Red Rhinestone Basic Jewels, Gold Holly Leaves, Dimensionals

Ruth

Monday, 25 October 2021

Joy To The World Paper Pumpkin Kit Christmas Cards Wallet

Quite a while ago I bought the SU! 'Joy to the World' Paper Pumpkin kit.  The kit contained everything needed to create eight Christmas cards.  I finally got round to putting the cards together and once I'd finished I decided to package them up in a wallet so I can give the cards as a gift.  This will be a surprise early Christmas gift for one of my friends.

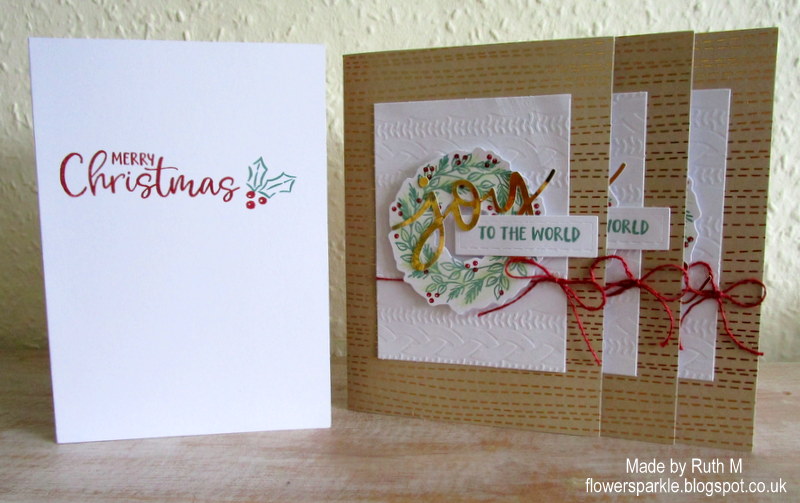
Here's the wallet of cards filled and tied up ready to be given.  I used Crumb Cake CS to make the wallet and I decorated the front with some elegant red patterned paper, floral elements from the 'Joy to the World' kit and a die cut label element.


Here's another view.


Here's a side view showing the cards and envelopes tucked inside the wallet.


Here's the wallet opened out with four cards and envelopes on each side.


Here are the two wreath Joy to the World cards.


Here are the two wreath Sending Peace cards.


Here are the four floral Merry Christmas cards.


Here's how I stamped the insides of the Joy to the World and Sending Peace cards.


Here's how I stamped the insides of the floral Merry Christmas cards.


The envelopes had a decorative printed liner inside.  


I made this card wallet a few months back but that was to hold six cards.  I used the same method to create this wallet but I had to tweak the measurements to make it large enough to hold the eight dimensional cards.  I'd already put the cards together and made them fairly dimensional before I decided to make the wallet.  I'll know better next time - if I remember!

Ruth

Tuesday, 16 February 2021

Portfolio Holding Six Best Wishes Cards

A little while ago I saw this YouTube video by Kelly Acheson where she made a card portfolio/wallet that held eight cards.  Kelly also shows  photos of the project on her blog post here.  It seemed easy to put together so I thought I'd have a go at making one myself.  As Kelly uses US sized CS I had to adapt some measurements for UK sized CS but I made it work, yay!  

I followed Kelly's instructions for putting the portfolio together but I did change the cutting and scoring measurements.  I trimmed an A4 piece of CS to 11", scored the long side at 5" and 6" and scored  the short side at 6 3/4" and 7 1/4".  I cut slits to make the fold up tabs and as they only measured 1" and I wanted them to be deeper I cut two 4 1/2" x 2" pieces of CS, rounded the top corners and glued them to the smaller tabs.

One of the Stampin' Up! Sale-A-Bration offerings (free with a qualifying £45 purchase) is a pack of 12" x 12" 'Paper Blooms' DSP.  It's really pretty paper and I chose to use that for my project.  Here's the portfolio all finished, filled up with cards and tied closed.  


Here's a side back view.  Kelly said the portfolio could hold eight cards.  I used Dimensionals on my six A6 sized cards and they fitted really nicely.  If no 3D foam tape was used you could definitely fit eight cards inside.


Here's a view from the front where you can see the angled flaps.  


Here's the portfolio open with the cards and envelopes inside.


Here's the empty portfolio, it's like a folder basically, a couple of score lines and some flaps turned up at the bottom to keep the contents in place.  You can see I added hole reinforcers to the ribbon holes.  Pretty but practical too!


On this photo I've pulled the flap down to show what small sized flaps I had originally. With the size of our UK card blanks and CS you do end up with flaps just 1" deep and I was concerned they weren't deep enough.  So I cut two separate pieces of 4 1/2" x 2" Night of Navy CS, rounded the top corners and glued them to the front of both  flaps - issue sorted!  


Here are all six cards and envelopes.  I've used a very simple layout which is easy to replicate when making multiples.  I used a 'Stitched Rectangles' die to cut the patterned paper strips, glued them to a Seaside Spray CS panel, added some Seaside Spray metallic ribbon and the sentiment label was popped up over the top. Stamped and punched small flowers were added to the label to finish.


Here are the three Rococo Rose cards.


Here are the three Night of Navy cards.


Here's a closer look at just one of the Rococo Rose cards.  I used the beautiful 'Best Wishes' stamp from the 'A Touch of Ink' set and each sentiment label is popped up on Dimensionals.  I used flower stamps from the 'Sweet Strawberry' set and cut them out with the 'Strawberry' builder punch.  On the Rococo Rose cards I stamped the sentiment in Rococo Rose ink and added two blue flowers to the label.


Here's a closer look at just one of the Night of Navy cards.  On the Night of Navy cards I stamped the sentiments in Night of Navy ink and added two Rococo Rose flowers to the label.


Strips of pretty patterned paper were used to decorate each card on the inside and to decorate each envelope.  After gluing the paper strips in place I drew a line with a navy blue Sharpie marker to add some defining detail.


Supplies:
Stamps: SU! 'A Touch of Ink' & 'Sweet Strawberry' sets
CS: SU! Night of Navy, Rococo Rose, Seaside Spray & Whisper White
Ink: SU! Night of Navy, Rococo Rose & Seaside Spray, navy blue Sharpie marker
Tools: SU! 'Stitched Rectangles' die set, SU! 'Strawberry' builder punch, SU! trimmer with scoring blade, MFT 'Tag Builder Blueprints 2' die set, Crop-A-Dile
Embellishments & Accessories: SU! Seaside Spray metallic ribbon, Dimensionals

Ruth

Thursday, 10 December 2020

Set Of Starry Note Cards

Back in July I made this set of 8 floral note cards for Petra which I presented in a cello bag.  Petra asked me if I could make a set of note cards for her to give as a gift but with a stars theme.  I don't have star themed goodies in my stash but my lovely friend Lesley came to my rescue by loaning me her SU! 'Star of Light' stamp set and 'So Many Stars' die set.

I made 2 each of 4 colour combo cards. I inlaid the stars into the swirl die cut shape - fiddly and time consuming but the end result was worth it I think!  I added a clear epoxy star embellishment to each star at the bottom of the die cut swirl.  Here are the note cards.


For these two cards I stamped the swirls in Coastal Cabana ink.  Then I used Night of Navy and Bermuda Bay CS for the die cut swirl and the sentiment is stamped in Night of Navy ink. 


These 2 cards have a colour combo of Highland Heather and Gorgeous Grape.


The colour combo for these 2 cards is Mint Macaron and Shaded Spruce.


For the last 2 cards the colour combo is Seaside Spray and Misty Moonlight.


I stamped the starry swirl on the inside of each card and on the front of each envelope using the appropriate colour of ink.


Once I'd finished I popped the 8 note cards in a cello bag and attached a die cut tag tied on with Mint Macaron ribbon. 


Here's a closer look at the tag.  I stamped the starry swirl in Mint Macaron ink and stamped the sentiment in Shaded Spruce ink.  I used the SU! 'Stitched So Sweetly' die set to cut the scalloped rectangles for the tag.  I popped up the white rectangle, added 3 tiny Shaded Spruce die cut stars and placed a clear epoxy dot on the centre of each star.  


Supplies:
Stamps: SU! 'Star of Light', 'Fancy Phrases' & 'Lots of Happy' sets
CS: SU! Whisper White Note Cards & Envelopes, Bermuda Bay, Gorgeous Grape, Highland Heather, Mint Macaron, Misty Moonlight, Night of Navy, Seaside Spray, Shaded Spruce & Whisper White
Ink: SU! Coastal Cabana, Gorgeous Grape, Highland Heather, Mint Macaron, Misty Moonlight, Night of Navy, Seaside Spray & Shaded Spruce  
Tools: SU! 'So Many Stars' & 'Stitched So Sweetly' die sets, Crop-A-Dile
Embellishments & Accessories: cello bag, SU! Mint Macaron linen ribbon, clear epoxy shape embellishments

Ruth

Sunday, 23 August 2020

8 Box Of Sunshine Cards - Stampin' Up! Box of Sunshine Paper Pumpkin Kit

Stampin' Up! Paper Pumpkin kits are monthly subscription paper crafting kits available in North America only.  SU! have made the 'Box of Sunshine' Paper Pumpkin kit available to other markets in August - exciting stuff!  The Paper Pumpkin kits come packaged in sturdy cardboard boxes and the 'Box of Sunshine' card kit comes in a pretty yellow box.  The idea is that after you've made the cards you fill the box with yellow items, decorate the box and gift the 'Box of Sunshine' to someone - what a lovely idea!

Here's the box and the stickers for decorating the box.


The card kit came with fancy card bases, a stamp set, a mini ink pad, stickers, sentiment banners, glue dots, Dimensionals and pretty adhesive sequins.  I made up the cards straight away!  Here are the 8 cards and envelopes.


Here are the two pineapple You are Loved cards.


Here are the 2 Sending Sunshine cards.


Here are the 2 Hello cards.


Here are the 2 lemon Brighten your Day cards.


Here are the gold foiled envelopes.


I had a great time putting the cards together and I'm now busy searching out yellow items to place inside the box so that I can share some sunshine!  It's great fun and I'll share the box when I've filled and decorated it!
Ruth

Thursday, 30 July 2020

Lots & Lots Of Happy Cards - Gift Set

This is a set of eight note cards and envelopes I made for Petra who made me a lovely fabric bag to keep my face masks in.  I think it's a lovely thing when crafters share their hand made goodies!  

Here are all eight cards pegged up on my new hexagon display thingy.  I kept to the same design but switched the colours up, making two of each colour combo.  It's very satisfying to see a collection of cards together!


Here are four cards showing the colour combos - from left to right it's Just Jade with Magenta Madness, Pear Pizzazz with Calypso Coral, Granny Apple Green with Highland Heather and Old Olive with Bermuda Bay.  I like them all but if I had to pick a favourite it would be Granny Apple Green with Highland Heather and Just Jade with Magenta Madness would be a close second!


Here's just one card.  The SU note cards measure 3 1/2" x 5" so are smaller than a standard A6 card.  The fern and flower images are from the SU! 'Positive Thoughts' stamp set and the happy sentiment is from the 'Lots of Happy' set that went with the 'Lots of Happy' card kit.  I used full strength ink and stamped off once ink (second generation stamping) for the ferns and flowers.  The 'Positive Thoughts' set does have a butterfly stamp but I tried it and felt it was too large for the smaller sized note card so I opted to punch the smaller butterfly from the 'Butterfly Duet' punch.  After shaping the wings I added rhinestone jewels to add some sparkle to the butterflies.


Of course, the insides of the note cards and the envelopes had to be stamped too!  That fern has to be one of the prettiest stamps ever!


Once I'd finished I placed the note cards and envelopes in a cello bag and added a tag tied with a ribbon bow.


Here's a closer look at the tag.  I die cut a shape from the 'Stitched So Sweetly' set of dies and popped up a 'Stitched Shape' oval.  I love that sentiment from the 'Fancy Phrases' set - it's perfect for a gift tag!  I punched a Granny Apple Green butterfly and added three rhinestone jewels.  I tied the tag onto the bag with the purple Tricolor Ribbon which ties so beautifully.


Supplies:
Stamps: SU! 'Positive Thoughts', 'Fancy Phrases' & 'Lots of Happy' sets
CS: SU! Whisper White Note Cards & Envelopes, Bermuda Bay, Calypso Coral, Highland Heather, Magenta Madness & Whisper White
Ink: Bermuda Bay, Calypso Coral, Granny Apple Green, Highland Heather, Just Jade, Magenta Madness, Old Olive & Pear Pizzazz
Tools:SU! 'Butterfly Duet' punch, 'Stitched Shapes' & 'Stitched So Sweetly' die sets, Crop-A-Dile, X Cut 3/8" circle punch
Embellishments & Accessories: cello bag, SU! purple Tricolor Ribbon, Rhinestone Jewels

Ruth

01 09 10