Wednesday 24 August 2016

Flowers & Ginkgo Leaves 50th Birthday Wish Card

We were invited to our neighbour Elke's 50th birthday barbecue and I wanted to create a card for her.  I ended up not having a lot of time to make the card so to make things easier and quicker I based the card on one I'd made earlier for the August card group meeting - a card I'd CASEd from Pinterest.  When you have colours, layout and supplies sorted out a card comes together very quickly!  For this card I changed the colour of the card base, swapped butterflies for flowers, used an extra mat layer and added the numbers and a birthday sentiment.

The Melon Mambo card base measures 5 1/2" square.  I stamped the Weave Backgrounder in Antique Linen Distress Ink, the leaves in Wild Wasabi ink and the flowers in Melon Mambo ink - stamping three times before re-inking to get different shades of pink.  I die cut a stack of numbers and glued them together to give dimension.  I snipped between the flower petals, shaped each flower, glued them in place and added a rhinestone jewel to each flower centre.


Here's the inside and the envelope - you can tell I love those ginkgo leaves!  I'm very happy to say Elke loved the card!


Supplies:
Stamps: Cornish Heritage Farms 'Weave Backgrounder' stamp, PTI 'Harvest Berries' set, SU! 'Number of Years' & 'Petite Petals' sets, 'Birthday Wish' from Woodware 'Love Tulips' set, Hero Arts 'Everything Wonderful'
CS: SU! Melon Mambo, Wild Wasabi, Basic Black & Whisper White
Ink: Memento Tuxedo Black, SU! Melon Mambo & Wild Wasabi, Ranger Tim Holtz Antique Linen Distress Ink
Tools: SU! 'Large Numbers' Framelits dies, SU! 'Petite Petals' punch, embossing tool & foam mat, Sizzix 'Card, Fancy Frame Flip-its #2' Framelits die set
Embellishments & accessories: SU! rhinestone jewels, Dimensionals


 photo RoseRuth.gif

Friday 19 August 2016

Jar Of Roses Birthday Wish Card

A little while ago I made this vase of hydrangeas card using the Stampendous 'Build a Bouquet' stamp set.  It's such a lovely set and I couldn't wait to use it again!  This time I've used the jar and roses from the set to make a birthday card.  Next time I must use the daisy stamp from the set!

I stamped the jar onto a panel of watercolour paper and stamped the rose cluster and the leaves onto a separate piece of watercolour paper.  I coloured all the images by watercolouring with SU! inks and a wet paintbrush.  I trimmed the panel to size, layered it onto a mat of black CS and added Pretty in Pink brads.  I adhered some very pretty patterned paper to the bottom of the white 5" x 7" card base and added a narrow strip of black CS above the paper.  It's impossible to tell from the photo but the patterned paper has a lovely pearlescent sheen to it.  The jar image has the word 'Hello' on it but I wanted to cover that up so I popped up the 'Birthday Wish' sentiment label and then I also popped up the leaves and roses,


Here's the inside and the envelope featuring more of the gorgeous patterned paper.


Supplies:
Stamps: Stampendous 'Build a Bouquet' cling stamp set, 'Birthday Wish' from Woodware 'Love Tulips' set, Inkylicious 'Wonderful Day' stamp
CS: PaperMania 5" x 7" white card blank, SU! Basic Black & Pink Pirouette, watercolour paper

Patterned paper: First Edition 'Floral Pavilion' 6" x 6" pad
Ink: VersaFine Onyx Black, Memento Tuxedo Black, SU! Rose Red, Garden Green, Lost Lagoon & Smoky Slate
Tools: Sizzix 'Banners, Fancy' & 'Charms, Fancy' die sets, Nestabilities Labels Four dies, SU! 'Mat Pack' & paper piercer, sponge dauber, paintbrush
Embellishments & accessories: SU! Pretty in Pink brads, Dimensionals


 photo RoseRuth.gif

Friday 12 August 2016

August 2016 Card Group Projects

Today I'm sharing the three cards I designed for my card group ladies to make at our August meeting which we had yesterday.  For some reason this month things didn't come together at all easily.  Each time I sat down to design a card group card my mojo seemed to disappear.  I wasn't happy with the finished cards and had to start all over again.  After this happened a few times I knew I'd have to make things easier for myself by CASEing designs and keeping things simple!  Thank goodness for the SU! catalogue and Pinterest!

This lovely card made by Dena Rekow was my inspiration for the first card.  I embossed the right side of the A6 Island Indigo card base with the SU! 'Petal Burst' folder - after I'd finished the card I saw that Dena had used the debossed side which I think I prefer. d'oh!  I showed the ladies both embossed and debossed and let them choose which they wanted on their cards - debossed was the favourite.  I used a Sizzix 'Banners, Fancy' die to make a tag, stamped the flower in Rich Razzleberry ink and stamped 'Gorgeous Grunge' splatters a few times in Pool Party ink.  I die cut 'ribbon' using Pool Party CS and a Memory Box 'Grosgrain Ribbons' die, snipped a couple of pieces and attached them to the tag with a Rich Razzleberry brad.  I die cut a Pool Party and a Rich Razzleberry fishtail flag, glued those to the card front and then popped up the tag.


Here's the inside and the envelope.  I used the largest die in the Sizzix 'Banners, Fancy' set to make the insert.  It made a nice change from using just a panel of white CS!


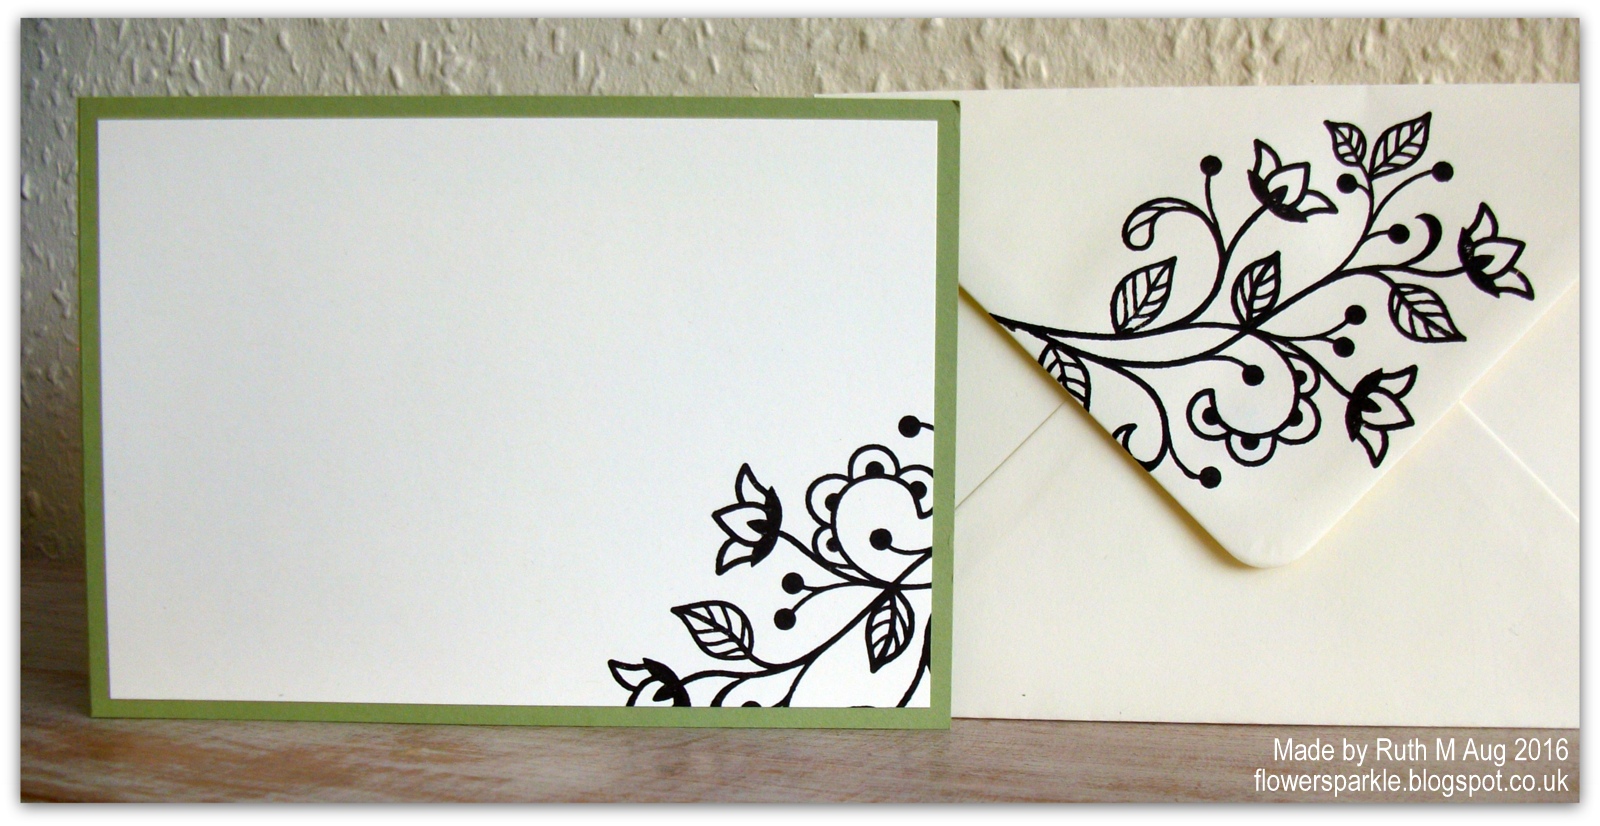
The second card was based on a card on page 48 of the SU! 2016 - 2017 annual catalogue - I really like the trio of die cut leaves.  However, I'm not keen on the sentiment banner covering up the pretty leaves so I had to tweak the design a bit!  I opted for a Pear Pizzazz, Early Espresso and Very Vanilla colour combo.  I knew I wanted to use that beautiful flourish image from the 'Flourishing Phrases' stamp set somewhere in the design.  I tried a few different ways but I was happiest with the Early Espresso tone on tone stamped panel with the Very Vanilla panel offset from it.  I stamped the sentiment before gluing the Very Vanilla panel in place and I then glued on the leaves, making sure to leave some areas without glue so I could lift the leaves up a bit to add some dimension.   


Here's the inside and the envelope with that beautiful flourish image.  I am always attracted to flourish images and if it's a leafy flourish, well, so much the better!


Quite a long time ago I saved this lovely card made by Stephanie Wincott to Pinterest.  I loved the design and the colour combo.  Also, it featured the gorgeous ginkgo leaf image from the PTI 'Harvest Berries' set which I have in my stash.  I've neglected this stamp for far too long and it was lovely to get inky with it again!  Actually, I have every stamp that Stephanie used on her card in my stash - apart from the sentiment.  I debated using the same striped background stamp but decided against it and opted for a large weave background stamp instead.  The way things were going for me I could see it would be headache inducing to get straight stamped stripes so I made it less stressful for myself! 

I made a Crumb Cake 5 1/4" square card base and cut a Melon Mambo CS mat layer.  Stephanie stamped berries on her white panel but I left those out and I chose to use all three butterflies from the Hero Arts 'Antique Flowers & Butterflies' set.  I stamped the weave background in stamped off once Crumb Cake ink and I stamped the leaves in Wild Wasabi ink.  I stamped the butterflies on Whisper White CS using Melon Mambo ink and die cut them.  Then I applied Spun Sugar Distress Ink to the butterflies using a Smoothie ink blending sponge.  I just wanted to give the butterflies a hint of colour rather than leaving them white.   I stamped the sentiment and glued the butterfly bodies to the card, folding the wings up for dimension.


Here's the inside and the envelope.


So nice and easy crafting for the ladies, a very relaxed and enjoyable afternoon was had by all.  I'll make up for it next month and have something more challenging when we start making our Christmas cards!

Supplies for Celebrate You card:
Stamps: SU! 'Flourishing Phrases', 'Birthday Blossoms' & 'Gorgeous Grunge' sets
CS: SU! Island Indigo, Pool Party, Rich Razzleberry & Whisper White
Ink: SU! Island Indigo, Pool Party & Rich Razzleberry
Tools: SU! 'Petal Burst' embossing folder, Sizzix 'Banners, Fancy' Framelits die set, MFT 'Fishtail Flag Stax' die set, Memory Box 'Grosgrain Ribbons' die set, paper piercer
Embellishments & accessories: SU! Rich Razzleberry brad, Dimensionals


Supplies for Just a Note card:
Stamps: SU! 'Flourishing Phrases' set
CS: SU! Pear Pizzazz, Early Espresso & Very Vanilla
Ink: SU! Early Espresso
Tools: SU! 'Flourish' Thinlits die set


Supplies for Best Wishes card:
Stamps: Cornish Heritage Farms 'Weave Backgrounder' stamp, PTI 'Harvest Berries' set, butterfly stamps from Hero Arts/Sizzix 'Antique Flowers & Butterflies' stamp & die combo set, 'Clearly Besotted 'Brushed Greetings II' set
CS: SU! Crumb Cake, Melon Mambo & Whisper White
Ink: Memento Tuxedo Black, SU! Crumb Cake, Wild Wasabi & Melon Mambo, Ranger Tim Holtz Spun Sugar Distress Ink
Tools: butterfly dies from Hero Arts/Sizzix 'Antique Flowers & Butterflies' stamp & die combo set, Smoothie ink blending sponge


 photo RoseRuth.gif


Thursday 11 August 2016

Two Watercolour Wash Nature Scene Birthday Cards

Recently I had a chance to play with the SU! 'Watercolor Wash' background stamp.  Before I passed the stamp onto Lesley I stamped a few wash panels that I could add stamping to and then put the panels onto cards. I shared this card a week or so back.  Both of the cards I'm sharing today use the same inking technique.  I inked the Watercolor Wash stamp with two ink colours, spritzed the stamp with water and then stamped onto Whisper White thick CS.

The first card features the lovely wading birds image from the SU! 'Wetlands' set.  I made an Early Espresso A6 sized card base.  To get a beach and water look I applied Pool Party and Crumb Cake inks to the background stamp, spritzed the stamp with water and stamped onto Whisper White thick CS.  I stamped the birds, cut the image using a cross stitched rectangle die and layered the stitched rectangle to an Early Espresso mat.  I thought the SU! 'Seaside' embossing folder was the perfect choice to go with the focal image!  I embossed a panel of Pool Party CS and decided to have the debossed side showing.  I attached the strip on the right hand side and glued the debossed panel to the card front.  I stamped the sentiment onto a piece of Crumb Cake CS, glued that behind the image panel and then adhered the panel to the card front.


Here's the inside and the envelope.


For this card I inked the 'Watercolor Wash' stamp with Soft Sky and Pear Pizzazz inks to get a sky and ground look.  Again, I spritzed the stamp with water and stamped onto Whisper White thick CS.  I stamped the deer, trees and grass from the SU! 'In the Meadow' set.  I coloured the deer with Crumb Cake and Soft Suede inks using a blender pen.  I cut the image out with a stitched square die and layered the square onto an Early Espresso mat.  I layered a strip of paper from the SU! 'Serene Scenery' DSP stack onto a larger strip of Early Espresso CS, glued that to the front of the Pear Pizzazz A6 sized card base, stamped the sentiment and adhered the image panel.


Here's the inside and the envelope.


Supplies for Birthday Greetings card:
Stamps: SU! 'Watercolor Wash' background stamp, 'Wetlands' set, Inkylicious 'Wonderful Day'
CS: SU! Pool Party, Crumb Cake, Early Espresso & Whisper White

Patterned paper: Authentique 'Newsprint Dot' from the Cozy collection
Ink: SU! Pool Party, Crumb Cake & Early Espresso
Tools: SU! 'Seaside' embossing folder, Memory Box 'Cross Stitched Frame' rectangle die, water spritzer bottle

Supplies for Happy Birthday Wishes card:
Stamps: SU! 'Watercolor Wash' background stamp, SU! 'In the Meadow', 'Simply Sketched' & 'Blooming with Kindness' sets
CS: SU! Pear Pizzazz, Early Espresso & Whisper White

Patterned paper: SU! 'Serene Scenery' DSP stack
Ink: SU! Soft Sky, Pear Pizzazz, Old Olive, Soft Suede & Early Espresso
Tools: Memory Box 'Stitched Square Layers' die, water spritzer bottle, blender pen


 photo RoseRuth.gif

Tuesday 9 August 2016

Rolled Flowers Tag Tealights Gift Box

I made this tealights gift box a little while ago and I gave it to Shirley at work - she really loved it!  I said I was going to give the tealights gift boxes a rest but when Eileen saw the one I'd given to Shirley she loved it, said it was 'really beautiful' so I offered to make Eileen her own tealights gift box!

Eileen opted to have pale blue tealights so I knew I'd use Pool Party CS for the box.  Once I'd chosen the pretty paper I decided to pair Sweet Sugarplum with the Pool Party.  This time I didn't use a sentiment tag, instead I added three die cut rolled flowers to a circular tag element.


Here's a view from the top.


Here's a closer look at the rolled flowers tag made with a die that came free with a craft magazine some time ago.  I used a quilling tool to roll the die cut spiral shapes into flowers.  I added glue to the bottoms of the flowers, applied some Sweet Sugarplum ink with a sponge dauber, glued the flowers to the round tag and tied the tag to the ribbon with some thick baker's twine.


Eileen was very happy with her little gift I'm pleased to say!

Supplies:
Stamps: none
CS: SU! Pool Party & Sweet Sugarplum 

Patterned paper: Bazzill 'Vintage Lace' 6" x 6" pad
Ink: SU! Sweet Sugarplum
Tools: SU! Simply Scored, SU! Decorative Label punch, SU! plain & scalloped circle punches, magazine freebie rolled flower die, quilling tool, sponge dauber
Embellishments & accessories: SU! Rich Razzleberry taffeta ribbon, thick baker's twine, Dimensionals


 photo RoseRuth.gif

Sunday 7 August 2016

Vase Of Hydrangeas Thank You Card

This is a thank you card I made for my lovely friend Lesley using  newly acquired stamps - the Stampendous 'Build a Bouquet' cling stamp set.  I fell in love with it as soon as I saw it!  There are matching dies for the stamp set but as I'm quite happy to fussy cut images I only bought the stamp set.

The card base is A6 sized and I used Smoky Slate CS.  I used ProMarkers to colour the images and I used a clear Wink of Stella pen to add some subtle shimmer to the stones at the bottom of the vase.  The vase, flowers and leaves are all popped up.  I added some Smoky Slate ink underneath and around the vase to provide some grounding and I layered the panel onto a mat layer of black CS.  I glued the whole panel to the front of the card and stamped the sentiment.


Here's the inside and the envelope with more stamped and fussy cut hydrangea clusters.  I had a very happy time making this card!


Supplies:
Stamps: Stampendous 'Build a Bouquet' cling set, Clearly Besotted 'Brushed Greetings II' set
CS: SU! Smoky Slate, Basic Black & Whisper White (thick & regular)
Ink: Memento Tuxedo Black, ProMarkers
Tools: sponge dauber
Embellishments & accessories: clear Wink of Stella pen, SU! Dimensionals


 photo RoseRuth.gif

Thursday 4 August 2016

Sparkly Silver Star Spinner Card

Thanks to my very lovely friend Lesley I was able to play with the SU! 'Sliding Star Framelits' die set.  I watched this SU! video on YouTube before I used the dies and I'm glad I did because Holly mentions orientation of the dies - which is important if you want to make a SPINNER card rather than a SLIDER card.

I made my star element by layering two die cut star shapes which I fixed together with a black brad.  I used two pennies sandwiched together with a round 3d foam pad as the spinner mechanism.  I tried it first using the circle track - the element spun nicely when it was at the bottom but it didn't move so smoothly when trying to manoeuvre it up and round. I tried it with the arch track, oriented as a 'smiley face' and it spun beautifully!    I love spinner cards and much prefer them to slider cards but that's just a personal preference.  I remembered making THIS CARD for Owen back in 2014 which shows that as long as you have circle dies you can easily make a circle track card.  For me the best die in this set is the arch and when used as a 'smiley face' rather than a 'rainbow' the spin is fabulous!

I made an A6 black card base, added a white mat layer and a piece of black CS to show through the arch aperture.  I popped up the black arch track panel and placed the star spinner element in the track.  I then added the sparkly silver strip, the popped up sentiment and two small stars.


The card is quite bulky because of the popped up elements so it was a tight squeeze into a normal envelope so I used a gusseted envelope.  Here's how I decorated the inside and the front of the envelope.


This card will be given to a lovely young man, Will, who is leaving Wilko soon to go to university.  I asked him what he would be studying and it's physics and astrophysics.  A no brainer to use stars on his card then!

Supplies:
Stamps: Penny Black 'Every Happiness' set
CS: SU! Basic Black & Whisper White, Silver Glimmer Paper
Ink: Memento Tuxedo Black
Tools: SU! 'Sliding Star' Framelits die set, Sizzix 'Stars' Framelits die set, Spellbinders 'Label Trio' die set, Sizzix 'Card, Fancy Frame Flip-its #2' Framelits die set
Embellishments & accessories: black brad, 3D foam pads & SU! Dimensionals


 photo RoseRuth.gif

Tuesday 2 August 2016

Watercolour Wash Just For You Card

I've been using Lesley's SU! craft goodies again - this time her Watercolour Wash background stamp.  I've passed the stamp onto Lesley now but today I'm playing with more of her goodies - the SU! Sliding Star Framelits dies.  Thank you SO much Lesley, it's very sweet of you to let me use your stuff before you get your hands on it!  Now that I've had a play with this stamp it has gone on to my 'must buy' list.  I stamped a few images but so far this is the only card I've completed.  I've got a few 'works in progress' to be finished off so I'll be sharing those here on the blog soon.

For this card I inked the background stamp with Pool Party and Mint Macaron inks and stamped onto Whisper White CS.  I stamped the sentiment in VersaMark ink and heat embossed with Aqua Tinsel embossing powder - a definite "oooooh" moment, it's so beautifully sparkly!  I trimmed the panel to size, mounted it onto Elegant Eggplant and Bermuda Bay mat layers and adhered the panel to the front of a white 7" x 5" card base.  I then stamped flowers from the 'Flourishing Phrases' stamp set in Elegant Eggplant ink, fussy cut just the smaller portions of the flowers and popped them up over Bermuda Bay die cut leaves from the 'Flourish'  Thinlits die set.  I completed the card front with some tiny Elegant Eggplant punched flowers with aqua gem centres.


Here's a closer look at the sparkly goodness. 


Here's the inside of the card and the envelope.  I love these colours together and I'm very happy how this card turned out!


Supplies:
Stamps: SU! 'Watercolor Wash' background stamp, SU! 'Flourishing Phrases' & 'Botanicals For You' sets  
CS: PaperMania white 7" x 5" card blank, SU! Bermuda Bay, Elegant Eggplant, Pool Party & Whisper White
Ink: SU! Pool Party, Mint Macaron & Elegant Eggplant, VersaMark
Tools: SU! 'Flourish' Thinlits die set, SU! 'Itty Bitty Shapes' punch pack, Sizzix 'Ornaments #3' Framelits die set, heat tool
Embellishments & accessories: Stampendous Aqua Tinsel embossing powder, aqua gems, SU! Dimensionals


 photo RoseRuth.gif

01 09 10