Monday 31 August 2020

Tropical Floral Hello Card

 This is a card I've made for a Dena Rekow Facebook class challenge where the challenge was to make a tropical card.  I've used one of Dena's card layouts - the July Live #3 Card #2 layout.  I must say I've cut it a bit fine, today is the last day to enter the challenge!

Here's the card and envelope together.

 
As the theme was tropical I knew I'd be using the SU! 'Timeless Tropical' stamps and dies and the 'Tropical Oasis' patterned paper.  Having decided on the layout I needed to choose some patterned paper and I selected a pretty floral design and a contrasting texture design.  I made a So Saffron A6 sized card base, glued my patterned paper pieces to a Soft Suede CS mat layer and wrapped the Faux Suede Trim around and tied a knot.  I stamped the sentiment in Early Espresso ink and glued the mat layer to the card front.  I die cut a stitched circle shape and then got busy stamping and die cutting flowers and leaves.  
 
I stamped the flowers in Soft Suede ink on Whisper White CS and then added Mango Melody ink to each flower using an oval make up brush, going darker at the edges.  For the leaves I applied Old Olive ink to each leaf, again using an oval make up brush.  After I'd die cut the flowers I snipped between a few petals so I could add some shape and dimension to the flowers.  I arranged the flowers and leaves on the circle, popped up one flower and popped up the Whisper White circle.  I added a gold Metallic Pearl to the centre of each flower to finish the front.


More of the pretty floral paper was used to decorate the inside of the card and the envelope.

 
Supplies:
Stamps: SU! 'Timeless Tropical' & 'Blossoms in Bloom' sets
CS: SU! Soft Suede, So Saffron & Whisper White
Patterned paper: SU! 'Tropical Oasis' DSP pack
Ink: SU! Early Espresso, Mango Melody, Old Olive & Soft Suede 
Tools:SU! 'In the Tropics' & 'Stitched Shapes' die set, oval make up brushes
Embellishments & Accessories: SU! Faux Suede Trim, Metallic Pearls & Dimensionals

Ruth

Snowflake Wishes Christmas Card & Gift Tags

On Thursday I had Lesley and Wendy over for a crafty play and a good old catch up.  It was so wonderful to chat, create and to spend time with good friends, it really refreshed my soul! 

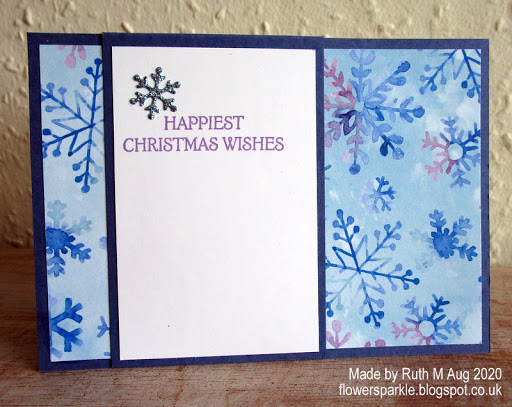
I made one card with a matching gift tag plus two more gift tags.  Here's the snowflake card, envelope and tag together.  These items showcase products from the gorgeous SU! Snowflake Splendor suite.

 
The card is a fancy fold card and it's a great design for showing off pretty patterned paper.  I used Misty Moonlight CS for the card base and the patterned paper is from the SU! 'Snowflake Splendor' DSP pack.  I embossed a piece of Whisper White CS with the 'Winter Snow' embossing folder but chose to use the debossed side when I adhered the panel to the card base.  I inked the snowflake stamp with Highland Heather ink and then lightly dabbed Misty Moonlight ink over the top using a sponge dauber in order to get a multi tonal effect.  I popped the snowflake up and added a blue faceted gem.  I stamped the sentiment, used the 'Banners' Pick a Punch to make a flagged banner and popped it up.  


Here's a closer look at the debossed panel and stamped snowflake.  I'm SO happy how that looks!
 
 
Here's the inside of the card with a sweet little stamped sentiment and a Balmy Blue Glimmer Paper die cut snowflake.

 
Here's the envelope with a stamped snowflake circle element.
 
 
Here's the matching gift tag.  I used Highland Heather CS and a Sizzix 'Rounded Tag' die for the tag.  I used dies from the SU! 'Circle Layering' die set to get circles for the snowflake element.  I stamped the sentiment in Misty Moonlight ink.  I punched a hole in the tag using my Crop-A-Dile and added Whisper White baker's twine.  I added two Balmy Blue Glimmer Paper die cut snowflakes for some sparkle.
 
 
I added a white circle to the back of the tag with a lovely sentiment from the SU! 'Tag Buffet' stamp set.


Here's the two gift tags made using the 'Scalloped Tag Topper' punch and the 'Tag Buffet' stamp set.


Here's the bauble tag.  I punched two tags - one Whisper White and one Just Jade - stamped a leafy background with Just Jade ink and offset the two tags.  I stamped the sentiment from the SU! 'Gift Wrapped' set in Memento Tuxedo Black ink.  I coloured the bauble using Poppy Parade Light and Real Red Dark Stampin' Blend markers and I also used the Colour Lifter marker.  I coloured the bauble topper with a gold gel pen, fussy cut the bauble, stamped the bow, added a Real Red jewel and popped the bauble up.  I added Real Red ribbon and some gold cord tied in a bow.
 

Here's the stocking tag.  I punched a Mint Macaron tag and a Whisper White tag, stamped a snowflake background on the white tag in Mint Macaron ink and offset both tags.  I coloured the stocking using Shaded Spruce Light and Dark and Smoky Slate Light Stampin Blend markers plus the Colour Lifter.  I stamped the sentiment in Shaded Spruce ink, popped the stocking up and added the adhesive backed snowflake embellishments.  I added the iridescent Snowflake Splendor ribbon and some Mint Macaron ribbon tied in a knot.

What a happy day, we chatted, laughed, crafted and ate cake - a pretty near perfect day actually!

Supplies for snowflake card & tag:
Stamps: SU! 'Snowflake Wishes' & 'Dashing Deer' sets
CS: SU! Highland Heather, Misty Moonlight & Whisper White, Balmy Blue Glimmer Paper
Patterned paper: SU! 'Snowflake Splendor' DSP pack
Ink: SU! Highland Heather & Misty Moonlight
Tools:SU! 'So Many Snowflakes', 'Snowfall' & 'Layering Circles' die sets, SU! 'Winter Snow' embossing folder, SU! 'Banners' Pick a Punch, Sizzix 'Rounded Tags' die set, Crop-A-Dile, sponge dauber
Embellishments & Accessories: SU! Whisper White baker's twine, Blue Adhesive Backed Gems,Dimensionals

Supplies for bauble & stocking tags:
Stamps: SU! 'Tag Buffet' & 'Gift Wrapped' sets
CS: SU! Just Jade, Mint Macaron & Whisper White
Ink: SU! Just Jade, Mint Macaron, Memento Tuxedo Black, Stampin' Blend markers, Colour Lifter pen, gold gel pen
Tools:SU! 'Scalloped Tag Topper' punch
Embellishments & Accessories: SU! Real Red ribbon, Snowflake Splendor ribbon, Mint Macaron ribbon, Red Rhinestone Basic Jewels, Snowflake Adhesive Backed Embellishments, Dimensionals, gold cord

Ruth

Sunday 23 August 2020

8 Box Of Sunshine Cards - Stampin' Up! Box of Sunshine Paper Pumpkin Kit

Stampin' Up! Paper Pumpkin kits are monthly subscription paper crafting kits available in North America only.  SU! have made the 'Box of Sunshine' Paper Pumpkin kit available to other markets in August - exciting stuff!  The Paper Pumpkin kits come packaged in sturdy cardboard boxes and the 'Box of Sunshine' card kit comes in a pretty yellow box.  The idea is that after you've made the cards you fill the box with yellow items, decorate the box and gift the 'Box of Sunshine' to someone - what a lovely idea!

Here's the box and the stickers for decorating the box.


The card kit came with fancy card bases, a stamp set, a mini ink pad, stickers, sentiment banners, glue dots, Dimensionals and pretty adhesive sequins.  I made up the cards straight away!  Here are the 8 cards and envelopes.


Here are the two pineapple You are Loved cards.


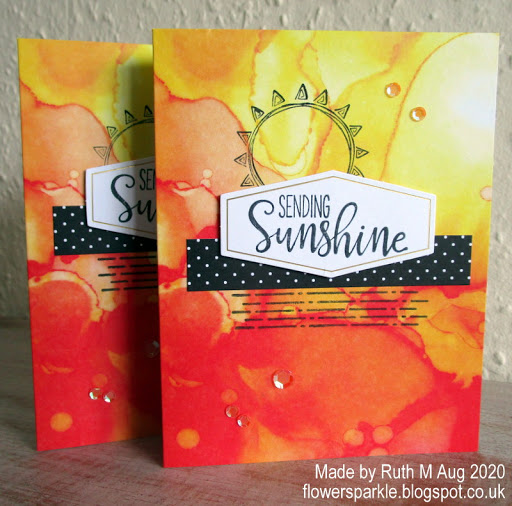
Here are the 2 Sending Sunshine cards.


Here are the 2 Hello cards.


Here are the 2 lemon Brighten your Day cards.


Here are the gold foiled envelopes.


I had a great time putting the cards together and I'm now busy searching out yellow items to place inside the box so that I can share some sunshine!  It's great fun and I'll share the box when I've filled and decorated it!
Ruth

Saturday 15 August 2020

Sunflowers 60th Birthday Card

This is the 60th birthday card I made for my friend Jackie who I've known since primary school. We bonded in the school playground aged five over our shared loathing of PE!

Here's the card and envelope together.


I think the SU! 'Painted Harvest' set is one of the most beautiful stamp sets, the stamped images are stunning.  So I'm at a complete loss as to why I don't use it much!  I must say I thoroughly enjoyed making this card.  The card base measures 5 3/4" square and I used Daffodil Delight CS.  I used Daffodil Delight and Pumpkin Pie inks for the Sunflowers, Soft Suede ink for the centres and Old Olive ink for the leaves.  I stamped sunflowers on a scrap of Whisper White CS and die cut the 60 numbers.  I also die cut several more numbers from thick Whisper White CS and stacked them together so my numbers were nice and chunky.  I used my trusty Stamp-A-Ma-Jig stamp positioner to get perfect placement for my sentiment words.  I glued the white panel to a mat layer of Soft Suede CS, added some Old Olive grosgrain ribbon and jute twine and glued the entire panel to the card front.  I added three Pumpkin Pie Candy Dots as a final touch to the front.  Wow, some very old, retired supplies dug out from the stash for this card, it feels good to use them!


Here's a closer look at the numbers, I love the dimension!


Here's the inside of the card.


Here's the envelope flap.


Here's the front of the envelope with stamped sunflowers and a name label.


Supplies: 
Stamps: SU! 'Painted Harvest','Number of Years' & 'Peaceful Moments' sets
CS: SU! Daffodil Delight, Old Olive, Soft Suede & Whisper White (regular & thick)
Ink: SU! Daffodil Delight, Old Olive, Pumpkin Pie & Soft Suede  
Tools: SU! 'Large Numbers' die set, Sizzix 'Card, Square Flip Its' die set, SU! Stamp-A-Ma-Jig
Embellishments & Accessories: SU! Old Olive grosgrain ribbon, jute twine, Brights Candy Dots, Dimensionals 

Ruth

Wednesday 12 August 2020

Hunting Owl Friendship Birthday Card

Petra asked me to make her a friendship birthday card for her to give to a special friend.  The friend's favourite colour is purple and she loves owls.  I found this beautiful Woodware owl stamp and loved it as soon as I saw it.

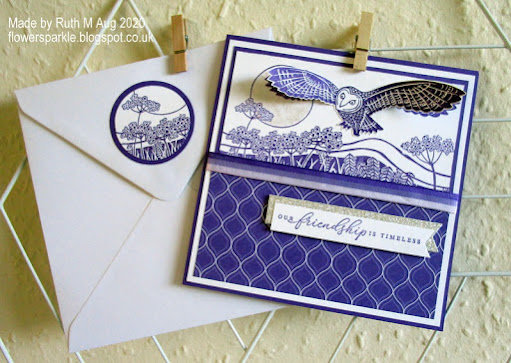
Here's the card and envelope together.


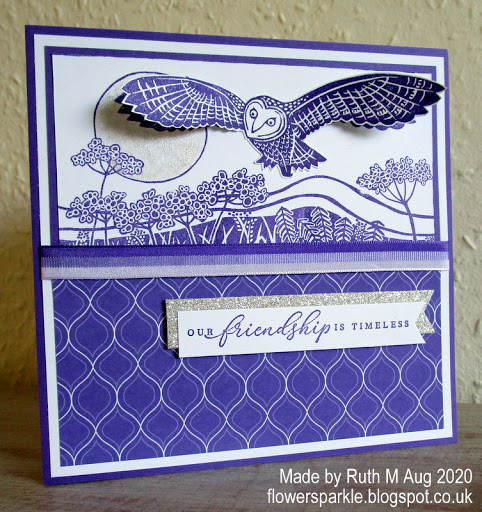
Here's the card.  I used SU! Gorgeous Grape, Whisper White and sparkly silver as my colour combo and the card measures 5 3/4" square.  I stamped the image, trimmed it to size and matted and layered it.  After adhering the patterned paper I wrapped a length of purple Tricolor ribbon around the panel and glued the whole thing to the front of the card base.  I applied Wink of Stella to the moon for a touch of shimmer.  I then stamped the image again and fussy cut the owl so I could adhere it over the top.  I glued the owl flat at the body but placed Dimensionals under the wings.  I'd given Petra a list of sentiments to choose from and she selected 'Our friendship is timeless' which I cut with a banner punch.  I glued the white banner to a Silver Glimmer Paper banner and I popped that up on Dimensionals.


Here's a closer look at the popped up owl, the dimension is amazing!


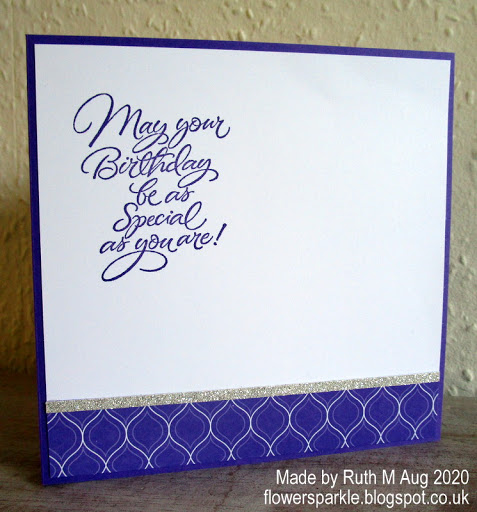
Here's the inside of the card.


Here's the envelope.  I stamped the image again and cut just part of it out with a circle die.


I was very pleased when Petra told me she was happy with the card!

Supplies: 
Stamps: Woodware 'Lino Cut, Hunting Owl', SU! 'Timeless Tropical' set, Hero Arts 'Special Birthday'
CS: SU! Gorgeous Grape & Whisper White, Silver Glimmer Paper
Ink: SU! Gorgeous Grape  
Tools:SU! 'Layering Circles' die set, 'Banners' Pick a Punch, Wink of Stella pen
Embellishments & Accessories: SU! purple Tricolor Ribbon, Dimensionals

Ruth


01 09 10