Thursday 30 July 2020

Lots & Lots Of Happy Cards - Gift Set

This is a set of eight note cards and envelopes I made for Petra who made me a lovely fabric bag to keep my face masks in.  I think it's a lovely thing when crafters share their hand made goodies!  

Here are all eight cards pegged up on my new hexagon display thingy.  I kept to the same design but switched the colours up, making two of each colour combo.  It's very satisfying to see a collection of cards together!


Here are four cards showing the colour combos - from left to right it's Just Jade with Magenta Madness, Pear Pizzazz with Calypso Coral, Granny Apple Green with Highland Heather and Old Olive with Bermuda Bay.  I like them all but if I had to pick a favourite it would be Granny Apple Green with Highland Heather and Just Jade with Magenta Madness would be a close second!


Here's just one card.  The SU note cards measure 3 1/2" x 5" so are smaller than a standard A6 card.  The fern and flower images are from the SU! 'Positive Thoughts' stamp set and the happy sentiment is from the 'Lots of Happy' set that went with the 'Lots of Happy' card kit.  I used full strength ink and stamped off once ink (second generation stamping) for the ferns and flowers.  The 'Positive Thoughts' set does have a butterfly stamp but I tried it and felt it was too large for the smaller sized note card so I opted to punch the smaller butterfly from the 'Butterfly Duet' punch.  After shaping the wings I added rhinestone jewels to add some sparkle to the butterflies.


Of course, the insides of the note cards and the envelopes had to be stamped too!  That fern has to be one of the prettiest stamps ever!


Once I'd finished I placed the note cards and envelopes in a cello bag and added a tag tied with a ribbon bow.


Here's a closer look at the tag.  I die cut a shape from the 'Stitched So Sweetly' set of dies and popped up a 'Stitched Shape' oval.  I love that sentiment from the 'Fancy Phrases' set - it's perfect for a gift tag!  I punched a Granny Apple Green butterfly and added three rhinestone jewels.  I tied the tag onto the bag with the purple Tricolor Ribbon which ties so beautifully.


Supplies:
Stamps: SU! 'Positive Thoughts', 'Fancy Phrases' & 'Lots of Happy' sets
CS: SU! Whisper White Note Cards & Envelopes, Bermuda Bay, Calypso Coral, Highland Heather, Magenta Madness & Whisper White
Ink: Bermuda Bay, Calypso Coral, Granny Apple Green, Highland Heather, Just Jade, Magenta Madness, Old Olive & Pear Pizzazz
Tools:SU! 'Butterfly Duet' punch, 'Stitched Shapes' & 'Stitched So Sweetly' die sets, Crop-A-Dile, X Cut 3/8" circle punch
Embellishments & Accessories: cello bag, SU! purple Tricolor Ribbon, Rhinestone Jewels

Ruth

Wednesday 29 July 2020

Denim Heart & Fabric Dress Sew Lovely Card

I've had some gorgeous face masks made for me by a lovely lady called Petra - her Facebook page is Buttoned With Love - and I suggested to her that she might think about making fabric bags/pouches for people to store their masks in.  Petra very kindly made me a pretty bag and I thought I'd have some fun with fabric and buttons to make her a thank you card.  It's been a long time since I've used my SU! 'Dress Up' dies and I really enjoyed choosing the fabric and raiding my button tin!

Here's the card and envelope together.


Here's the card.  I started off by stamping the stitched heart using black StazOn ink onto a sheet of denim and I then used double sided adhesive to stick the fabric to a piece of CS.  I then fussy cut the heart and glued it to the front of an A6 sized black card base.  I used double sided adhesive again to attach the pretty floral fabric to a piece of CS, I die cut the dress and added ribbon and a sweet little flower button.  I popped the dress up on Dimensionals.  I stamped the sentiment onto a piece of Pretty in Pink CS, cut that out using a stitched rectangle die and popped that up. Wow, Pretty in Pink is a blast from the past, I only have a couple of CS sheets left but it's the pink colour that matches best with the fabric.  I threaded a few buttons with black baker's twine and attached them to the card with glue dots to finish the front.


Here's a closer look at the denim heart and dress.  The heart stamp is from an old Docrafts Papermania set that came free with a magazine - it's great!  I was given some fabric pieces years ago by some card group ladies who do patchwork.  Fabrics with a tiny print are perfect for these die cut dresses!  I still have a box full in my stash and I'm glad as I chose not to part with my retired 'Dress Ups' die set or my 'Button, Button' stamp set - I knew I'd want to play again one day!  


Here's the inside of the card.  I wanted to stamp buttons using black, Old Olive and Pretty in Pink inks.  Sadly, my Pretty in Pink ink pad has dried out and I don't have an ink refill.  I die cut a Pretty in Pink CS button instead and consigned the dried out ink pad to the bin. 😞


Here's the envelope.  I die cut a fabric flower (attached to a piece of CS with double sided adhesive) added a button and mounted it onto punched circles.  


What a fun project, I had a blast!  The anniversary card I made recently was commissioned by Petra.  I've also made her a set of eight note cards and envelopes as a little gift in return for the fabric bag she made for me.  All the cards have been delivered and I'm delighted to say Petra was so happy with them, she gave me such lovely feedback!   I'll be sharing the note cards here on the blog tomorrow.  I've not met Petra in person but it's so lovely to connect and share with a fellow crafty person! 

Supplies: 
Stamps: DoCrafts Papermanis 'Sew Lovely' magazine freebie set, SU! 'Peaceful Moments' set
CS: Basic Black, Old Olive, Pretty in Pink & Whisper White 
Ink: Jet Black StazOn, Memento Tuxedo Black, SU! Old Olive
Tools: SU! 'Dress Up' & 'Stitched Rectangles' die set, circle punches, button die from MFT 'Blueprints 14' die set, First Edition 'Flowers' die set
Embellishments & accessories: double sided adhesive sheet, floral fabric, Papermania denim sheet pack, SU! buttons, black baker's twine, Dimensionals
Ruth

Tuesday 28 July 2020

Beachy Hearts 18th Wedding Anniversary Card

This 18th wedding anniversary card was made to order and the lady who ordered it told me "we love anything to do with the beach, sunsets, tranquility and two hearts linked is our thing!" so I had an excellent brief to follow when creating the card!

Here's the card and envelope together.


After musing for a while I came up with the idea of stamping beach scenes on two hearts which I could link by tying the two together.  The SU! 'Waterfront' stamp set was the ideal choice and after die cutting two hearts I got busy creating my scenes.  I started with the heart at the front and created the water first, masked that and then stamped just the top portion of the sun.  I inked the sun stamp with Mango Melody ink and added a touch of Real Red with a sponge dauber to get a rich, deep colour for a setting sun.  I masked the water again, applied Daffodil Delight and then some Flirty Flamingo inks for the sky using oval make up brushes and then I stamped the birds (from the 'High Tide' stamp set.)  On the background heart I stamped water again, a sandy beach, palm trees and a beach hut.  I used my Crop-A-Dile to punch holes in both hearts and I tied them together with linen thread tied in a bow.

I made a 5 3/4" square card base from Seaside Spray CS, cut a panel of Whisper White CS and added the wavy blue patterned paper and a narrow Night of Navy CS strip to the bottom of the panel.  I stamped the '18TH' in Night of Navy ink and fussy cut the numbers.  I stamped the words in Seaside Spray ink and cut the sentiment strip out using a fishtail flag die.  I popped the two hearts and the sentiment strip up on Dimensionals and added a banner and dot detail as a finishing touch.


Here's a closer look at the hearts.


Here's the inside of the card.  After stamping the wavy sentiment I die cut it using a matching die and  put more of the patterned paper at the bottom.  I brushed Daffodil Delight and Flirty Flamingo inks onto a scrap of Whisper White CS and punched two small hearts.


I used more of the lovely blue patterned paper to decorate the front and flap of the envelope and added a name label which I popped up.


It was a rainy, miserable day when I made this card - perfect crafting weather!  What a lovely time I had in my craft room creating this card - although clearing up wasn't exactly a breeze - and I just hope it's a hit with the anniversary couple!

Supplies:
Stamps: SU! 'Waterfront', 'High Tide' & 'Memorable Moments' sets, Apple Blossom 'Wavy Sentiments' set
CS: SU! Night of Navy, Seaside Spray & Whisper White

Patterned paper: SU! 'See a Silhouette' DSP pack
Ink: SU! Daffodil Delight, Early Espresso, Flirty Flamingo, Mango Melody, Mossy Meadow, Night of Navy, Real Red, Sahara Sand & Seaside Spray
Tools: X Cut 'Hearts' nesting dies set, MFT 'Fishtail Flags' Stax die set, SU! 'Heart to Heart', 'Banner' & 1/4" circle punches, Crop-A-Dile, Sizzix 'Card, Square Flip Its' die set, oval make up brushes, sponge dauber
Embellishments & accessories: SU! linen thread, Dimensionals

Ruth

Sunday 26 July 2020

Poppy Every Happiness Card

Moni is a very sweet work colleague of mine and it was her birthday one day last week.  I came across one of my card group card kits from March and I thought I'd use it to make her a card - changing a few things up for a bit of fun!

Here's the card and envelope together.


Here's the card which measures 5 1/4" square.  The hexagon paper from the SU! 'See a Silhouette' DSP pack is layered onto a mat of Mossy Meadow CS.  I die cut the two poppy shapes using Poppy Parade CS and I used a leaf die from the 'Nature's Roots' die set rather than the leaf dies that come in the 'Poppy Moments' die set.  I love the shape and texture of that 'Nature's Roots' leaf!  To add texture to the poppy flower I embossed the solid shape with the SU! 'Old World Paper' embossing folder and glued the outline shape over the top.  I glued the leaves to the patterned paper panel but I've popped up the poppy and sentiment banner.  As I gave the card to Moni after her birthday I used a non birthday sentiment - I masked off the 'this special day will bring' words on the stamp so I could just stamp the 'wishing you every happiness' words.  I die cut the poppy centre from Basic Black CS and shaped it a wee bit before gluing it to the poppy.


This is such a simple card layout but adding some texture kicks things up a notch.  Here's a closer look at the poppy and leaves.


Here's the inside of the card simply decorated with patterned paper and a strip of Mossy Meadow CS.


Here's the envelope.  I decided to personalise the envelope for Moni using my Crafts Too 'Small Alphabet' embossing folder.  Once I'd embossed my piece of Poppy Parade CS I punched out each embossed letter with a 5/8" circle punch which is the perfect size for the letters.  I've had the folder for ages and haven't used it in quite a while so it was good to give it an outing!  I popped each letter up onto the Mossy Meadow flagged banner.


Here's a closer look at the embossed letter circles.  A sweet touch I think!


Supplies:
Stamps: SU! 'Peaceful Moments' set
CS: SU! Mossy Meadow, Poppy Parade, Basic Black & Whisper White thick & regular

Patterned paper: SU! 'See a Silhouette' DSP pack
Ink: SU! Mossy Meadow
Tools: SU! 'Nature's Roots' & 'Poppy Moments' die sets, 'Old World Paper' embossing folder & 'Banners' Pick a Punch, Crafts Too 'Small Alphabet' embossing folder, Woodware 5/8" circle punch
Embellishments & accessories: SU! Dimensionals

Ruth

Friday 24 July 2020

Ribbon & Bow Faux Wrapped Christmas Gift Card

One of the things I love best about getting a new SU! catalogue is getting inspiration from the many card designs inside.  I spotted a card on page 71 that resembled a wrapped Christmas gift and knew I'd have to make a version.  I didn't purchase the particular patterned paper that SU! have used for the card but it's so easy to substitute a different patterned paper.

Here's my card and envelope together.


Here's the card.  I chose to make a standard A6 sized card although I think the card in the catalogue is a taller, narrower size.  I covered the front of a Whisper White thick CS card base with paper from the SU! 'Tis the Season' 6" x 6" DSP pack.  I then cut strips of Shaded Spruce CS to mimic ribbon and glued those in place.  I stamped and punched two bows using the 'Gift Wrapped' stamp set and the matching 'Gift Bow' builder punch to replicate a double ribbon bow - I cut the tails off the bow I adhered at the back.  I made a tag using the 'Banners' Pick a Punch - the hole was punched using the 'Label Me Fancy' punch - added some gold cord, attached the tag in place and popped the bow up over the top.  I'd stamped the sentiment in Real Red ink and I added three Real Red rhinestone jewels to add a further pop of red.


Here's a closer look at the bow detail. 


Here's the inside of the card.


Here's the envelope with a stamped and punched Shaded Spruce gift bow.


Supplies:
Stamps: SU! 'Gift Wrapped' set
CS: SU! Shaded Spruce & Whisper White thick & regular

Patterned paper: SU! 'Tis the Season' 6" x 6" DSP pack
Ink: SU! Shaded Spruce
Tools: SU! 'Gift Bow' builder punch, 'Banners' pick a punch, 'Label' Me Fancy' punch
Embellishments & accessories: SU! gold cord from the 'Wonder of the Season' ribbon combo pack, Real Red rhinestone jewels, Dimensionals

Ruth

Wednesday 22 July 2020

Paper Strips & Bell Christmas Greetings Card

On page 29 of the SU! Aug - Dec 2020 Mini Catalogue there are three cards showcasing the 'Christmas Means More' stamp set.  The cards illustrate the 'Step It Up' process where you design a basic card, step it up a bit for a second card and then step it up even further for a third card.  I love the look of the cards - the middle card in particular - and decided to CASE the design substituting the supplies SU! had used for supplies I had in my stash.  The cards feature Crumb Cake CS, paper strips, a large sentiment and gold foil bells and those features are what I focused on to make my version of the cards.

Here's my card and envelope together.


Here's the card.  I opted to use a Real Red card base and cut 3/4" strips from patterned papers in the 'Tis the Season' 6" x 6" DSP pack.  After stamping the sentiment (from the 'Greatest Part of Christmas' hostess set from last year's seasonal catalogue) I cut it out with a 'Stitched Rectangle' die and popped it up.  I die cut one gold foil bell and three white bells and stacked them together for some dimension.  The bell die is from the SU! 'Trim Your Stocking' retired die set.  I glued the bell in place and secured a gold cord bow on top with a glue dot.


Here's the inside of the card.  I've used a new SU! stamp set called 'Joyful Holly' which I loved as soon as I saw it in the catalogue.  The set is a two step stamp set and comes with two different sized holly branches and two lovely sentiments - I couldn't resist!  A couple of the papers I used for the card front feature holly so I thought this set was a good choice to decorate the inside of the card and the envelope.  I stamped the sentiment and outline holly in Shaded Spruce ink, the solid leaves in stamped off once Garden Green ink and the berries in Real Red ink.


Here's the envelope with more stamped holly.


Supplies:
Stamps: SU! 'Greatest Part of Christmas' & 'Joyful Holly' sets
CS: SU! Crumb Cake, Real Red & Whisper White, Gold Foil Sheet

Patterned paper: SU! 'Tis the Season' 6" x 6" DSP pack
Ink: SU! Garden Green, Real Red & Shaded Spruce
Tools: SU! 'Stitched Rectangle' & 'Trim Your Stocking' die sets
Embellishments & accessories: SU! gold cord from the 'Wonder of the Season' ribbon combo pack, Dimensionals

Ruth

Sunday 19 July 2020

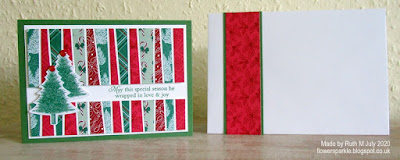
Scrappy Strips Split Panel Christmas Card

A little while ago I made this scrappy strips card and I wanted to try a version where the panel is cut apart.  I recently got a pack of SU! 'Tis the Season' 6" x 6" patterned paper and there are some lovely designs so I decided that would be a great choice for my strips.

Here's the card and envelope together.  A very traditional red and green Christmassy combo!


Here's the card.  The A6 sized card base is made with SU! Garden Green CS.  I adhered all the strips to a panel of Whisper White CS and cut it to size.  I cut a mat layer of Whisper White CS to go on the card front and stamped the sentiment.  I cut the scrappy strips panel apart, cut the two panels to size and popped them both up on Dimensionals.  I punched two trees from a piece of paper in the 'Wrapped in Plaid' 6" x 6" paper pack and adhered those in place.  I added a red glitter enamel dot to the top of each tree as a finishing touch.


Here's the inside of the card.


Here's the envelope.


I made this card on a really hot day, it seems strange at the time but I know I'll be glad that I made Christmas cards in plenty of time to avoid that mad November rush!

Supplies:
Stamps: SU! 'Perfectly Plaid' set
CS: SU! Garden Green & Whisper White

Patterned paper: SU! 'Tis the Season' & 'Wrapped in Plaid' 6" x 6" DSP packs
Ink: SU! Garden Green
Tools: SU! 'Pine Tree' punch
Embellishments & accessories: SU! Toile Tidings Glitter Enamel Dots, Dimensionals

Ruth

Saturday 11 July 2020

Floral Card & Gift Envelope

I gifted a pack of SU! self adhesive sequins to a friend and I wanted to present it nicely so I made an envelope using patterned paper.  Of course, I made a card too!

Although it's only July I received a Stampin' Up! seasonal mini catalogue through the post and I was able to pre-order some goodies.  The 'Gift Wrapped' bundle (gift bow stamps with a matching bow punch) leapt out at me straight away.  I thought the gift bows could be used not just for Christmas projects and as I couldn't wait to have a go with my new goodies I decorated my envelope and card with gift bows!  I've used two very similar papers from the SU! 'Perennial Essence' DSP pack.  Here's the card and envelope together.


Here's the card.  I stamped the bow on Flirty Flamingo CS using Flirty Flamingo ink and added colour using a dark Flirty Flamingo Stampin' Blends marker.  I popped up the bow on Mini Dimensionals and added a copper star embellishment.  The sentiment flagged banner was made using another new punch - the SU! 'Banners Pick a Punch'.  This punch offers six options - two designs with 3 sizes for each design.  I used the flagged end at 3/4" wide.  The 'Friend' is from the SU! 'Daisy Lane' stamp set.


Here's the envelope made with the Envelope Punch Board, I love how this punch board makes it so easy to create an envelope!  The envelope is sized to fit a 4" x 5" card and I started with a 7 1/2" square piece of patterned paper.  I glued two 1/2" strips of Flirty Flamingo CS to the front and popped up the sentiment label made with a die from the 'Stitched So Sweetly' die set and a sentiment from the 'Fancy Phrases' stamp set.  I popped up the gift bow on Mini Dimensionals and added a copper star embellishment..  


Supplies:
Stamps: SU! 'Daisy Lane' & 'Fancy Phrases' sets
CS: SU! Flirty Flamingo & Whisper White (regular & thick)

Patterned paper: SU! 'Perennial Essence' DSP pack
Ink: SU! Flirty Flamingo, Flirty Flamingo dark Stampin' Blends marker
Tools: SU! Envelope Punch Board, 'Gift Bow Builder' & 'Banners Pick a Punch' punches, 'Stitched So Sweetly' die set
Embellishments & accessories: SU! copper Star Designer Elements, Dimensionals & Mini Dimensionals

Ruth

Thursday 9 July 2020

Floral Background & Butterfly Birthday Wishes Card

Recently I came across this lovely card made by Lisa Curcio at Lisa's Stamp Studio.  I'd just received my SU! 'Butterfly Wishes' stamp set so I was keen to ink it up and Lisa's card really appealed to me.  I'd also just received my SU! Just Jade ink pad and CS and because I was eager to try out my new colour I used that instead of Lisa's original black and white monochrome look.

Here's the card and envelope together.


I used a Just Jade card base rather than a white card base so after I'd glued my stamped white strips to a Just Jade CS panel I added a mat layer of white CS.  I stamped the butterfly onto a panel of white CS, stamped it again on a scrap of white CS, fussy cut it out and popped up the fussy cut shape over the top.  After stamping the sentiment I glued the white panel to a mat layer of Just Jade CS and popped that up.  As a finishing touch I added three iridescent white gems.


Here's the inside of the card.


Here's the envelope.  'Butterfly Wishes' is a Distinktive™ stamp set which means the stamps have a special texture that gives added depth and dimension, creating photo-realistic stamped images.  The results are stunning and these type of stamps are such a joy to use!


Supplies:
Stamps: SU! 'Butterfly Wishes' & 'Fancy Phrases' sets
CS: SU! Just Jade & Whisper White
Ink: SU! Just Jade
Embellishments & accessories: SU! 'From My Heart' faceted gems, Dimensionals

Ruth

Tuesday 7 July 2020

Brightly Gleaming Scrappy Strips Christmas Card

The scrappy strips technique has taken the card making world by storm!  The craze was started by Bruno Bertucci who was inspired by a piece of aboriginal art.  Visit the blog post HERE to find out more.  There is also this video on YouTube which shows Bruno demonstrating the technique - at the 20.00 minute mark on the video.

Dena Rekow from the Creativity Cave featured this technique with one of her card layouts in her May 2020 Facebook Live class.  I've finally got around to trying out the technique and I thought I'd make a Christmas card.  Here's my card and envelope together.


I chose to cut strips from SU! 'Brightly Gleaming' patterned papers along with strips of  plain Mossy Meadow and Pretty Peacock CS.  I applied the strips to a panel of Very Vanilla CS, cut the panel to size and glued it to a mat layer of Very Vanilla CS which I glued to the front of a Mossy Meadow card base.  I stamped the sentiment in Pretty Peacock ink, cut it out with a Stitched Rectangle die and used the same die to cut out a copper foil rectangle.  I glued the vanilla shape to the copper shape, offsetting the two and I popped up the sentiment with Dimensionals.  I punched two copper foil dots and added those to the sentiment as a finishing touch.


Here's the inside of the card.


Here's the envelope.


What a fun technique and a great use for CS and patterned paper scraps!  In one of Dena's example cards she split the scrappy strips panel apart and stamped a sentiment between the two pieces which looked great and I definitely want to try that look!

Supplies:
Stamps: SU! 'Greatest Part of Christmas' set
CS: SU! Mossy Meadow, Pretty Peacock & Very Vanilla 

Patterned paper:: SU! 'Brightly Gleaming' specialty DSP pack
Ink: SU! Pretty Peacock
Tools: SU! 'Stitched Rectangles' die set, circle punch
Embellishments & accessories: SU! Dimensionals

Ruth


Monday 6 July 2020

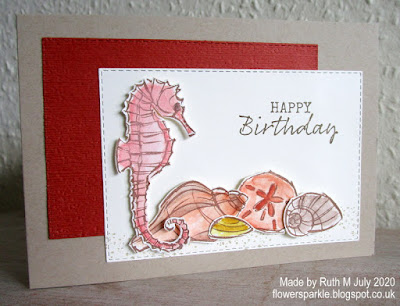
Seahorse & Shells Happy Birthday Card

I've had the SU! 'Seaside Notions' stamp set for a few months and hadn't used it and I decided it was high time I inked up the stamps.  I love the look of the images, the style really appeals to me.  Oh dear, when I sat down at my desk to stamp I just couldn't get in the groove with these stamps, it was painful.  I don't colour images in very often and I don't practise enough so I'm not very confident.  I tried colouring with Stampin' Blends and watercolouring with inks and an aquapainter and I didn't like my results with those.  Then I tried watercolour pencils and a paintbrush and I stuck with those.  After colouring and fussy cutting the images I was having problems getting a layout together and as I was really frustrated by this point I walked away.

The next day I sat down to try again and things went more smoothly.  Here's my card and envelope together. I chose neutral, earthy colours and I think this would make a good masculine card.


Here's the card.  I stamped the images in VersaFine Vintage Sepia ink on watercolour paper and coloured by picking pigment up from watercolour pencils using a wet paintbrush.  I die cut two stitched rectangle shapes, one from Very Vanilla CS and one from Cajun Craze CS.  I stamped sand along the bottom of the Very Vanilla panel, stamped the sentiment and popped up the shells and seahorse.  I embossed the Cajun Craze rectangle with the 'Subtle' embossing folder to add a touch of texture and adhered the panels offset from each other.


Here's the inside of the card.  I stamped the sand dollar on the Vanilla panel, stamped it again on a Post It note, cut it out and used that as a mask and stamped the shell.  After stamping the sentiment I layered the panel onto a mat of Cajun Craze CS.


Here's the envelope front with just simple stamping.  There was absolutely no way I was going to attempt colouring images for the inside of this card and envelope after the struggles of the previous day!


I'm put off this set now because of the struggles but I'll try again - one day!  Maybe I'll get on much better next time or perhaps it's one of those sets that is not right for me and in that case I will pass it on!

Supplies:
Stamps: SU! 'Seaside Notions' & 'Fancy Phrases' sets
CS: SU! Cajun Craze, Crumb Cake & Very Vanilla, watercolour paper
Ink: VersaFine Vintage Sepia, SU! watercolour pencils
Tools: SU! 'Stitched Rectangles' die set, 'Subtle' embossing folder, paintbrush
Embellishments & accessories: SU! Dimensionals

Ruth
01 09 10