Showing posts with label Gap card. Show all posts

Saturday, 15 June 2019

Floral Happy Birthday Gap Card

I've recently purchased a few Stampin' Up! Stampin' Blends alcohol markers and I was keen to have a go.  I only bought a few colours as I thought I'd try them out first to see how I got on with them before deciding if I want to start a collection.

Last year I made this gap card and I chose to CASE the card.  I thought the floral image from the SU! 'Southern Serenade' set would be perfect to colour using the Stampin' Blends!  The gap card measures 5 3/4" square and my colour combo is Granny Apple Green, Flirty Flamingo, Basic Black and Whisper White.  I stamped the scrap of lace image from the 'Southern Serenade' set as a background onto a piece of Whisper White thick CS using stamped off once Daffodil Delight ink - it's very subtle!  I stamped the floral image using Memento Tuxedo Black ink.  I added colour to the flowers and leaves using Daffodil Delight, Flirty Flamingo and Granny Apple Green Stampin' Blends markers.  After stamping the sentiment I added a punched butterfly with a few rhinestone jewels.


Here's a side view of the card.  The stamped panel bridges the gap I cut from the card base.


Here's the inside of the card and the envelope flap.  I stamped the lace image in stamped off once Flirty Flamingo ink on opposite corners.  I added the Granny Apple Green Textured Weave ribbon,  popped up the Flirty Flamingo die cut oval and added a punched butterfly at the bottom.  I used circle punches for the decorative element on the envelope flap.


Supplies:
Stamps: SU! 'Southern Serenade' set, Hero Arts 'Yummy Treats' set
CS: SU! Basic Black, Flirty Flamingo, Granny Apple Green & Whisper White (thick & regular)
Ink: Memento Tuxedo Black, SU! Daffodil Delight, Flirty Flamingo, SU! Daffodil Delight, Flirty Flamingo & Granny Apple Green Stampin' Blends alcohol markers
Tools: SU! 'Stitched Shapes' die set, SU! 'Butterfly Duet & circle punches
Embellishments & accessories: SU! Granny Apple Green Textured Weave ribbon, rhinestone jewels, Dimensionals

Ruth

Thursday, 14 June 2018

Happy Birthday Friend Gap Card

This is a gap card I made for a friend's birthday featuring the lovely SU! 'Southern Serenade' stamp set and the water stamping technique.  I applied Mustard Seed and Worn Lipstick Distress Inks to a piece of Whisper White thick CS using ink duster brushes.  I spritzed the SU! 'Burlap' background stamp liberally with water, pressed the stamp to the inked panel and then used my heat tool to dry the panel.  I stamped the lace strip, floral image and sentiment, trimmed the panel to size and matted it onto a black layer.  I used ProMarkers to colour in the floral image and added three die cut and embossed butterflies.

I made a 5 3/4" square Flirty Flamingo card base, cut away a piece from the card front, trimmed that to the size I wanted, added black CS border strips to my card front pieces and bridged the gap by popping up the image panel over the two card front pieces. 


Here's a side view of the gap card so you can see how the card is put together.


Here's a closer look at the water stamped panel.


Here's the inside of the card and the envelope flap featuring the gorgeous scrap of lace stamp from the 'Southern Serenade' stamp set.


I was looking for something in my embellishments stash and came across a few resin roses that I'd completely forgotten about.  They match beautifully with Flirty Flamingo so one was perfect to dress up the butterfly on the envelope front!  I popped up the name label to finish.


Supplies:
Stamps: SU! 'Southern Serenade' set, SU! 'Burlap' background stamp, Hero Arts 'Yummy Treats' set
CS: SU! Basic Black, Flirty Flamingo & Whisper White (regular & thick)
Ink: Ranger Tim Holtz Mustard Seed, Worn Lipstick & Black Soot Distress Inks, ProMarkers
Tools: Inkylicious ink duster brushes, SU! 'Beautiful Wings' Embosslits die, SU! 'Stitched Shapes' Framelits die set, Sizzix 'Card, Fancy Frame Flip- Its #2' Framelits die set
Embellishments & accessories: black & white gingham ribbon, resin rose, SU! rhinestone jewels, Dimensionals

Ruth


Sunday, 31 July 2016

Snowman Wonderful Christmas Gap Card

Really, it was inevitable that I'd create a snowman gap card!  I've really enjoyed making a few Christmas gap cards and it just wouldn't have been right to not include a snowman card in the collection!

This card measures 7" x 5" and I used a colour combo of Island Indigo, Pool Party, Night of Navy and white.  The patterned paper is from the SU! 'Floral Boutique' DSP pack - I thought the dotty navy and white paper looked quite snowy!  I stamped the snowman twice using Night of Navy ink, fussy cut one snowman, inked the edges with Pool Party ink and popped him up.  I stamped part of the image again using Island Indigo ink and I fussy cut the hat and glued that in place.  I decorated the panel at the bottom of the card with some Pool Party ribbon, attached a snowflake charm with some silver thread and added a rhinestone jewel to the centre of the charm.  I added more jewels to the image panel.


Here's a closer look.


Here's the inside and the envelope.  


Yay, another Christmas card added to the box - I've just got to keep it up!

Supplies:
Stamps: Inkadinkado 'Holiday Sentiments' set, Hero Arts 'Wonderful Christmas' set, Imaginisce 'Be Merry'
CS: SU! Island Indigo, Night of Navy, Pool Party & Whisper White

Patterned paper: SU! 'Floral Boutique' DSP
Ink: SU! Island Indigo, Night of Navy & Pool Party
Tools: Sizzix 'Banners, Fancy' Framelits die set, circle punches, X Cut corner rounder punch, sponge dauber
Embellishments & accessories: silver thread, snowflake charm, 
SU! Pool Party ribbon, rhinestone jewels, Dimensionals

 photo RoseRuth.gif

Friday, 22 July 2016

Poinsettia Joyful Christmas Wishes Gap Card

This is the third Christmas gap card I've made this week.  Jan came round yesterday to make one and I'd made a bet with myself that out of the three cards I'd designed Jan would choose to make the poinsettia card - and I was right!

I made a Cherry Cobbler 5 3/4" card base and the plaid paper is from the SU! 'Merry Moments' DSP pack.  Jan opted to use a lighter plaid patterned paper on her card.  I stamped the 'Joyful Christmas Wishes' sentiment on the inside white panel in Mossy Meadow ink.  The poinsettia was made with the Creative Expressions Sue Wilson 'Shaded Poinsettia' stamp set and the 'Classic Poinsettia' die set.  I stamped the poinsettia flowers and leaves on Whisper White CS using Cherry Cobbler ink for the flowers and Mossy Meadow ink for the leaves - I stamped three of the larger and three of the smaller flower shapes.  I applied Spun Sugar Distress Ink to the flowers and Peeled Paint Distress Ink to the leaves using ink duster brushes.  I die cut the shapes and inked the edges of the flowers with Cherry Cobbler ink and the leaves with Mossy Meadow ink using sponge daubers.  I die cut two Cross Stitched Frame rectangles, attached the six stacked flower layers together with a gold brad, fluffed up the layers a wee bit, glued the leaves down and popped up the flower.  I added a strip of Cherry Cobbler ribbon to the bottom of the card and glued a strip of Gold Glimmer Paper over the top.  A sprinkling of red metallic nailheads completed the card front.


Here's the inside and the envelope.  I glued a strip of the plaid paper to the inside of the card at the bottom, added a line drawn with a Cherry Cobbler marker pen and stamped the sentiment.  For the envelope front I matted a strip of paper onto Cherry Cobbler CS, glued the strip in place and popped up the die cut name label.  Jan chose to decorate her envelope with a couple of poinsettias instead which looked lovely.


Supplies:
Stamps: Creative Expressions Sue Wilson 'Shaded Poinsettia' set, sentiments from SU! 'Joyful Christmas' set
CS: SU! Cherry Cobbler & Whisper White, SU! Gold Glimmer Paper

Patterned paper: SU! 'Merry Moments' DSP pack
Ink: SU! Cherry Cobbler & Mossy Meadow, Ranger Tim Holtz Spun Sugar & Peeled Paint Distress Inks
Tools: Creative Expressions Sue Wilson 'Classic Poinsettia' die set, Memory Box 'Cross Stitched Frame Border' die set, Spellbinders 'Grommet Tags' die set,  Inkylicious ink duster brushes, sponge daubers
Embellishments & accessories: red & gold metallic nailheads, gold brad, SU! Dimensionals


 photo RoseRuth.gif

Wednesday, 20 July 2016

Snowflake Merriest Wishes Gap Card

I'm getting in as much crafty time as I can this week as I'm on holiday from work!  I thought I'd enter into a Christmas card challenge as it's been ages since I've done that.  There's a snowflakes theme challenge over at Sparkles Christmas Challenges and I'm entering this snowflake gap card.  This card was made on one of the hottest days of the year, I hoped working with snowflakes would take my mind off the heat!

This card measures 5 3/4" square and I used SU! Bermuda Bay CS for the card base and the snowflake paper is from the SU! 'Season of Cheer' DSP pack.  I cut a 2" wide gap 1 1/2" from the top of the card.  I used Bermuda bay ink for the larger snowflake and Night of Navy ink for the smaller one.  I stamped and fussy cut the small hexagonal piece and glued it in the centre.  I popped up both the larger and smaller snowflakes and some rhinestone jewels completed the card front.


Here's a side view of the gap card.


Here's the inside and the envelope.  I stamped the snowflakes in stamped off once Bermuda Bay ink and stamped the sentiments in Night of Navy ink.  I used my Stamp-A-Ma-Jig to stamp the snowflakes repeatedly to form the border at the bottom.   A stamped and die cut snowflake decorates the envelope flap.


Supplies:
Stamps: SU! 'Festive Flurry' set, Hero Arts 'Very Merry Christmas' set, PSX 'Snowflake Medley'
CS: SU! Bermuda Bay, Night of Navy & Whisper White

Patterned paper: SU! 'Season of Cheer' DSP
Ink: SU! Bermuda Bay, Night of Navy
Tools: SU! 'Festive Flurry' Framelits dies, Stamp-A-Ma-Jig
Embellishments & accessories: SU! rhinestone jewels, Dimensionals


 photo RoseRuth.gif


Monday, 18 July 2016

Ornament Noel Gap Card

This week Jan is coming over one afternoon for a crafty play and she'd like to make a Christmas gap card.  I'm hoping to make a few designs before our get together - to give Jan more choice and to add a few Christmas cards to the stash!  This design features the beautiful SU! 'Embellished Ornaments' set and the 'Season of Cheer' patterned paper.

The A6 sized card base was made with Cherry Cobbler CS and I cut a 2" gap 1 1/4" from the top of the card.  I glued a panel of white CS inside the card and stamped the sentiment.  I stamped and die cut the ornament elements and added a separately stamped and fussy cut poinsettia.  I used an inverted corner rounder punch on the white panel and glued that to the Old Olive mat layer.  I added a gold cord bow to the ornament hanger, popped the ornament up and sprinkled on a few rhinestone jewels.


Here's a side view of the card.


Here's the inside and the envelope.  I stamped the holly using Old Olive ink and went over the berries with a Cherry Cobbler marker pen.  The envelope flap was simply decorated with the pretty holly paper.


Supplies:
Stamps: SU! 'Embellished Ornaments' set, Hero Arts 'Noel'
CS: SU! Cherry Cobbler, Old Olive & Whisper White

Patterned paper: SU! 'Season of Cheer' DSP
Ink: SU! Old Olive & Cherry Cobbler
Tools: SU! 'Delicate Ornament' Thinlits dies, Woodware inverted corner rounder punch
Embellishments & accessories: gold cord, SU! rhinestone jewels, Dimensionals


 photo RoseRuth.gif


Saturday, 25 June 2016

Blue Field Flowers Birthday Gap Card

Gap cards seem to be popular on Pinterest, I keep seeing them and I'd made a mental note to make one soon.  When I got out my SU! 'Field Flowers' set to make another two step stamping card I decided to make it a gap card.

I knew I wanted to use some paper from the SU! 'Floral Boutique' DSP pack so my colour combo had to include Night of Navy and white - I chose to add Marina Mist too.  The card base measures 5 3/4" square and the gap measures 2".  I glued the patterned paper pieces down first, added the white panel inside the card and stamped the sentiment.  I then stamped the image using Old Olive ink for the stem, Marina Mist ink for the solid flower images and Night of Navy ink for the outline images.  I matted and layered the panel and adhered it in place over the gap.  I stamped more flower images, fussy cut them and popped them up.


This floral image is one of my all time favourites, the flower is just so pretty!  I'd forgotten just how lovely it was and I so enjoyed using these stamps again!  Here's a closer look.


Here's the inside of the card.  I stamped and fussy cut two flower heads and added some rhinestone jewels around the sentiment.


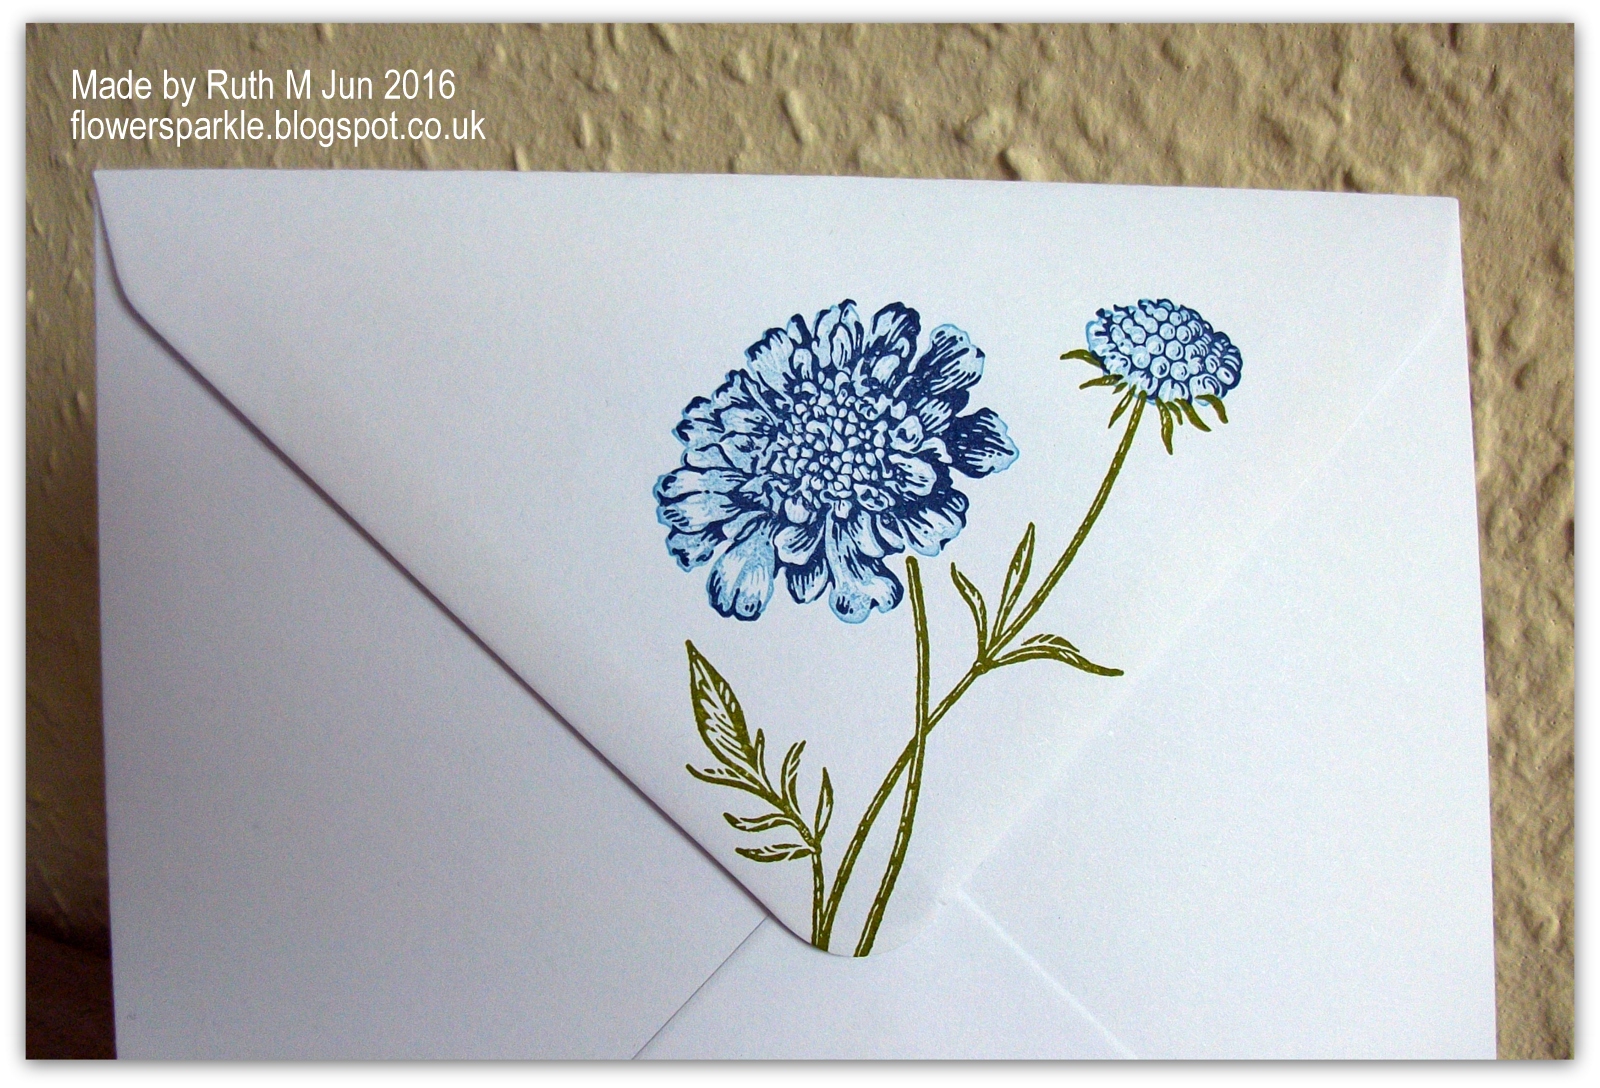
Here's the envelope where I stamped the beautiful image onto the flap.  


Supplies:
Stamps: SU! 'Field Flowers' & 'Birthday Blooms' sets
CS: SU! Marina Mist, Night of Navy & Whisper White

Patterned paper: SU! 'Floral Boutique' DSP
Ink: SU! Old Olive, Marina Mist & Night of Navy
Embellishments & accessories: SU! rhinestone jewels, Dimensionals


 photo RoseRuth.gif

Saturday, 13 April 2013

Snowman & Circles Gap Card - 52 {C}CT Apr Colour Challenge

We have this wonderful colour challenge for you this week at 52 {C}CT.  I love blue Christmas cards!


To start I chose a favourite Inkadinkado snowman stamp and I stamped him with Night of Navy ink.  I remembered I have a Sizzix Circles strip die that goes well with this stamp and I decided to use that to make a gap card.  I think gap cards are such fun and I haven't made one in a while.  I made a 5 3/4" square Bashful Blue card base and then cut a gap from the front.  I cut two Night of Navy circles die cut shapes and glued them back to back between the gap.  I think using two shapes gives a bit more strength and reinforces the gap.

Here's the card open on display where you can see the gap.


This next photo shows the card closed.  I glued a strip of white CS inside the card so it will show through from behind.  I added three punched blue snowflakes inside so they are visible through the large circular holes.  I then punched smaller white snowflakes and glued those to the front of the circles strip.  I layered the snowman panel onto a Night of Navy mat, glued that to the card and added a photo corner with a small punched snowflake.  I added three white snowflakes underneath the snowman panel and then added rhinestone jewels to each snowflake centre.  I applied Star Dust Stickles underneath the snowman for some sparkly snow.


Here's the inside.


For the front of the envelope I die cut another Night of Navy Circles strip and added punched snowflakes with jewel centres.


I really enjoyed putting this card together!  I hope you'll join us for this week's 52 {C}CT challenge, I'm looking forward to checking out your blue Christmas cards!  The other DT members will have fab cards to inspire you so please take a look at those before you go off and get inky!

Supplies:
Stamps: Inkadinkado 'Holiday Sentiments' clear set, Hero Arts 'Holiday Cheer' clear set
CS: SU! Bashful Blue, Night of Navy & Whisper White
Ink: SU! Night of Navy
Tools: Sizzix 'Circles' Decorative Strip die, SU! Photo Corners punch, Fiskars snowflake punch, Woodware tiny snowflake punch
Embellishments & accessories: Star Dust Stickles, SU! Rhinestone Jewels


 photo DiamanteHeartsRuth.gif

Monday, 28 November 2011

Two Punched Holly Christmas Cards

I thought it was time to switch from a wintery blog template to a Christmassy one seeing as it will be here in a few short weeks!  These are two cards I made using my Martha Stewart Holly Branch punch.  I wanted to make them both gap cards but I couldn't make that work with this first card due to how I'd positioned the punched shapes, the gap just didn't look right at all - so the holly is hanging off the edge.  Actually, I really liked how this card turned out and I prefer it to the gap card!  The side opening A6 card was made with Cherry Cobbler CS and I cut 2 3/8" off the side.   I stamped a music background, heat embossed the sentiment with white powder and added white ribbon.  I punched 6 holly shapes and glued them front and back to add some strength and then I added some red pearls as berries.


Inside I stamped a sentiment onto a panel of My Mind's Eye paper and added a couple of Cherry Cobbler CS strips.  I stamped a sprig of mistletoe on the envelope flap to finish off.


So this next card is the gap card.  Again I used Cherry Cobbler CS to make an A6 side opening card and added a white embossed sentiment.  I used snowflakes as a background on this card and the ribbon is Chocolate Chip taffeta.  I cut the card apart and then re-joined two pieces of CS with the punched holly bridging the gap.  Again I glued the shapes front and back for strength.  As I used a large sentiment on the front of the card I didn't stamp a greeting inside.  The aqua patterned paper you can see through the gap has been glued to the inside back panel of the card and I've glued the red pearl berries onto the aqua paper. I stamped the envelope flap with the lovely mistletoe sprig again.


Supplies for card 1:
Stamps: Hero Arts Music Background, Hero Arts Very Merry Christmas clear set, mistletoe from SU! Peaceful Wishes set
CS: SU! Cherry Cobbler, Core'dinations Amazon
Patterned paper: paper from My Mind's Eye 'I Believe' collection
Ink: SU! Cherry Cobbler & Pear Pizzazz, VersaMark
Tools: Martha Stewart Holly Branch punch
Embellishments & accessories: white embossing powder, white grosgrain ribbon, red pearls


Supplies for card 2 (gap card):
Stamps: snowflakes from Butterfly Kisses Snowy Christmas clear set, sentiment from Stampendous, mistletoe from SU! Peaceful Wishes set
CS: SU! Cherry Cobbler,  Core'dinations Amazon
Patterned paper: paper from My Mind's Eye 12 Days of Christmas collection
Ink: SU! Cherry Cobbler & Pear Pizzazz, VersaMark
Tools: Martha Stewart Holly Branch punch
Embellishments & accessories: white embossing powder, SU! Chocolate Chip taffeta ribbon, red pearls


Photobucket

Monday, 24 October 2011

Merry Christmas Ornaments Gap Card

Another Christmas card made for my stash, I am determined to have enough cards made in time this year!  This is a 5 3/4" square gap card made with the SU! Contempo Christmas set.  My colour combo is Pear Pizzazz, Baja Breeze and Riding Hood Red - hmmm, I like this combo muchly!  I started with a Pear Pizzazz card base and added a snowflake embossed Baja Breeze panel at the top.  I inked inside the folder with Baja Breeze ink before embossing the CS.  I cut the card apart, stamped and punched three ornaments, punched another three ornaments and then joined the card back together by sandwiching the ornaments with 3d foam pads.  The gap measures 1 1/4".  I sprinkled Dazzling Diamonds glitter on the front of the ornaments.  I added the sentiment, a decorative punched border and a couple of red strips to finish off the front.


Then it was time to work on the inside of the card.  I added a white panel with two coloured strips, stamped the sentiment and the three snowflakes.  I absolutely love that snowflake from the Patterned Pines set and stamped in those three colours - even lovelier!   It was so worth the effort of cleaning the stamp in between inkings to get the three colours!  A stamped and punched snowflake circle element on the envelope flap and the card was completed.  


Supplies:
Stamps: SU! Contempo Christmas & Patterned Pines sets, Stampendous Christmas Wishes clear set
CS: SU! Pear Pizzazz, Baja Breeze, Riding Hood Red & Whisper White
Ink: SU! Pear Pizzazz, Baja Breeze & Riding Hood Red
Tools: SU! Ornament Punch, Martha Stewart Optic Dot border punch, snowflake embossing folder from Cuttlebug Winter Wonderland set, circle punches
Embellishments & accessories: SU! Dazzling Diamonds, 3d foam pads


Photobucket

Tuesday, 23 August 2011

Stars Birthday Gap Card For Kevin

This is the birthday card I've made for our friend Kevin.  I've swapped some craft goodies with Lesley for a few weeks and I have this stars border punch on loan from her.  I thought it would be ideal to use it to make a gap card.

I started off with a Marina Mist side opening landscape A6 card.  I punched the stars border and then cut the card apart.  I stamped the fab sentiment with VersaMark ink and embossed with white powder.  I then die cut the stars using white CS and silver mirror card and embossed the silver star die cuts with the Square Lattice folder.  I used Marina Mist brads to attach the stars together.  I've added 2 punched silver stars to the card front.  I joined the card together by gluing two stars between the gap.  I punched another Marina Mist stars border and glued it behind and I also die cut two more stars and glued those behind to add strength to the gap.  I covered the whole inside back panel of the card with Bashful Blue CS so that's visible through the gap and stars border when the card is closed.


I found this lovely Stampendous "Wishing you many happy moments of discovering new things in life.  Have a wonderful Birthday" sentiment stamp recently.  I love using nice sentiments inside cards so I couldn't resist buying this stamp!  I love it, it's meaningful but not slushy - I'm not keen on slushy sentiments!  As it was a new addition to my stash I couldn't wait to ink it up and use it.  After stamping it I realised putting it inside a gap card probably wasn't the wisest move - I wasn't left with a lot of room to write a message, I didn't want any writing to show through the gap from the front!  Mind you,  that sentiment says enough so it wasn't a major problem.  I punched 3 silver mirror stars for the envelope flap.


I decorated the front of the envelope with strips of Marina Mist, Bashful Blue and silver mirror card and used the stars border punch on the Marina Mist piece.  This was a fun card to make - blimey, a masculine card that I actually enjoyed making!


Supplies:
Stamps: 'Happy Birthday' from SU! Swirls & Curls Verses set, inside sentiment from Stampendous
CS: SU! Marina Mist, Bashful Blue & Whisper White, silver mirror card
Ink: VersaMark, SU! Marina Mist
Tools: Sizzix Stars #2 die, star punches, Martha Stewart Classic Stars border punch, SU! Square Lattice embossing folder
Embellishments & accessories: white embossing powder, SU! Marina Mist brads


Photobucket

Tuesday, 8 December 2009

Tree Trimmings Gap Card

Another gap card but this time I've used the Circles Decorative Strip die. To make this card I cut an A4 sheet of SU! Real Red CS in half length ways and then scored and folded that piece in half. It fits in a C6 size envelope.

For the gap, I cut 2 1/2" off the bottom of the card, glued the top of the Circles die shape, lined up the 2 1/2" piece I'd earlier cut off and glued the bottom of the Circles shape to that and then cut the excess CS off at the bottom of the card. I then glued a second Circles die cut shape to the back to add some strength. This time I decided to add some patterned paper behind the gap element. As I tried a strip of the green snowflakes paper I couldn't believe how the three snowflakes just happened to fit behind the larger circles - it's fab when something happens like that!

I stamped the ornaments in Old Olive, Garden Green and Chocolate Chip inks and then cut them out. I hand drew the strings with a Marvy marker pen - I saw a card Kristina Werner made on her blog where she did that and it looked really nice. I'm not very confident at free hand drawing anything but I followed Kristina's foolproof method of drawing in pencil first, going over it with the pen and then erasing the pencil lines after! The ornaments are all popped up. I added crystals to the ornaments and to the three snowflake centres visible through the gap. I then added the sentiment and rounded the bottom corners.


Supplies:
Stamps: SU! Tree Trimmings set, sentiment by Hero Arts
CS: SU! Real Red, Whisper White & Old Olive
Patterned paper: SU! Merry Moments Designer Series Paper pack
Ink: SU! Old Olive, Garden Green & Chocolate Chip
Tools: Sizzix 'Circles' Decorative Strip die, Crop-A-Dile Corner Chomper
Embellishments & accessories: Clear and red crystals, 3d foam pads

Photobucket

Saturday, 28 November 2009

Noel Gap Cards

I've seen a few gap cards on Paula Pascual's blog here - the page will open in a new window - and I absolutely loved the Noel gap card she made. I got to see a few of her gap cards on display at the Glitter Pot too - and she was in the shop so I got to have a chat with her, she is so lovely and helpful.

I've made two gap cards so far. My cards measure 5 3/4" square and I cut 3" off the bottom front of the cards. The Noel is from a Sizzix Decorative Strip die and I cut two Noels for each card so one is glued at the front and another glued at the back to add some strength.

After cutting off the bottom 3", I applied glue to the top of one Noel and glued it to the front of the card. Then I applied glue to the bottom of the Noel and carefully lined up the 3" piece I'd earlier cut off, glued the bottom of the Noel and then trimmed off the excess CS at the bottom. Then I glued the second Noel to the back.

For the first card I applied a strip of gorgeous glittered holly paper to the top of the card and at the bottom there is a strip of Bravo Burgundy CS with a strip of Garden Green CS embossed with the Holly Ribbons Cuttlebug folder. Then to finish, I added some tiny punched snowflakes with crystal centres.


For my second gap card, I put a strip of SU! Merry Moments paper, matted on Real Red CS at the top. The line of snowmen at the bottom is stamped in Garden Green ink and I used the fine end of Marvy marker pens to add some colour. This stamp is a wheel but I'm definitely wheel challenged and find them difficult to use! So I unmounted the stamp from the wheel, applied cling foam to the back of the rubber and now I use the stamp with a long clear acrylic block - so much easier for me!

To finish this card, I've added red grosgrain ribbon with a snowflake charm at the top and again added punched snowflakes with crystal centres. I think these gap cards are fun and something quite different. I can't wait to see if my Circles Decorative Strip die will work for gap cards too!


Supplies for holly Noel gap card:
Stamps: None
CS: SU! Old Olive, Bravo Burgundy & Garden Green
Patterned paper: K & Co Christmas Cheer Holly Glittered paper
Ink: None
Tools: Sizzix Phrase, Noel w/Holly & Frame Decorative Strip die, Cuttlebug Holly Ribbons Embossing Folder, Woodware tiny snowflake punch
Embellishments & accessories: Clear crystals

Supplies for snowmen Noel gap card:
Stamps: SU! Snowman Fun wheel
CS: SU! Old Olive, Real Red & Whisper White
Patterned paper: SU! Merry Moments Designer Series Paper pack
Ink: SU! Garden Green, Marvy Le Plume II marker pens
Tools: Sizzix Phrase, Noel w/Holly & Frame Decorative Strip die, Woodware tiny snowflake punch
Embellishments & accessories: SU! Real Red grosgrain ribbon, snowflake charm, clear crystals

Photobucket
01 09 10