Showing posts with label Classic & Elegant. Show all posts

Monday, 2 June 2014

30th Wedding Anniversary Card - HOC June Blog Hop & Anything Goes Photo Inspiration Challenge

Hi, all!  It's time for an end of the term blog hop over at House of Cards and we have a super fun challenge AND tons of great prize opportunities for those of you who join in the fun!!! :)   There is also a DT call going on too!  You should have arrived here from MYNN - who has shared not one but three beautiful cards! If you haven't, please start all the way back at the House of Cards hop post and follow the list found in the body of the hop post!

Here's our photo inspiration~

Here are our fabulous sponsors~
Eclectic Anthology
Prize: $50 gift voucher to the shop.
FREE Vintage Flower Basket Graphics-free, vintage, flower, rose, graphics, basket, antique
Inspired By Stamping
Prize: $15 gift voucher to the shop.
Inspired by Stamping


Paper Sweeties

Prize: $20 gift voucher to the shop.


STAMPlorations

Prize: 5 stamps sets--your choice--from the shop.
Stitchy Bear
Prize: $10 gift voucher to the shop.


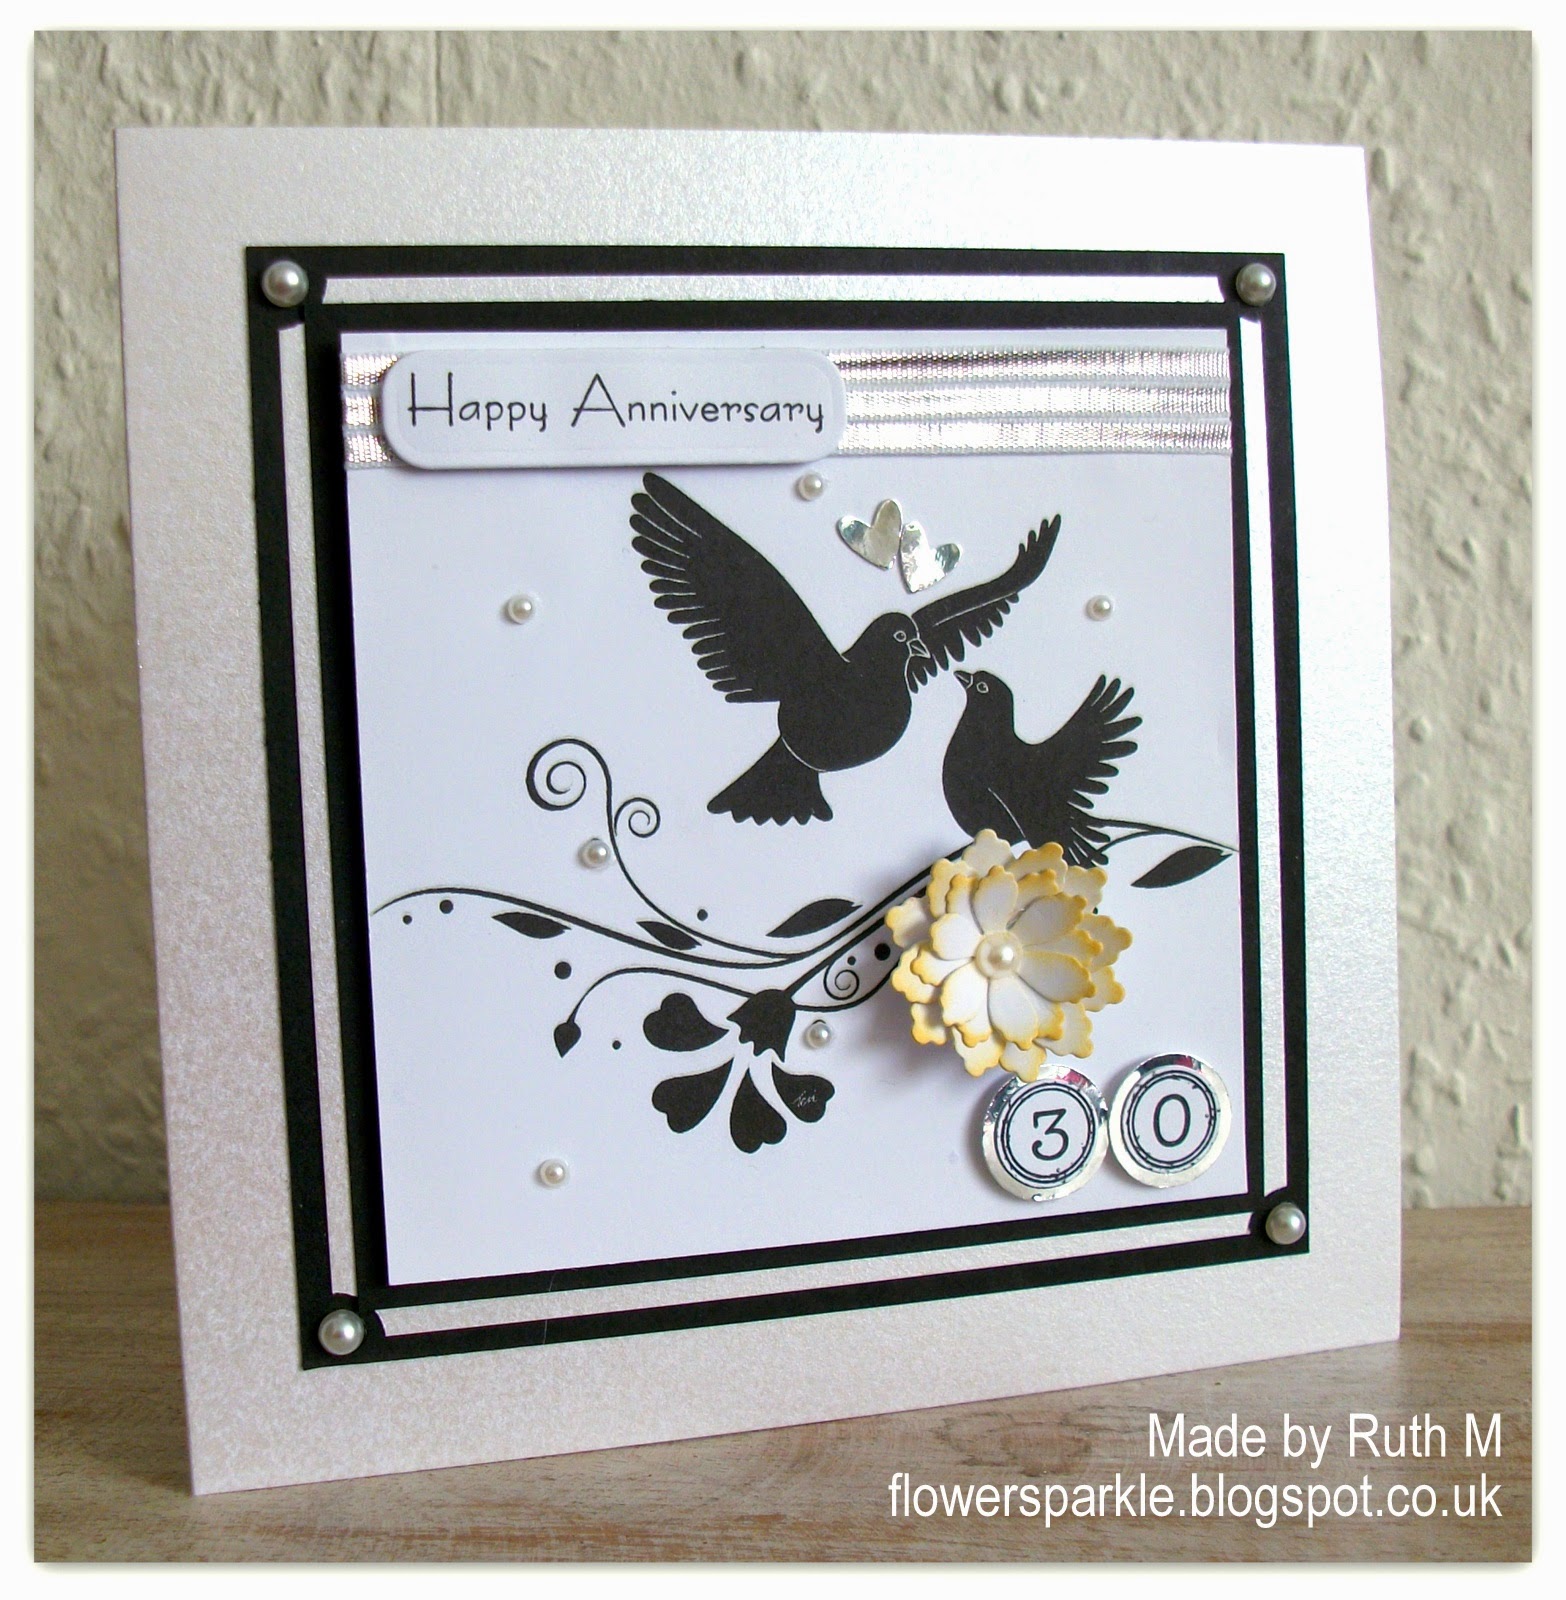
For my card I chose to be inspired by the black and white numbered jars, the metal basket and the flowers.  I've made a Classic and Elegant style 30th Wedding Anniversary card using a simple combo of black, white and silver - I used shiny silver mirri CS and shiny silver ribbon for a touch of glamour.  A pearl anniversary is celebrated at 30 years so I've included pearl CS and pearls in my design.

The card base is 5 3/4" square and was made from Centura Pearl white with a hint of silver CS.  I printed the beautiful Stitchy Bear 'Lovey Dovey Silhouette' digi image onto white CS, adhered 3 strips of narrow silver ribbon to the top of the panel and layered onto black and white pearl CS mats.  I punched the corners of the white pearl CS mat layer so that I could add pearls onto the black mat.  I stamped, punched and popped up the numbers.  I stamped and die cut the sentiment and popped that up also.  I die cut some white flowers and edged the petals with Scattered Straw Distress Ink.  I shaped the flower layers, glued the flower to the card and added a pearl to the centre.  I added 2 small punched silver hearts and sprinkled more pearls on the panel to complete the card front.  

Here's the inside and the envelope.  I stamped the decorative heart onto white CS using Smoky Slate ink and I stamped the sentiment over the top in black ink.  I layered onto a black mat and added 2 silver punched hearts.  For the envelope flap I used a circle Nestie die to cut out a portion of the Lovey Dovey Silhouette image and matted onto a larger black circle. 


Very sadly, this will be my last post for House of Cards as I'm now stepping down.  I've enjoyed the HOC experience so much and I'm so happy to have been a part of it!  If you'd like to design for HOC  now's the time to apply as there is a DT call going along with the Blog Hop!

Now get to hoppin'!  Your next stop is CORNELIA!  Wow, what a stunning and stylish CAS creation she has shared!  If you get lost along the way, you can always head back to the original blog hop post--and don't forget to link up a project at the House of Cards blog after completing the hop for an extra chance to win a mystery prize from one of our fabulous sponsors, too!


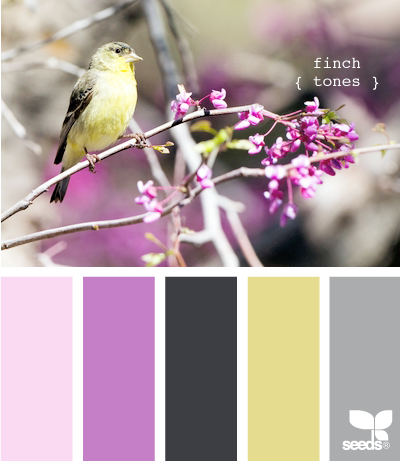
 photo RoseRuth.gif

Monday, 19 May 2014

Bird To You From Me Card - HOC May Colour/Photo Challenge

This month at HOC we have a colour combo/photo inspiration challenge.  For the next two weeks we'd like you to make and link up CAS or Classic & Elegant style cards using the picture below for inspiration - you can use the colours, the picture or both as your inspiration!


I used some of the colours plus a bird for my Classic & Elegant style card - I was very happy to ink up the Inkadinkado pretty bird image again!  I embossed some lavender coloured Core'dinations CS with the Birds & Swirls folder, scuffed the embossing with sandpaper and layered the panel onto a black mat.  I threaded two strips of ribbon through a metal ribbon slider, taped the ends behind the panel and adhered it to the 5 3/4" square Smoky Slate card base.  I stamped the bird twice and fussy cut the second bird and popped it up.  I punched tiny flowers and added gems to the centres and popped up the sentiment to complete the card front.


Here's the inside and the envelope.  I stamped a bold birthday sentiment and punched larger flowers for the inside of the card.


So that's my card based on the photo and the other DT members have got fabulous inspiration for you so do check that out before you make your own fab creation!  Whatever you create make sure to link it up for us at HOC

Supplies:
Stamps: Inkadinkado 'Birds Galore' set, SU! 'Best Yet' set, Hero Arts 'Friends are Tresures' cling set
CS: SU! Smoky Slate, So Saffron, Basic Black & Whisper White, Core'dinations lavender CS
Ink: VersaFine Onyx Black, SU! Smoky Slate
Tools: Cuttlebug 'Birds & Swirls' embossing folder, circle punches, Woodware flower punches
Embellishments & accessories: SU! So Saffron grosgrain riibbon, black & white gingham ribbon, metal ribbon slider, SU! rhinestone jewels, Dimensionals


 photo RoseRuth.gif
 

Monday, 21 April 2014

Butterflies Good Luck Card - HOC April Sketch Challenge - Classic & Elegant

At House of Cards this month we have a sketch challenge for you.  During the next two weeks we're wanting to see either CAS or Classic and Elegant cards made using this great layout.  You can rotate the sketch and change shapes - as long as the layout still comes through on your completed card it's all good!


 I stayed faithful to the layout - and I was even literal enough to use a butterfly as the main image! - but I opted to make a square card.  I layered dotty patterned paper onto an Island Indigo mat, added the lace trim and adhered the panel to the front of the Pool Party 5 3/4" square card base.   I then got busy with my butterfly die, I cut it out, dry embossed it - and keeping the shape in place inside the die - I applied Pool Party ink using a sponge dauber.  I removed the shape from the die, masked the string and bow and stamped a woven pattern over the top in Island Indigo ink. The Pool Party square and the sentiment are popped up and to complete the card front I added more butterflies and sprinkled on some rhinestone jewels. 


Here's a closer look at the butterfly.  Because I kept the die in place before adding the Pool Party ink the debossed areas remained white.  I tried stamping the woven background over the top whilst the die was still in place but that wasn't successful.  So I removed the shape from the die and stamped again - perfect - only the raised embossed areas got stamped so my debossed areas stayed white.  I inked the edges of the butterfly with Island Indigo ink using a sponge dauber just to give a little more definition.


Here's the inside of the card and the envelope.  For these butterflies I die cut using Pool Party CS and applied Island Indigo ink with a sponge dauber and didn't stamp a design over the top.  The Memory Box Precious Butterflies die comes with both large and small butterfly shapes, both suspended from a string and bow.  I snipped the bow off the smaller one, glued it to the white panel and lined the larger butterfly up above it before gluing it into place.  I just used a small butterfly shape for the envelope flap.  


That Good Luck sentiment stamp has been in my stash for many, many years, it's one of the first stamps I ever bought, I fell in love with that gorgeous font - and I still love it now!  I rarely make Good Luck cards so it doesn't get an outing very often.  I was very happy to ink it up again to make a card for Hollie, a sweet girl who worked at our local craft shop, the Glitter Pot.  Hollie starts a new job soon and I wanted to wish her the best of luck and good wishes for her future.    

So now it's over to you, please link up your creations made using the sketch, we'd love you to play along with us at HOC!

Supplies:
Stamps: Rubber Stampede 'Good Luck', Hero Arts 'Large Woven Background', Hobby Art 'Sentiments' clear set
CS: SU! Pool Party, Island Indigo & Whisper White

Patterned paper: Lasting Impressions 'Seaside' dotty paper
Ink: SU! Pool Party & Island Indigo
Tools: Memory Box 'Precious Butterflies' die, SU! 'Beautiful Wings' Embosslits die, Spellbinder's Grommet Tags die set, SU! Ticket Corner punch, small circle punches, sponge daubers
Embellishments & accessories: Woodware self adhesive white lace ribbon, SU! Island Indigo Candy Dots & Brad Bases, SU! rhinestone jewels, Dimensionals


 photo RoseRuth.gif
 

Monday, 31 March 2014

Dimensional Bloom Happy Birthday Card - HOC March Photo Inspiration Challenge

Because there is a 5th Monday in March we have a 5th week photo inspiration challenge for you at HOC.  This challenge will run for one week only, you can use any card making style but you must use the photo as inspiration for your card design.  Photo inspiration challenges are great fun, it's amazing to see the different interpretations from everyone!

Pretty, country, chic. Love it.

I used the very pale green, the darker green, the blue and white colours from the photo, plus I really liked the plates on the wall so I included circles in my design as a nod to the plates.  While searching in my stash for some textured CS for another project I came across the pale green CS which I'd forgotten I had.  It's gorgeous, it looks like watered silk!  Perfect for this challenge so I immediately pulled it out and set it aside. 

To start I made a 5 3/4" square card base with the pale green CS.  I nested two bloom dies on Lucky Limeade CS and ran them through my Big Shot using the Tim Holtz Dimensional Cutting Pad so that the centres of the blooms didn't cut out and remained attached to the CS.  I then used a circle die to cut out my Limeade piece and I cut a same size circle of Marina Mist dotty patterned paper which I glued behind the Limeade circle.  When the bloom is made dimensional by folding the sides up you can see the dotty paper peeking through from behind.  Using a sponge dauber I added Limeade ink to the dimensional bloom piece to add a little bit of definition, I layered onto a blue textured CS circle, glued it to the card front and popped up the sentiment banner.  I then shaped two die cut blooms, fixed them together with a Limeade brad and attached them to a pale green circle.  When I folded up the sides of the dimensional bloom I got some creases in the CS which, being a perfectionist, I didn't like the look of!  I punched two small blue flowers and glued them on to cover the creases - aah, much better!  Having placed the small flowers at North and South I then decided I'd add two more so I have flowers at West and East too - obviously my perfectionist side wanted the symmetry! A sprinkling of rhinestones and the card front was complete.


Here's a side view photo giving a closer look at the dimensional bloom.


Now onto the inside and the envelope.  Oh look, a new frame stamp features on the inside of my card!   It's a bit flourishy/damasky, it's classic, it's elegant, it's ideal for sentiments on the insides of cards - it was half price - so of course it had to go in my basket!  I stamped the sentiment, cut out the frame, layered it onto a Limeade mat and added punched flowers.  The final touch was a cheerful dotty bloom on the envelope flap.   


Please do join us at HOC this week and make a card inspired by that lovely photo. There is a ton of inspiration on offer from the rest of the DT so do check out their creations.  CAS, Cute and Fun, Classic and Elegant, Shabby and Vintage - the choice is yours, any of those styles goes!  I'm looking forward to seeing your interpretations!

Supplies:
Stamps: SU! 'Itty Bitty Banners' set, PaperMania 'Urban Stamps 'Oval Frame' set, Hero Arts 'Fabulous Birthday'
CS: pale green textured pearly CS, Bazzill blue textured CS, SU! Lucky Limeade & Whisper White

Patterned paper: Marina Mist dotty paper from SU! Polka Dot Parade DSP pack
Ink: SU! Lucky Limeade & Marina Mist
Tools:  X Cut 'Bloom' Nesting Dies, Sizzix Tim Holtz Dimensional Cutting Pad, Woodware flower punch, sponge dauber
Embellishments & accessories: SU! rhinestone  jewels, Dimensionals


 photo RoseRuth.gif
 
01 09 10