The dangly butterfly tent card (A6 size) was made with a colour combo of Pool Party, Soft Suede and Very Vanilla. The Very Vanilla panel was embossed with a folder and then Pool Party ink was brayered lightly over the top. The butterfly was made using two Sizzix dies, a solid shape and a fancy shape layered over the top which I cut from a piece of SU! Spice Cake DSP. The butterfly was dangled from linen thread and topped with a satin ribbon bow. The stamped and die cut sentiment label was popped up.

Here's a side view of the tent card.

Here's the back of the card.

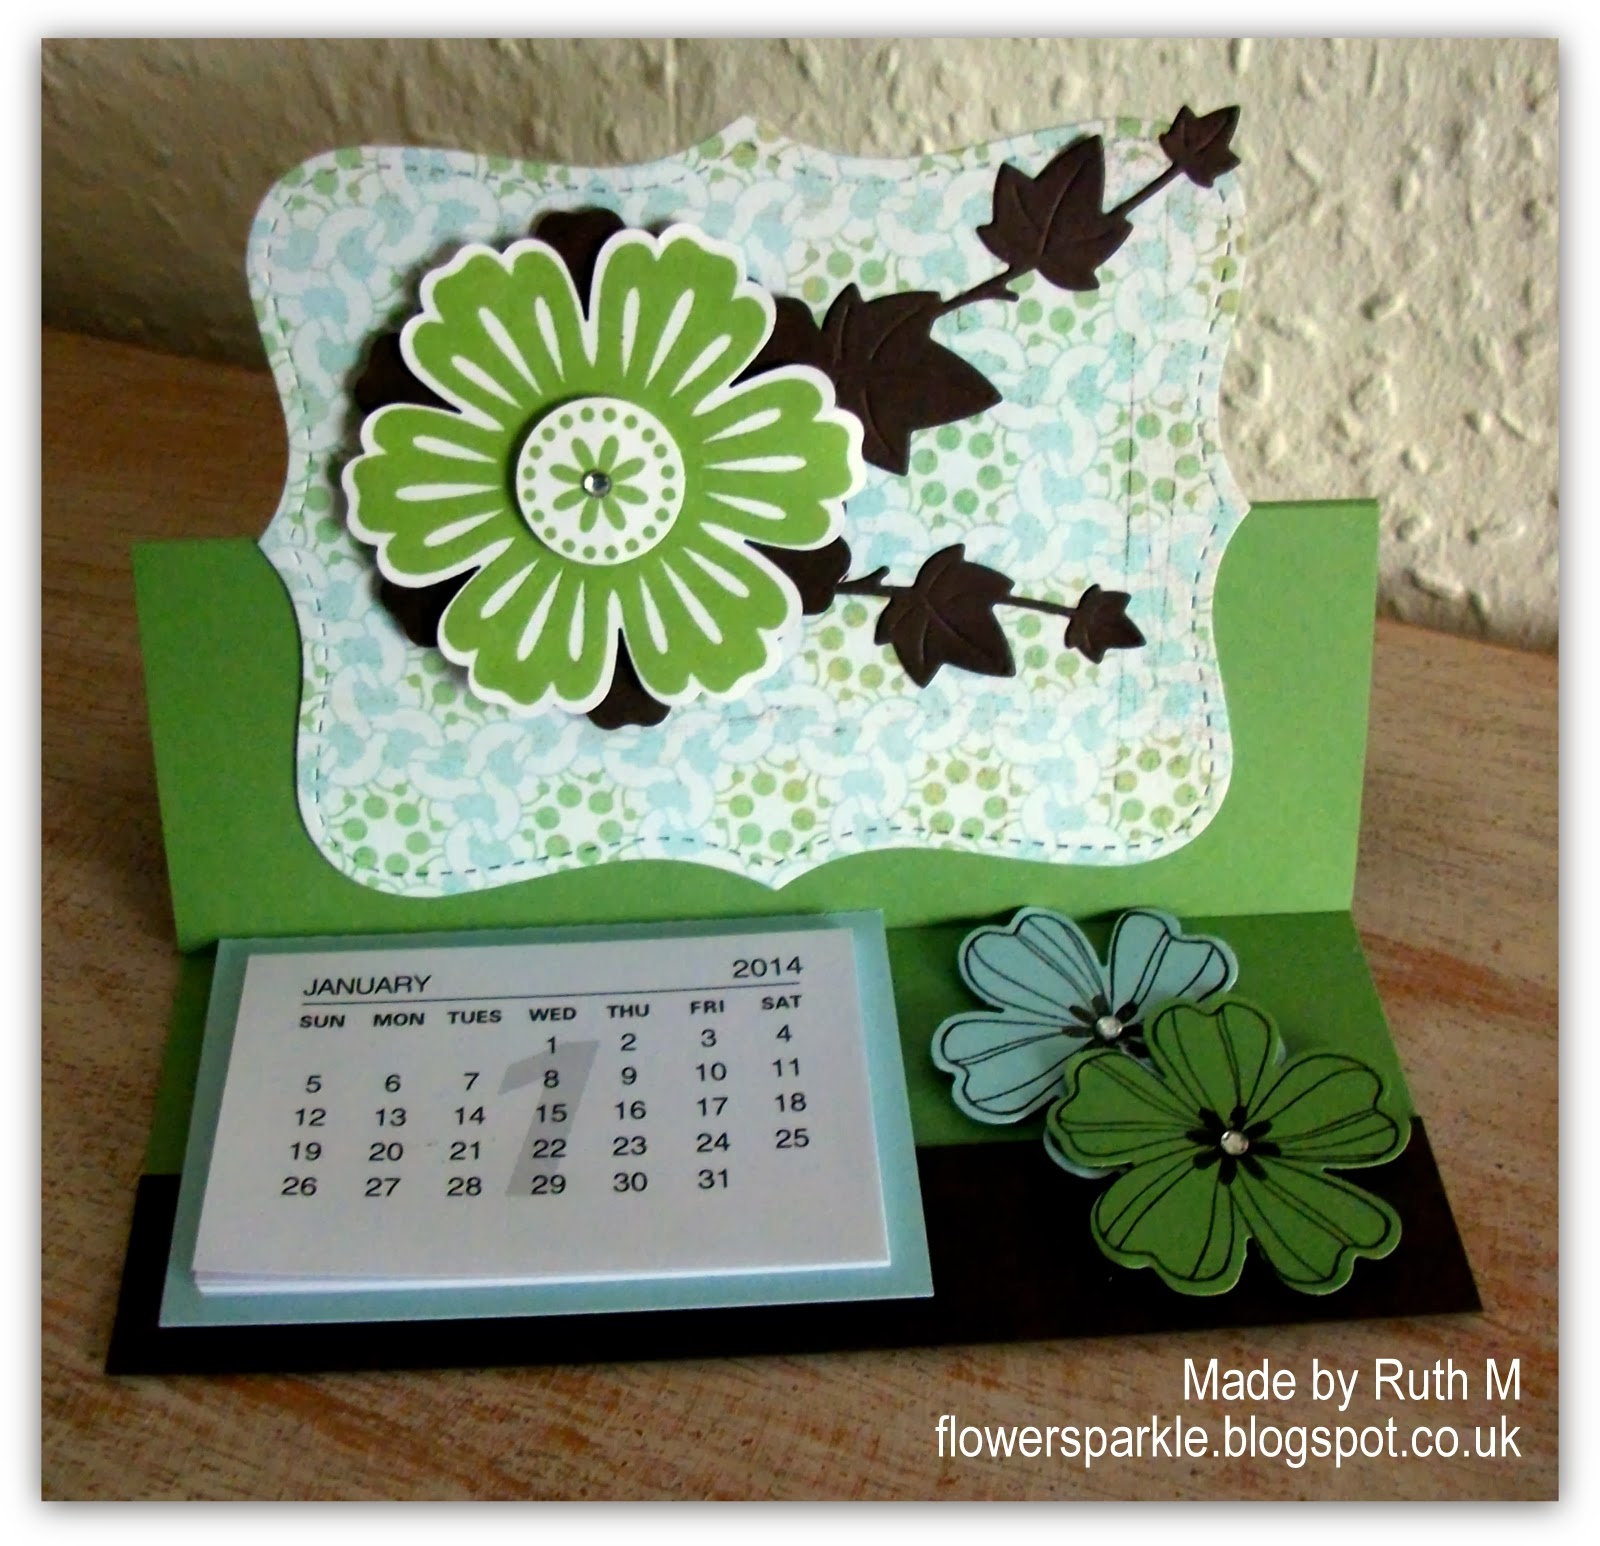
Next I designed a calendar easel card using the SU! Top Note die, flower stamps and punches plus an ivy Joanna Sheen Signature die. The card is A6 size and the colours used are Perfect Plum, Pale Plum and Elegant Eggplant with some old Basic Grey patterned paper from my stash.

Last Thursday was our February get together and I designed three cards for the ladies to make. First up was this flower Happy Birthday card made using the water stamping technique. I must give credit to Amy O'Neill for the inspiration for this card, I saw her lovely card on Pinterest. I applied Crushed Olive and Peeled Paint Distress inks to Whisper White CS using ink applicator tools. I liberally spritzed the Penny Black Delicate Pattern stamp with water and stamped onto the inked panel. The Delicate Pattern stamp is my favourite to use for this technique, I've tried others but I always come back to this one! I love the subtle effect of this technique. I dried the panel with a heat gun, stamped the sentiment and cut out a square with a Nestie die. I glued the blue dotty paper to the card front and layered the stamped panel over the top. I die cut two Old Olive leaf shapes using a die from the SU! Secret Garden set. I stamped two flowers onto Strawberry Slush CS, die cut the larger one and fussy cut the small centre shape. I edged the flowers with Rose Red ink applied with a sponge dauber and popped the flower up.

The second card is a circle shaped card measuring 5 1/4". I enjoy creating shaped cards and circle cards are a fave. To cut out larger circles for card blanks I've used an EK Success Circle Scissor Pro cutting tool for a few years but I can't get spare blades now and I'm no longer getting neat cuts, I'm getting ragged edges all the time. I sold a few crafty bits and pieces on eBay a few months ago and I used some of the money to buy a set of Grand Circle Nestability dies. The largest dies in the set don't fit in my Big Shot but I can cut up to 5 3/4" circles which is great so the large die set was a worthwhile investment for me. It's so wonderful to get perfect cut circles!
I used Crumb Cake CS to make the card base and Early Espresso and Rose Red CS for the mat circle layers. I stamped a woodgrain stamp onto Crumb Cake CS using Crumb Cake ink and I stamped the floral butterfly image over the top in Early Espresso ink. I also stamped a butterfly onto the woodgrain panel which I cut out with a 1" circle punch. The main image was cut out with a circle die and I popped the butterfly circle element up.

I used the Inkadinkado Nostalgia clear stamp set for this card and I stamped the birthday sentiment from the set on the inside of the card. I also stamped the circular butterfly image onto the envelope flap as it fits so nicely there.

For the third project I CASEd a card I saw on Pinterest designed by Freddie Boger and shown on Julie Davison's blog post HERE. I loved the crisp, CAS style of Freddie's card and the fresh red and white combo, I changed things up a bit though and used Crisp Cantaloupe, Pool Party, Calypso Coral and white as my colour combo. I used patterned paper from the SU! Sweet Sorbet DSP pack and the small banners and tiny flower are stamps from the SU! Banner Blast set. I punched the small banners out with the matching SU! Banner punch and popped them up. All these products are from the SU! Sale-a-bration promotion which is going on at the moment. I cut the tiny flower out with a punch from the Itty Bitty Shapes punch pack, shaped it and added a gem to the centre. I used an MFT Fishtail Flags Stax die to cut the Pool Party banner and the Warm Wishes is a favourite sentiment from an old retired SU! set.

We were snug and contented inside while atrocious weather raged outside, a very happy afternoon was had by all!
*****************************************************************************************************************
Life continues to be challenging and my card making mojo is sporadic (Pinterest has been VERY useful!) but I have managed to make a few cards over the last week or so. I'll be sharing them here very soon so do please pop back. I'm cautiously optimistic enough to say I'm back creating and sharing on my blog now! I am hoping to resume my DT duties at 52 {C}CT and House of Cards soon as well. Sorry I've been away and thanks for your patience and the lovely messages! The kind words and encouragement are SO very much appreciated, thank you!

2 comments:
Welcome Back!!! We've missed you.
I love the January cards, they're great. Hope all is well with both of you and you're not too wet!
Hi Ruth - so nice to see you posting again! I do like the easel calenders you've made, and that circle card is just stunning! As always, I love that you've done the inside and envelope to match! Hugs, Deborah xx
Post a Comment