
A large butterfly aperture was die cut from the white panel but the positive butterfly shape wasn't needed for this card, I told the ladies not to discard their white butterflies but to keep them to one side as I was giving them homework - a lot of groans ensued! Nothing too tricky, I only asked the ladies to make a card featuring the butterfly and I did say I'd provide prizes for each lady that took part!
Carol covered her butterfly with blue felt.

Janet made a circle pivot accordion card and added an inked, stamped and embellished butterfly.
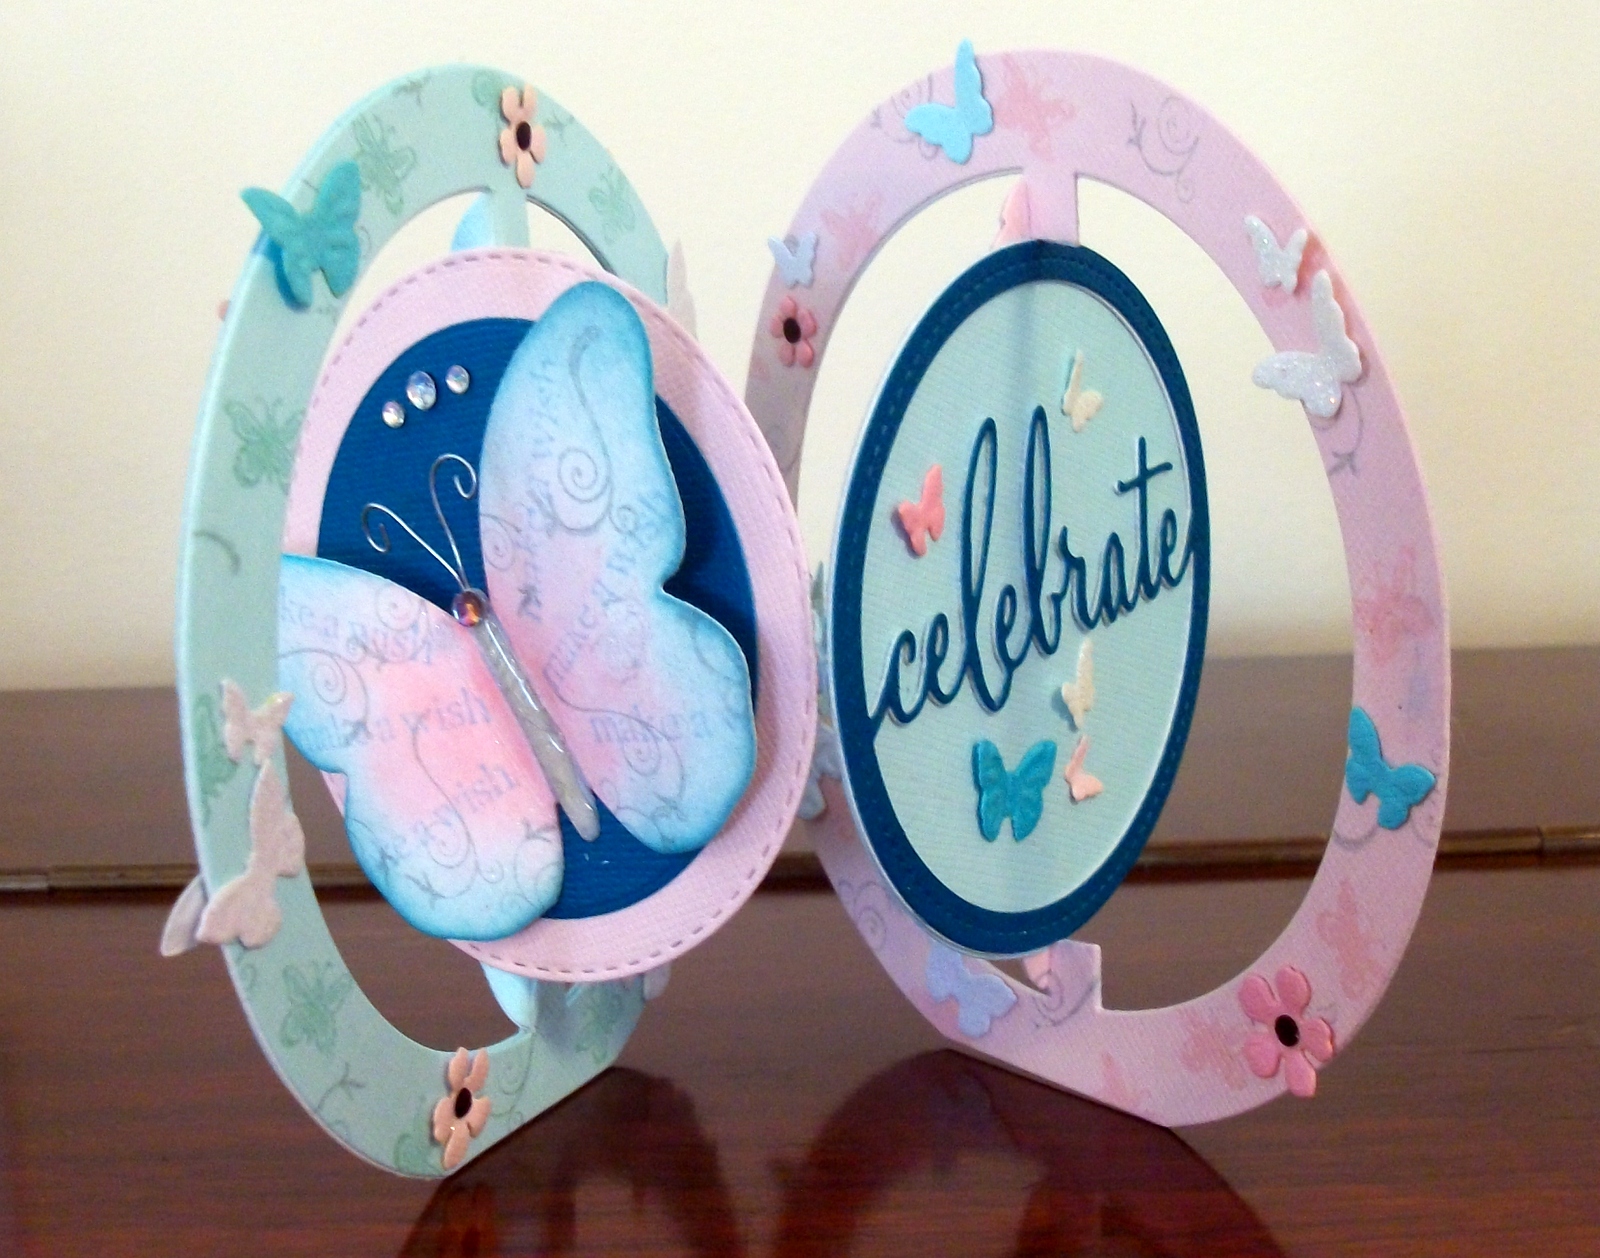
Here's another view of Janet's card.

Jan inked her butterfly with Distress Inks and added pen details and gems.

Jan also decorated the inside of her card and made an envelope.

Lesley inked and layered her butterfly on a pretty vintage background.

Margaret A had to substitute a different butterfly because things went awry when she tried to glitter the one she'd taken home - but she still wanted to participate and make a card!

Pam covered her butterfly with pretty iridescent paper.

Sue mounted her butterfly on a background stencilled with glitter paste, She layered another butterfly over the top and added shimmery mica powders.

As I said there were a few groans when I set the homework plus a few comments along the lines of "what on earth am I going to do with a plain white butterfly?" Well, the ladies certainly rose to the challenge and it just goes to show what you can do with a plain, white, die cut butterfly shape - all of them are different! I knew they wouldn't let me down despite the initial grumbles!
I made a card myself as I thought it was only fair that I took the challenge too!
I applied Mustard Seed, Salty Ocean and Picked Raspberry Distress Inks to the white butterfly using ink duster brushes. Then I stamped the beautiful Hero Arts 'Leafy Vine' image over the top in VersaFine Onyx Black ink. I love how the Distress Inks blend so you get lots of colours just from three inks! I attached three pastel gem brads to the butterfly body. Here's the finished butterfly.

Here's the completed card. I used the Memory Box 'Postage Set' die which gave me the four white postage stamp edged shapes. The large rectangle was the perfect size for the butterfly and the long rectangle was perfect for the birthday sentiment from the Clearly Besotted 'Brushed Greetings II' set! I really wanted to use all four of the shapes from the die set and to do that meant I had to make a non standard sized card base measuring 6" x 4 7/8". I popped up the sentiment and butterfly panels. To complete the card front I attached die cut butterfly and flower shapes and added rhinestones.

Here's the inside of the card. That Leafy Vine image is just so gorgeous!

Because the card wasn't a standard size I used my envelope punch board to make an envelope. I used some old, retired SU! speciality paper - old and retired but still beautiful! I added a die cut name label over the top of a postage stamp edged rectangle to embellish the envelope front.

What a good challenge, I may set the ladies homework again some time!
Stamps: Hero Arts 'Leafy Vine' background stamp & 'Yummy Treats' set, Clearly Besotted 'Brushed Greetings II' set
CS: SU! Basic Black & Whisper White (standard & thick)
Patterned paper: SU! 'Groom' speciality DSP
Ink: VersaFine Onyx Black, Ranger Tim Holtz Mustard Seed, Salty Ocean & Picked Raspberry Distress Inks
Tools: Memory Box 'Postage Set' die, Spellbinders Shapeabilities 'Flower Play' die set, Sweet Dixie 'Daisy Set' die set, Memory Box 'Cascadia Butterfly Trio' die, Sizzix 'Banners, Fancy' die set, SU! Envelope Punch Board
Embellishments & accessories: rhinestone brads, SU! rhinestone jewels, Dimensionals

No comments:
Post a Comment