Lisa Curcio has this fab YouTube video tutorial for a W fold card which I decided would be perfect for a girly birthday card I wanted to make for a work colleague. I had the SU! 'Best Dressed' patterned paper and my oldie but goodie 'Dress Up' die set but I had to borrow the 'Dressed to Impress' stamp set and matching 'All Dressed Up' die set from my lovely friend Lesley. I've now ordered the stamps and dies for myself!
Here's the card and envelope together.
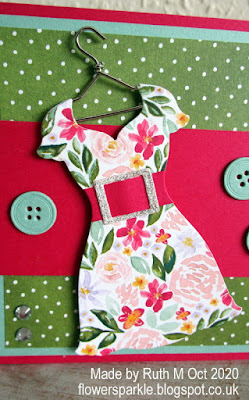
Here's the card front. My colour combo is Lovely Lipstick, Mint Macaron, Old Olive and Petal Pink with a hint of sparkly Silver Glimmer Paper.
Here's a closer look at the dress. I added a treasured, long hoarded metal clothes hanger embellishment and popped the dress up. I die cut several Mint Macaron buttons and stacked a few together so they had dimension.
Here's the inside with the surprise W fold element. Just two stamped sentiments and lots of patterned papers!
A top view of the card.
Here's a closer look at the left side of the card.
Here's a closer look at the right side of the card. The perfume bottle and lipsticks are fussy cut from patterned paper.
Here's the envelope with very pretty paper and a popped up name label.
I gave the card to the recipient and it was very well received I'm happy to say. Later on I kicked myself for not using the dies in the 'All Dressed Up' die set to make a gift bag so I made a bag and delivered that the next day - also very well received!
A view from the side of the bag. You can tuck the sides in for a more streamlined handbag shape or do as I did and have the sides pushed out for a tote bag look. Also, you can arrange the bag straps differently to make a backpack. The size of the choccies I placed inside determined it had to be a tote bag!
Here's a closer look at the tag which I tied to the handle with silver sparkly thread.
There's something special about creating something tailored for a specific person and it's so rewarding when your efforts are really appreciated! I had great fun making this, I spent a very happy time in my craft room for sure!
Supplies:
Stamps: SU! 'Dressed to Impress' & 'Fancy Phrases' sets
CS:
SU! Lovely Lipstick, Mint Macaron, Old Olive, Petal Pink & Whisper White, Silver Glimmer Paper
Patterned paper: SU! 'Best Dressed' 6" x 6" DSP pack
Ink: SU! Lovely Lipstick
Tools: SU! 'Dress Up', 'All Dressed Up' & 'Stitched So Sweetly' die sets, SU! 'Label Me Lovely' punch
Embellishments & Accessories: silver metal clothes hanger embellishment, silver lurex thread, SU! Rhinestone Jewels, Dimensionals
Ruth


No comments:
Post a Comment