Sunday, 5 June 2016

Two Magnolia Blooms Thanks Cards

The Clearly Besotted 'Magnolia Blooms' set has just been added to my stash after I'd seen some lovely cards on Pinterest made by Stephanie Wincott using the set.  Stephanie's blog post featuring the cards can be found HERE.  Floral sets are very hard for me to resist and I really like the stylised look this set has and I love the leafy stem image!

I made two Magnolia Blooms thanks cards, one portrait oriented and one landscape oriented.  Works really well either way!


For the portrait card I used a colour combo of Island Indigo, Rose Red and Mossy Meadow.  The stamp set does have matching dies available but the flowers are a simple shape to cut and I enjoy fussy cutting so I didn't get the dies.  Also, sometimes I find it frustrating to line up dies with stamped images and I think it would be quicker for me to fussy cut rather than to faff about lining up!  I fussy cut and popped up all three flowers and added three clear gems to finish the front.  I gave the portrait card to Wendy and the landscape card to Lesley at my card group.  As soon as Wendy saw her card she said "Ruth, you really are the fussy cut queen", bless her!


Here's the inside and the envelope.


For the landscape card I used a dramatic colour combo of Basic Black, Whisper White and Tempting Turquoise.  Again I fussy cut and popped up the three flowers.  To finish off this card front I added two turquoise gems to the sentiment.


Here's the inside and the envelope.


The flowers are certainly easy and fast to fussy cut - the leafy stem probably not so much - but I'll give it a go one day!

Supplies:
Stamps: Clearly Besotted 'Magnolia Blooms' set
CS: SU! Island Indigo, Basic Black & Whisper White
Ink: Memento Tuxedo Black, SU! Mossy Meadow, Rose Red, Island Indigo, Tempting Turquoise
Embellishments & accessories: clear & turquoise gems, SU! Dimensionals


 photo RoseRuth.gif

Friday, 3 June 2016

Inked Butterfly Birthday Card - Card Group Homework Cards

In May the ladies at my card group made this card.


A large butterfly aperture was die cut from the white panel but the positive butterfly shape wasn't needed for this card,  I told the ladies not to discard their white butterflies but to keep them to one side as I was giving them homework - a lot of groans ensued!  Nothing too tricky, I only asked the ladies to make a card featuring the butterfly and I did say I'd provide prizes for each lady that took part!  

Carol covered her butterfly with blue felt.


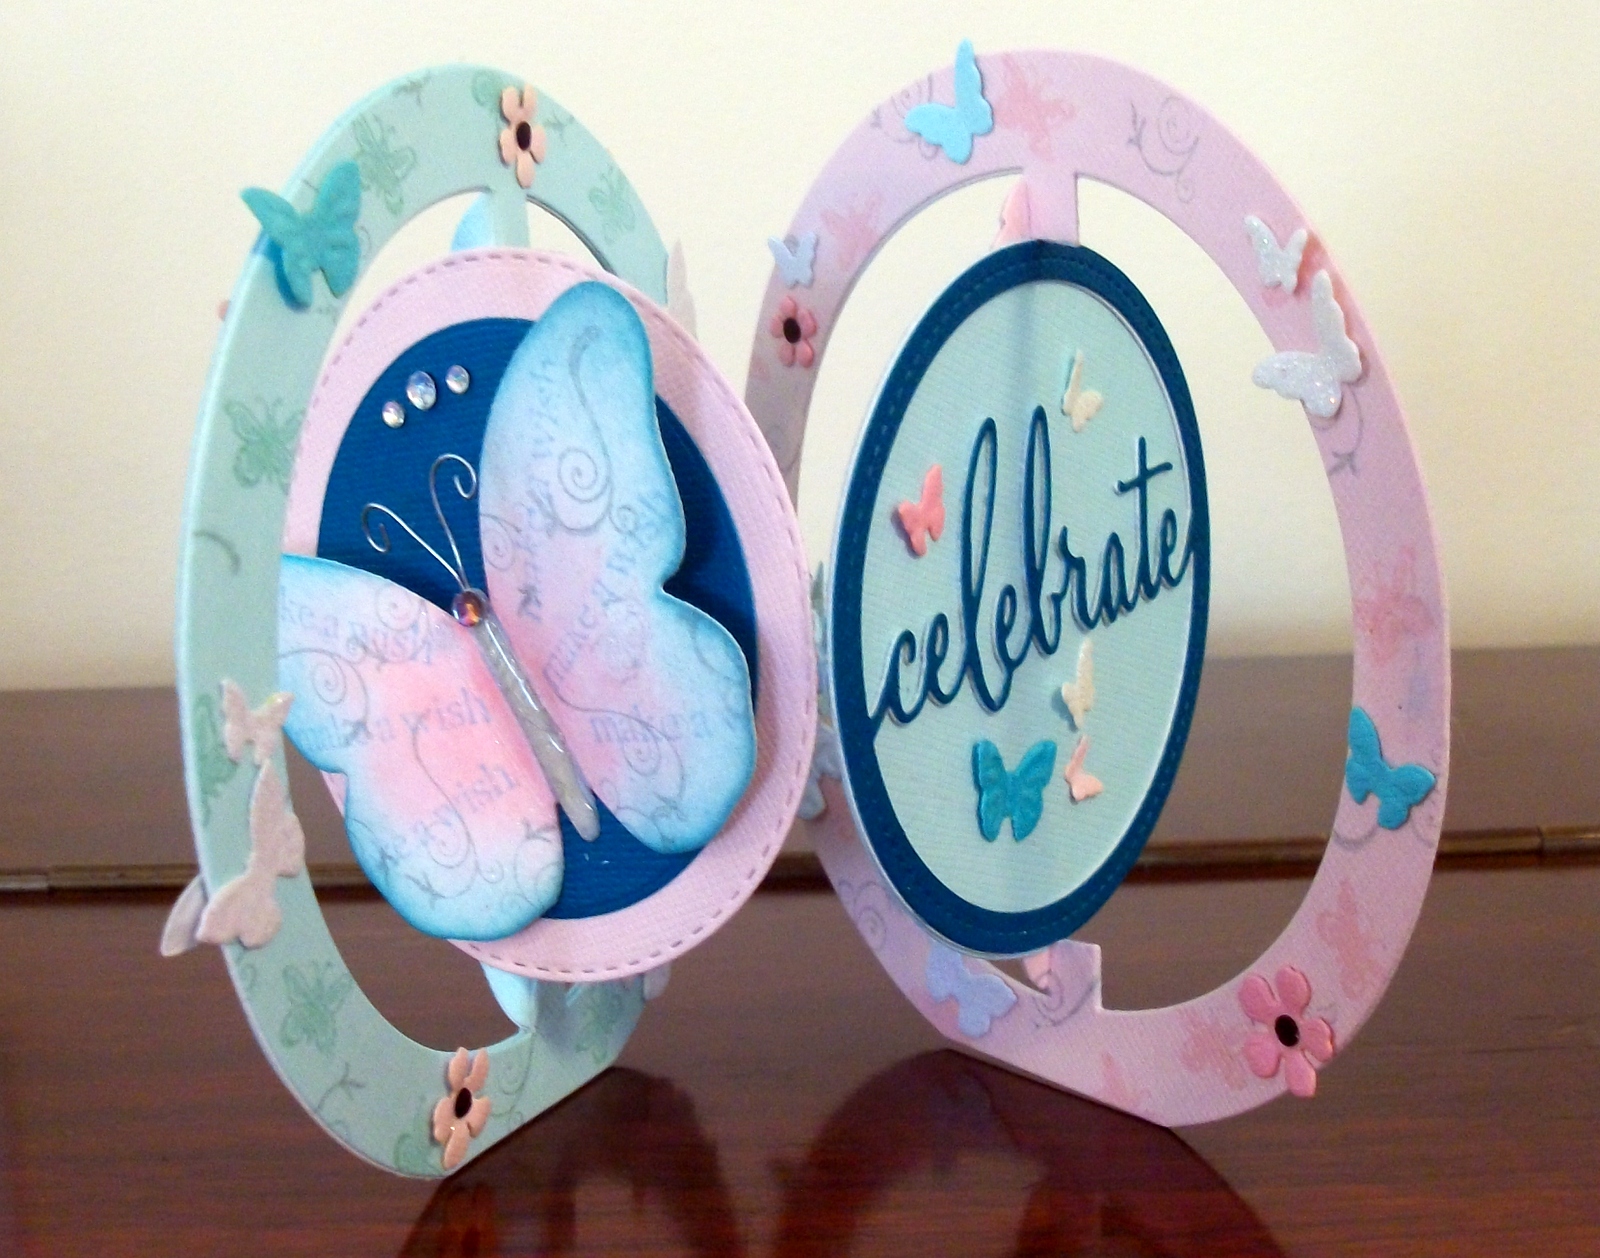
Janet made a circle pivot accordion card and added an inked, stamped and embellished butterfly.


Here's another view of Janet's card.  


Jan inked her butterfly with Distress Inks and added pen details and gems. 


Jan also decorated the inside of her card and made an envelope.


Lesley inked and layered her butterfly on a pretty vintage background.


Margaret A had to substitute a different butterfly because things went awry when she tried to glitter the one she'd taken home - but she still wanted to participate and make a card!


Pam covered her butterfly with pretty iridescent paper.


Sue mounted her butterfly on a background stencilled with glitter paste,  She layered another butterfly over the top and added shimmery mica powders.


As I said there were a few groans when I set the homework plus a few comments along the lines of "what on earth am I going to do with a plain white butterfly?"  Well, the ladies certainly rose to the challenge and it just goes to show what you can do with a plain, white, die cut butterfly shape - all of them are different!  I knew they wouldn't let me down despite the initial grumbles!

I made a card myself as I thought it was only fair that I took the challenge too!  

I applied Mustard Seed, Salty Ocean and Picked Raspberry Distress Inks to the white butterfly using ink duster brushes.  Then I stamped the beautiful Hero Arts 'Leafy Vine' image over the top in VersaFine Onyx Black ink.  I love how the Distress Inks blend so you get lots of colours just from three inks!  I attached three pastel gem brads to the butterfly body.  Here's the finished butterfly.


Here's the completed card.  I used the Memory Box 'Postage Set' die which gave me the four white postage stamp edged shapes.  The large rectangle was the perfect size for the butterfly and the long rectangle was perfect for the birthday sentiment from the Clearly Besotted 'Brushed Greetings II' set!  I really wanted to use all four of the shapes from the die set and to do that meant I had to make a non standard sized card base measuring 6" x 4 7/8".  I popped up the sentiment and butterfly panels.  To complete the card front I attached die cut butterfly and flower shapes and added rhinestones.


Here's the inside of the card.  That Leafy Vine image is just so gorgeous!


Because the card wasn't a standard size I used my envelope punch board to make an envelope.  I used some old, retired SU! speciality paper - old and retired but still beautiful!  I added a die cut name label over the top of a postage stamp edged rectangle to embellish the envelope front.


What a good challenge, I may set the ladies homework again some time!

Supplies:
Stamps: Hero Arts 'Leafy Vine' background stamp & 'Yummy Treats' set, Clearly Besotted 'Brushed Greetings II' set
CS: SU! Basic Black & Whisper White (standard & thick)

Patterned paper: SU! 'Groom' speciality DSP
Ink: VersaFine Onyx Black, Ranger Tim Holtz Mustard Seed, Salty Ocean & Picked Raspberry Distress Inks
Tools: Memory Box 'Postage Set' die, Spellbinders Shapeabilities 'Flower Play' die set, Sweet Dixie 'Daisy Set' die set,  Memory Box 'Cascadia Butterfly Trio' die, Sizzix 'Banners, Fancy' die set, SU! Envelope Punch Board
Embellishments & accessories: rhinestone brads, SU! rhinestone jewels, Dimensionals


 photo RoseRuth.gif

Thursday, 2 June 2016

June 2016 Card Group Projects

The weather certainly hasn't been great considering it's June but we all had a lovely time indoors crafting this afternoon as it was our monthly card group get together.  As well as card making we had cake - homemade chocolate, sour cherry and cream sponge cake plus iced orange fairy cakes - yum!  Not only that but I gave out prizes!  Last month I set the ladies some homework - I asked them to make a card with the white butterfly which was left over from cutting out the aperture for this card.


Every group member who bought along a card made with the butterfly was allowed to choose a couple of pre-loved crafty items I'd bought along as prizes - there were quite a few stamps, punches and dies!  I put the names in a bag and drew them out raffle style so the first name out got the first pick.  There were still items left over so the few ladies that hadn't managed to make a card didn't go home empty handed and everyone went home with a crafty something!  And I'd managed to have a bit of a clear out so happy days all round!  I'll be back soon to share the homework cards.

Last time Jan asked if we could make a card featuring the wax resist technique so that's how the first card for this month's card group came about.  The A6 sized card was made with SU! Calypso Coral CS and I stamped the sentiment in black ink.  I die cut the Chandra Stem dandelion and applied gloss to the circles with a black glaze pen.  I set that aside to dry while I worked on the wax resist panel.  I have a wax resist technique tutorial HERE (scroll to the bottom of the page) which gives all the how to info.  I applied Worn Lipstick and Spiced Marmalade Distress Inks to the glossy CS panel using ink duster brushes and buffed the panel with a piece of kitchen towel.  I wrapped the bottom of the stem around the panel, taped it to the back, popped up the dandelion head, added the gingham ribbon and attached the panel over the top of a black mat layer.  I was going to attach the panel straight but I decided I preferred the wonky look!  To complete the card front I added two die cut decorative corners.


Here's a close up of the wax resist panel.


Here's the inside of the card and the envelope.


Last month we made a card featuring a coffee mug and Lesley remembered we'd used the teacup from the stamp set on a previous card group card - I've just checked and it was back in July 2012, blimey!  Lesley asked if we could make a card with the teacup again so I designed a teacup and doily easel card.  

The colour combo is Bermuda Bay, Island Indigo and white.  The drink portion of the teacup was stamped onto kraft CS using Soft Suede ink.  The white border strip was cut using the Cheery Lynn 'Francesca Border' die which co-ordinates beautifully with the Cheery Lynn 'French Pastry' doily die.  I glued the border onto a strip of Island Indigo CS and popped the strip up to act as the stop for the easel.  After fussy cutting and paper piecing the teacup I popped that up.  When I first started working on this card I tried various colour inks for the teacup but Bermuda Bay ink was my fave - it reminds me of the pretty crockery you get in our local Waitrose cafe!  But being the forgetful silly moo that I am these days, I left the Bermuda Bay ink pad at home and so the ladies had to stamp their teacups in Island Indigo ink.  I stamped and die cut the sentiment and popped that up.  The two flowers were stamped, punched, shaped and glued to the card.  I also forgot to take that sentiment stamp but we managed to substitute a stamp from one of the stamp sets I'd given away as a prize - thank goodness!  I also forgot my Big Shot magnetic platform, stamp cleaner and kitchen roll - but at least I remembered the cakes!


I stamped a sentiment panel to go on the bottom of the easel card and added a stamped and punched flower to the envelope flap.  The easel card measures 5 1/4" square.  


I have my guillotine cutter out on top of two sets of drawers - which I grandly call my cutting station!  I find it a lot better to have the cutter out permanently as it was a pain to keep dragging it out each time I needed it.  If I'm being lazy and untidy I end up with piles of offcut CS in various colours all over the cutting station.  I do try mostly to clear up as I go along but just recently that hasn't been happening.  It was at the stage where I HAD to clear it so I was placing the different colour CS in piles and Rose Red, Lost Lagoon and Blackberry Bliss ended up together and I was really struck by how lovely the colours looked together and I decided I'd use that combo for the third card group card.

No surprise - this card features butterflies!  I wanted to use my new SU! 'Fluttering' embossing folder so having decided on the colour combo my next step was to create an embossed background piece.  I die cut the fancy banner shape and embossed it.  


The Blackberry Bliss strip is a die cut from the Memory Box 'Grosgrain Ribbons' set of three dies. This is a very recent purchase and I'm tickled to be able to get 'ribbons' in every colour of CS and three widths!  Here's a close up so you can see the grosgrain detail.  


After attaching the die cut ribbon to the embossed banner I glued it to the front of a Rose Red A6 sized card base and stamped the sentiment in Blackberry Bliss ink.  I die cut the two butterfly shapes using the SU! 'Bold Butterfly' Framelits die set and layered the shapes together.  I added a tiny punched flower and a rhinestone to finish the card front.

Here's the inside of the card and the front of the envelope.


Here's hoping I remember everything next time!

Supplies for wax resist Happy Birthday card:
Stamps: Hobby Art 'Happy Birthday', Stampendous 'Sending Wishes', Inkylicious 'Make a Wish' set
CS: SU! Calypso Coral, Basic Black & Whisper White, Ranger Glossy Paper, Reynolds Cut-Rite wax paper
Ink: Memento Tuxedo Black, Ranger Tim Holtz Worn Lipstick & Spiced Marmalade Distress Inks
Tools: Memory Box 'Chandra Stem' die, Die'Sire 'Decorative Corner 1' die set, Inkylicious ink duster brushes, craft mat, iron
Embellishments & accessories: black & white gingham ribbon, Sakura black Glaze Pen, tiny 3D foam pad


Supplies for teacup easel card:
Stamps: Kanban 'Coffee Shop' set,  SU! 'Blooming with Kindness' & 'Petite Petals' sets, Hero Arts 'Yummy Treats' set
CS: SU! Bermuda Bay, Island Indigo, Kraft & Whisper White
Ink: SU! Bermuda Bay, Island Indigo & Soft Suede
Tools: Cheery Lynn 'French Pastry' doily die, 'Francesca Border' die & 'Sentiment Tag 2' die set, circle Nestabilities dies, SU! 'Petite Petals' punch
Embellishments & accessories: 3D foam tape & pads 


Supplies for butterflies birthday card:
Stamps: SU! 'Cheer & Wishes' set, Hero Arts 'Fabulous Birthday'
CS: SU! Lost Lagoon, Rose Red, Blackberry Bliss & Very Vanilla
Ink: SU! Blackberry Bliss
Tools: SU! 'Fluttering' embossing folder, Sizzix 'Banners, Fancy' die set, SU! 'Bold Butterfly' Framelits die set, Memory Box 'Grosgrain Ribbons' die set, flower punch from SU! 'Itty Bitty Shapes' punch pack
Embellishments & accessories: SU! rhinestone jewels small 3D foam pads


 photo RoseRuth.gif

Wednesday, 25 May 2016

Watercolour Poppies One Layer Thank You Card

The Penny Black 'Pop Pop Poppy' stamp is so pretty, I really love the watercolour look.  I don't always want to use watercolour paper though and so I was chuffed to bits to find that the image stamped beautifully onto the front of an ordinary white card blank after being inked and spritzed with water.  I don't make a one layer card very often but I'm really happy with how this turned out.  I think this design would be great for a set of cards using different sentiments and colours.

I stamped the flourish image from the SU! 'Timeless Textures' set as a background in So Saffron ink.  I applied Wild Honey, Worn Lipstick and Peeled Paint Distress Inks to the stamp using sponge daubers, spritzed the stamp with water and stamped onto the card front.  I stamped the sentiment in black ink and the splatters in stamped off once black ink.


Here's a closer look at the stamped image.


I spritzed the stamp again with water (without reinking) and stamped inside and repeated the spritzing and stamping a third time for the envelope.  I love the soft look that the second and third generation stamping gives!


Supplies:
Stamps: Penny Black 'Pop Pop Poppy', Clearly Besotted 'Brushed Greetings II' set, SU! 'Timeless Textures' set
CS: PaperMania white A6 card blank
Ink: Memento Tuxedo Black, Tim Holtz Wild Honey, Worn Lipstick & Peeled Paint Distress Inks, SU! So Saffron
Tools: Sponge daubers, water spritzer bottle


 photo RoseRuth.gif

Monday, 23 May 2016

Pink Poppies Thank You Card

My crafting time has increased over the last couple of weeks - woohoo!  One day last week I was determined to spend as much time as I could in my craft room - and more time playing than tidying up!   All I had in mind was to use a stamp I've had for ages and never used, the Penny Black 'Pop Pop Poppy' stamp.  So I got out a pile of scraps and the stamp and experimented using different types of inks, CS and techniques, that took a while but was a thoroughly enjoyable and worthwhile process.  Then I was ready to create something to go on a card.

Inks spritzed with water and stamped on to watercolour paper was my favourite result following my experiments so I went with that technique.  Firstly I applied a watercolour wash of SU! So Saffron ink to a piece of watercolour paper.  I applied Wild Wasabi and Garden Green inks to the leaves and stems on the stamp using markers.  Using a sponge dauber I applied Worn Lipstick Distress Ink to the flowers, spritzed the stamp with water and stamped.  I used a fine black pen to add detail to the centre of the poppies.  I used a few stamps from the SU! 'Timeless Textures' set to add just a touch of grunge to the panel.  I glued on the black die cut border and glued the panel to the front of an A6 white card base.  I used my Dymo label maker to create the sentiment and I added three black metallic nailheads to complete the card front.


I used the same border die I'd used on the card front to embellish the inside and the envelope.  I added a sentiment label on the inside and a name label on the front of the envelope.  


While I had the 'Pop Pop Poppy' stamp still out on my desk I made a second card so I'll be sharing that here soon!  

Supplies:
Stamps: Penny Black 'Pop Pop Poppy', SU! 'Timeless Textures', Hero Arts 'Sending You Love' set
CS: PaperMania A6 white card blank, SU! Basic Black & Whisper White, watercolour paper
Ink: Memento Tuxedo Black, SU! So Saffron, Soft Suede, SU! Wild Wasabi & Garden Green markers, Tim Holtz Worn Lipstick Distress Ink, black fineliner pen
Tools: Dymo label maker, MFT Die-namics 'Delicate Lace Border' die, Hero Arts Small Tag Frame Framelits die, Spellbinders Shapeabilities 'Fancy Framed Tags Two' die set, water brush, sponge dauber, water spritzer bottle
Embellishments & accessories: black metallic nailheads


 photo RoseRuth.gif

Friday, 20 May 2016

Rosy Trio Thank You Card

This is the card I made using the stamp set that came free with issue 149 of Simply Cards & Papercraft magazine.  It's a lovely set designed by AlteNew, so pretty!  I used some other new goodies too - the Tonic Studios 'Tea Party Square Base' die set and the Clearly Besotted 'Brushed Greetings II' sentiment stamp set.  I cut the 'Tea Party' die out of Wild Wasabi CS and popped that up on the front of a 5 3/4" square white card base.  I stamped the rose flowers using Pretty in Pink, Regal Rose and Rose Red inks.  I used Pistachio Pudding, Wild Wasabi and Garden Green inks for the leaves.  I popped up the Rose Red circle and the three roses.  I added three pale green gems to the white circle to complete the card front.


Here's the inside and the envelope with more pretty stamped roses and leaves.  I had a very happy time in my craft room making this card!


Supplies:
Stamps: AlteNew designed rose set free with Simply Cards & Papercraft mag issue 149, Clearly Besotted 'Brushed Greetings II' set
CS: SU! Wild Wasabi, Rose Red & Whisper White (regular & thick)
Ink: SU! Pretty in Pink, Regal Rose, Rose Red, Pistachio Pudding, Wild Wasabi & Garden Green
Tools: Tonic Studios Indulgence Round Window 'Tea Party Square Base' die set, dies from AlteNew designed rose set free with Simply Cards & Papercraft mag issue 149, circle Nestabilities dies
Embellishments & accessories: PaperMania self adhesive gems, SU! Dimensionals


 photo RoseRuth.gif

Wednesday, 18 May 2016

Fancy Square & Flowers Thanks So Much Card

Every now and again I borrow the SU! 'Greenhouse Garden' stamp set from my friend Jan and get busy with my trusty Stamp-A-Ma-Jig to make pretty two step stamping flowers.  My colour combo is Pink Pirouette, Rose Red, Old Olive and white.  The fancy die cut squares on the card come from the Sue Wilson 'Times Square' die set.  I stamped the leafy stem from the SU! 'Summer Silhouettes' set and the thanks sentiment on the white square and then popped up the three flowers.  The Rose Red fancy square is also popped up.  To complete the front I added some olive Swarovski crystals.


Here's the inside of the card and the envelope.


Multi step stamp sets seem to be really popular at the moment.  These days they're clear stamps so it's a lot quicker and easier without the need for a stamp positioner!  Last month's issue of Simply Cards & Papercraft (issue 149) came with a free multi step rose set with matching die designed by AlteNew.  Being a lover of multi step flower stamps I had to get that - it's a really pretty set.  Stay tuned for a rosy card appearing here on the blog very soon!

Supplies:
Stamps: SU! 'Greenhouse Garden', 'Summer Silhouettes' & 'Simply Sketched' sets
CS: SU! Pink Pirouette, Rose Red, Old Olive & Whisper White
Ink: SU! Pink Pirouette, Rose Red & Old Olive
Tools: Creative Expressions Sue Wilson 'Times Square' die set from the New York collection, circle punches, Stamp-A-Ma-Jig
Embellishments & accessories: Swarovski crystals, SU! Dimensionals


 photo RoseRuth.gif

01 09 10