Thursday, 18 November 2021

Papaya, Pear & Gold Floral Hello Card

Barb Mullikin shared a lovely card on this YouTube video using the SU! 'Artistically Inked' bundle and I was inspired to CASE Barb's card.  I changed a few things to make the card my own  - I usually try to Copy And Selectively Edit when I CASE!  Orange is definitely not a go to colour for me but I went outside my comfort zone and I was very happy with the end result.  Pale Papaya goes really nicely with Pear Pizzazz - and the dash of gold adds a touch of elegance!  Here's the card and envelope together.


I cut a panel of Pale Papaya CS, taped a decorative mask in place and applied Pale Papaya ink with a blending brush to create the patterned background.  I added some patterned paper and a die cut Pear Pizazz strip to the panel and glued that to the Pear Pizzazz card base.  I inked the flowers with Pale Papaya ink but added a touch of Pumpkin Pie ink using a sponge dauber to give my flowers some nice shading.  After die cutting both flower shapes, I glued them together and popped the flower up.  I tucked Pear Pizzazz and gold foil leaf shapes behind the flower.  To complete the card front I stamped and die cut the sentiment label and popped that up.


Here's the inside of the card.


I used the Envelope Punch Board to create an envelope from a piece of patterned paper and I added a die cut name element to decorate the front.


Supplies:
Stamps: SU! 'Artistically Inked' set
CS: SU! Pale Papaya, Pear Pizzazz & Basic White, Gold Foil Sheet
Patterned paper: SU! 'Expressions in Ink' DSP
Ink: SU! Pale Papaya, Pear Pizzazz & Pumpkin Pie
Tools: SU! 'Artistic' & 'All Dressed Up' die sets, 'Messages' die, 'Pattern Party' Decorative Masks set, Blender Brush, Envelope Punch Board, MFT 'Fishtail Flags' Stax die set
Embellishments & Accessories: SU! Dimensionals

Ruth

Tuesday, 16 November 2021

Plants Dear Friend Card

This is a just because, friendship card made for a dear friend who is going through a challenging time.  I used my newly acquired SU! 'Plentiful Plants' stamp set and the 'Bloom Where You're Planted' patterned paper pack.  Here is the card and envelope together.


I glued a piece of the patterned paper to a panel of Evening Evergreen CS and glued that to the front of the Just Jade card base.  I stamped the pot and plant using Cinnamon Cider and Just Jade inks and I fussy cut the stamped image - I didn't buy the matching die set, I thought I could manage without the dies!  I stamped the trailing foliage on Basic White CS in Evening Evergreen ink, die cut the white CS using a stitched rectangle die and I popped up the rectangle.  I stamped and die cut the sentiment label, popped that up and then popped up the potted plant.  To finish the front, I added three Evening Evergreen jewels to the sentiment label.  


Here's the inside of the card.  The stamped images from the 'Plentiful Plants' set are amazing due to the 'Distinktive' style and design of the stamps.  They are a total pleasure to work with! 


I decorated the envelope flap with patterned paper.  I always think that is a very classy touch!


Supplies:
Stamps: SU! 'Plentiful Plants' set
CS: SU! Evening Evergreen, Just Jade & Basic White
Patterned paper: SU! 'Bloom Where You're Planted' DSP
Ink: SU! Cinnamon Cider, Evening Evergreen & Just Jade 
Tools: SU! 'Rectangle Stitched' die set 
Embellishments & Accessories: SU! In Color Jewels, Dimensionals

Ruth

Monday, 8 November 2021

Christmas Pinwheel Tower Card

This is the second Pinwheel Tower Christmas card I've made. Instructions to make a Pinwheel Tower card sized to fit in a UK sized C6 envelope can be found here on my Tutorials page.  I love the colour combo in the SU! 'Whimsy & Wonder' patterned paper, it's unusual but very pretty for Christmas cards.  Here's the card and envelope together.


Here's a view from the top so you can see how the card is put together.


Here's the first panel of the card.  I fussy cut the ornament from the patterned paper, added some Blushing Bride baker's twine and popped the ornament up.  I also popped the sentiment label up.


Here's the second panel.


Here's the third panel.


Here's the fourth panel where I will write my message.  I added some self adhesive snowflakes as a finishing touch.


Here's the envelope.  I love the rainbow iridescence on the silver stripes!


Supplies:
Stamps: SU! 'Arrange a Wreath' set 
CS: SU! Evening Evergreen & Mint Macaron 
Patterned paper: SU! 'Whimsy & Wonder' 
Ink: SU! Evening Evergreen 
Tools: SU! 'Rectangle Stitched' die set 
Embellishments & Accessories: SU! Blushing Bride baker's twine, self adhesive enowflakes, Dimensionals

Ruth

Sunday, 7 November 2021

Snowflake Peace On Earth Card

Just Jade, Mint Macaron and the Be Dazzling paper have become a favourite colour combo, especially for Christmas cards.  I couldn't resist die cutting a big snowflake from the beautiful, sparkly Be Dazzling paper!  Here's the card and envelope together.


Here's the card.  I die cut the patterned paper with a stitched rectangle die and glued the large snowflake in place.  I popped the Just Jade circle and the sentiment elements up on Dimensionals and added two smaller sparkly snowflakes. 


Here's the inside of the card.


Here's the envelope.


Supplies:
Stamps: SU! 'Peace & Joy' & 'Snowflake Wishes' sets, Clearly Besotted 'Eat, Drink & Be Merry' set
CS: SU! Just Jade & Basic White
Patterned paper: SU! 'Snowflake Splendor' DSP. 'Be Dazzling' 6" x 6" specialty DSP
Ink: SU! Just Jade & Mint Macaron 
Tools: SU! 'Joy' & 'Snowfall' die sets, Sweet Dixie 'Large Swirly Snowflake' die, Claina Palmer 'A6 Double Stitched Nested Dies' set, circle punches
Embellishments & Accessories: SU! Dimensionals

Ruth

Friday, 5 November 2021

Ornaments, Holly & Snowflakes Pinwheel Tower Card

Pinwheel Tower cards have been popping up online and I was keen to try one for myself.  I love that a Pinwheel Tower card has four panels and that it stands up beautifully for display but folds flat to go inside an envelope. Julie Davison has this blog post and I watched her fab YouTube video to find out how to make one.  I tweaked the measurements for a UK A6 sized card and I've given the information below.  Julie says in her video to make the tower using patterned paper rather than CS as that gives less bulk to the card so that's what I did.

Here's how I made an A6 sized Pinwheel Tower Card:

  • Cut CS or patterned paper 4 1/2" x 4 1/8.  On 4 1/2" side, score at 1", 2", 3" & 4". Glue the tab.
  • Cut four CS panels measuring 4 1/8" x 2 7/8".
  • Cut four patterned paper mat layers measuring 3 7/8" x 2 5/8" & glue to the CS panels.
  • Glue the four panels to the four tower sections.
  • Add any elements to decorate the card as desired.

I have added instructions to make a Pinwheel Tower card sized to fit in a UK sized C6 envelope here on my Tutorials page.

Here's the card and envelope together.


Here's a top view of the card so you can see how it's made.  Basically, you create a tower and adhere a panel to each of the four sides which gives the pinwheel shape.  I've used SU! Mint Macaron and Polished Pink CS with 'Whimsy & Wonder' specialty DSP to create my card.


Here's panel one.  I fussy cut the two ornaments and popped them up on Dimensionals.


Here's panel two.  I stamped holly from the 'Christmas Season' stamp set, die cut the shapes, snipped one holly berry off because I like three berries rather than four and popped up the leaves and berries.


Here's panel three.  The snowflake circle is popped up.  I added some iridescent self adhesive snowflake embellishments which go nicely with the holographic details in the patterned paper.


Here's panel four where I will write my message.  I die cut a tag with a hole re-inforcer, stamped the sentiment, fussy cut the present and ornament and popped those up.  I added Blushing Bride baker's twine to the tag and then popped up a Mint Macaron bow which I'd fussy cut from the patterned paper.


Here's the envelope.


What a fun card to put together, I enjoyed it so much I immediately made another one!

Supplies:
Stamps: SU! 'Christmas Season' & 'Itty Bitty Christmas' sets
CS: SU! Mint Macaron, Polished Pink & Basic White
Patterned paper: SU! 'Whimsy & Wonder' Specialty DSP
Ink: SU! Mint Macaron, Mossy Meadow & Polished Pink 
Tools: SU! 'Seasonal Labels' & 'Tailor Made Tags' die sets, circle punches
Embellishments & Accessories: SU! Blushing Bride baker's twine, Adhesive Backed Snowflakes, Dimensionals

Ruth

Sunday, 31 October 2021

Snowflakes Tag 'Tis The Season Card

I wanted to use my snowflakes 3D embossing folder again so that's why this card came about.  Here's the card and envelope together.


The snowflakes 3D embossing folder is designed to fit in the SU! Mini Die Cut & Embossing Machine so it's not wide enough to emboss a panel of CS which will cover a whole card front.  I couldn't get a design with a layout that I was happy with using just the narrow panel, I decided I needed to cover the whole card front.  Therefore, I embossed a second panel, cut it to size, glued the two panels in place and covered the join with a strip of sparkly silver CS.  

My idea was to add sparkly snowflakes to a dark coloured tag so I played with the idea a bit before choosing to apply a wash of colour to a panel of watercolour paper.  Using a wide flat water painter I wet the panel of watercolour paper and added Misty Moonlight and Gorgeous Grape inks.  I blasted my panel with a heat tool to dry it and die cut the largest label shape from the SU! 'Seasonal Labels' die set.  I die cut several snowflakes, glued them in place on the label and turned my label into a tag with a hole and hole re-inforcer.  I glued on the stamped sentiment, added Gorgeous Grape sheer ribbon to the tag and popped the tag up on Dimensionals.


Here's the inside of the card.  The 'May Your Season Sparkle' is such a fab sentiment and I always add a sparkle element when using it.  I die cut the snowflakes swirl from the sparkly silver paper.  The SU! 'Snowfall' die set is retired but I love the dies in this set and will continue to use it.  I must admit I have a lot of retired SU! snowflake stuff, I love snowflakes so much I just can't part with my favourites!


Here's the envelope with more dies from the 'Snowfall' die set.


Supplies:
Stamps: SU! 'Christmas To Remember' & 'Snowflake Wishes' sets
CS: SU! Gorgeous Grape, Misty Moonlight & Basic White, watercolour paper
Patterned paper: SU! 'Be Dazzling' 6" x 6" specialty DSP
Ink: SU! Gorgeous Grape & Misty Moonlight 
Tools: SU! 'Wintry' 3D embossing folders set, 'Seasonal Labels', 'Snowfall' & 'Tailor Made Tags' die sets, water painter brush
Embellishments & Accessories: SU! Gorgeous Grape sheer ribbon, Dimensionals

Ruth

Saturday, 30 October 2021

Snowflake Circle Merry Christmas Card

Snowflakes are one of my favourite motifs for Christmas and winter cards so it's hard for me to resist snowflake products!  I just got the SU! 'Wintry' set of 3D embossing folders which has a snowflakes folder and a pine boughs folder.  I've paired my new snowflakes embossing folder with one of the beautiful iridescent snowflake embellishments and added some sparkle for a festive touch.  Here's the card and envelope together.


Oh my word, the snowflakes embossing folder is so pretty and as it's a 3D folder the embossed detail is amazing! I glued the embossed strip across the front of the Mint Macaron card base and added strips of sparkly silver paper at the top and bottom.  I stamped the sentiment in Just Jade ink, die cut it out with a stitched rectangle die and slid it under the Mint Macaron die cut circle.  I punched out two circles - one  Mint Macaron CS circle and a smaller sparkly silver circle.  I glued the circles to the centre of the snowflake and popped the snowflake up on Dimensionals.


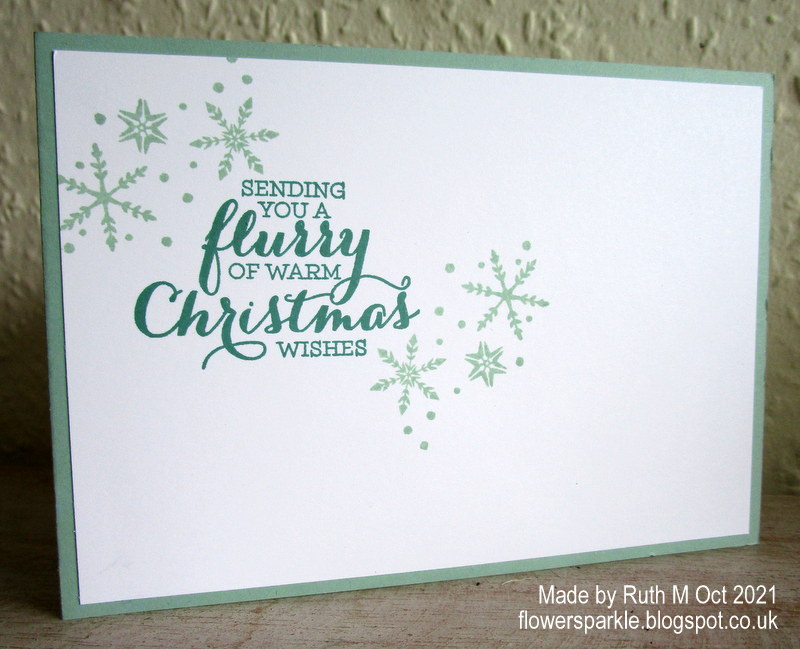
Here's the inside of the card.


Here's the envelope with a stamped and punched snowflakes element on the flap.


Supplies:
Stamps: SU! 'Flurry of Wishes' & 'Snowflake Wishes' sets 
CS: SU! Mint Macaron & Basic White
Patterned paper: SU! 'Be Dazzling' 6" x 6" specialty DSP
Ink: SU! Just Jade & Mint Macaron 
Tools: SU! 'Wintry' 3D embossing folders set, 'Layering Circles' & 'Rectangle Stitched' die sets, circle punches
Embellishments & Accessories: SU! 'Wonderful Snowflakes', Dimensionals

Ruth

01 09 10