Monday, 23 August 2021

Autumn Leaf Trio Happy Birthday Card

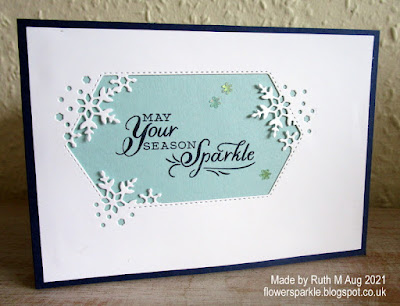
I just had to have another go at the baby wipe re-inker technique using a solid image stamp after I'd made this snowflake card.  This time I've made a birthday card using leaves and autumnal colours.  Here's the card and envelope together.


Kelly Acheson talks about the quality of baby wipes used for the technique in her video and I bought some Huggies wipes to try this time rather than the Wilko wipes - both wipes have worked fine for the technique.  I laid just one wipe onto my silicone craft sheet and dropped Cherry Cobbler, Crushed Curry and Old Olive inks onto the wipe to create my ink pad.  The great thing about this technique is you can stamp several images - I stamped six leaves altogether.  After stamping the leaves I used the 'Stitched Leaves' dies to cut out the shape and to add the stitched detail.  I decided to use three leaves on my card and I determined my layout.  I made an Old Olive card base and added a panel of plaid paper and a strip of Cherry Cobbler CS.  I die cut a white stitched rectangle and glued two leaves directly on it and popped the central leaf up on Dimensionals.  I die cut the Crushed Curry sentiment label using a shape from the SU! 'Messages' die and I popped it up.  To finish the front I added a green linen thread bow.


Here's a closer look at the leaves.  I really love how they turned out!


Here's the inside of the card.


Here's the envelope.


Supplies:
Stamps: SU! 'Love of Leaves' & 'Shaded Summer' sets, Hero Arts 'Yummy Treats' set 
CS: SU! Cherry Cobbler, Crushed Curry, Old Olive & Basic White
Patterned paper: SU! 'Plaid Tidings' 6" x 6" DSP pack
Ink: SU! Cherry Cobbler ink pad, SU! Cherry Cobbler, Crushed Curry & Old Olive ink refills 
Tools: SU! 'Stitched Leaves' die set, 'Messages' die, Claina Palmer 'A6 Double Stitched Nested Dies' set 
Embellishments & Accessories: Huggies baby wipe, SU! Old Olive Linen Thread, Dimensionals

Ruth

Saturday, 21 August 2021

Poinsettia Wreath Merry Christmas Card

Here's another alcohol ink background Christmas card.  I wanted to try with just red and green inks and I wanted to add some gold to the background.  Here's the card and envelope together.


I used Dark Cherry Cobbler and Dark Mossy Meadow Stampin' Blends on the vellum and I think it did get a little muddy in places once I'd added the alcohol.  To add some gold 'veining' detail I used a VersaMark pen to draw lines and then I heat embossed with gold embossing powder.  I've had the VersaMark pen for years and I was amazed it still worked as I haven't used it in years!  It came out a little thicker than I really wanted so I'm not sure I'll do it again, but I tried it!  I taped the vellum to a piece of Basic White CS, cut it out with a stitched rectangle die, mounted that onto a gold foil stitched rectangle and adhered that to the front of the Mossy Meadow card blank.  

Using the SU! 'Wreath Builder' die set, I die cut a Mossy Meadow wreath and a gold foil wreath and glued them together.  I die cut and assembled the poinsettia flowers using Poppy Parade, Cherry Cobbler and gold foil CS.  I stamped the sentiment and die cut that using a shape from the 'Messages' die.  I popped up the wreath, flowers and the sentiment label.


Here's the inside of the card.  I stamped the sentiment in Mossy Meadow ink, stamped three poinsettias in Cherry Cobbler ink and used a blender pen to draw ink into the stamped images to add colour.  I coloured the centres with a gold gel pen.


Here's the envelope.  I used a larger poinsettia stamp to decorate the envelope flap.


Supplies:
Stamps: SU! 'Arrange a Wreath', Hero Arts 'Holiday Cheer' & Creative Expressions 'Shaded Poinsettia Additions' sets 
CS: SU! Cherry Cobbler, Mossy Meadow, Poppy Parade & Basic White, Gold Foil Sheet, vellum
Ink: SU! Cherry Cobbler & Mossy Meadow ink pads, Dark Cherry Cobbler & Dark Mossy Meadow Stampin' Blends, VersaMark pen, gold gel pen
Tools: SU! 'Wreath Builder' die set, 'Messages' die, Claina Palmer 'A6 Double Stitched Nested Dies' set, small circle punch, SU! Blender Pen, flat paintbrush
Embellishments & Accessories: 99% isopropyl alcohol, SU! gold embossing powder, Dimensionals

Ruth

Thursday, 19 August 2021

Snowflakes Merry Christmas Card

Recently I watched Kelly Acheson's Facebook Live Replay video dated 8th August 2021 where she demonstrates the baby wipe re-inker technique.  Kelly shows the technique at around the 35.40 mark on the video.  This technique has been around a very long time but I've never tried it.  After watching Kelly's video I decided I'd have a go and here's my card and envelope.


I used Balmy Blue, Coastal Cabana and Highland Heather ink refills for my baby wipe palette.  Kelly talks about baby wipe quality in her video, I used what I had which was Wilko baby wipes and they worked.  I might experiment with a more expensive packet of wipes later on to see if there's a difference.  I made a Highland Heather card base and glued a panel of snowflake patterned paper cut out with a stitched rectangle die on top.  I die cut my multicoloured snowflake and popped that up on a stitched square die cut.  I glued the sentiment rectangle down and then popped up the Night of Navy square.  I added a rhinestone jewel to the snowflake centre to finish the front.


Here's a closer look at the snowflake.  It's fabulous to get a multicoloured image, what a great technique!  


Here's the inside of the card - I had to use the technique on the inside too!  I stamped the sentiment a few times on Basic White CS and die cut the one that came out darkest.  I will try darker colours next time I use the technique.  I felt that a pop of Night of Navy was needed so I stamped a snowflakes cluster a couple of times.


Here's the envelope.  I stamped a few snowflakes to start with on a piece of Basic White CS before I stamped my main snowflake image.  I punched a circle out of that white CS to decorate the envelope.  I've mounted the white circle onto a larger Night of Navy circle.


Supplies:
Stamps: SU! 'Snowflake Wishes' & 'Flurry of Wishes' sets
CS: SU! Highland Heather, Night of Navy & Basic White
Patterned paper: SU! 'Snowflake Splendor' DSP
Ink: SU! Night of Navy ink pad, Balmy Blue, Coastal Cabana & Highland Heather ink refills 
Tools: SU! 'So Many Snowflakes', 'Stitched Rectangles' & 'Stitched Shape' die sets, SU! circle punches, Claina Palmer 'A6 Double Stiched Nested Dies' set 
Embellishments & Accessories: SU! Dimensionals

Ruth

Tuesday, 17 August 2021

Coloured Strips Snowflake Wishes Card

A little while ago I made this rainbow strips birthday card and when I'd done I knew I wanted to make a snowflakes Christmas card version and here it is!  Here's the card and envelope together.

Here's the card.  I made a Night of Navy card base and chose Balmy Blue, Pool Party, Coastal Cabana, Bermuda Bay, Highland Heather and Gorgeous Grape CS for my coloured strips.  After I'd die cut the strips I stamped tone on tone snowflakes on each strip using the same colour ink as the CS.  I kept my shammy to hand so I could clean the stamp between ink colours!  I cut a Basic White mat layer for my strips and before adhering that in place I stamped and heat embossed the sentiment.  There are some iridescent foil 'Wonderful Snowflakes' in the SU! July to December mini catalogue and they are gorgeous!  I popped up one of those and added a Night of Navy die cut snowflake to the centre.  I added two white die cut snowflakes, added rhinestone jewels to all three snowflake centres and finished the front by adding some self adhesive snowflake embellishments around the sentiment.


I went a bit fancy on the inside by using the negative snowflake label die from the SU! 'So Many Snowflakes' die set.  I stamped the sentiment in Night of Navy ink onto a piece of Pool Party CS and glued that down before adhering the white panel over the top.  I added three more of the snowflake embellishments.


Here's the envelope with a circle snowflake element glued on the flap.


Supplies:
Stamps: SU! 'Snowflake Wishes' set
CS: SU! Balmy Blue, Bermuda Bay, Coastal Cabana, Gorgeous Grape, Highland Heather, Night of Navy, Pool Party & Basic White
Ink: SU! Balmy Blue, Bermuda Bay, Coastal Cabana, Gorgeous Grape, Highland Heather, Night of Navy & Pool Party, VersaMark
Tools: SU! 'So Many Snowflakes' & 'Stitched Rectangles' die sets, circle punches
Embellishments & Accessories: SU! white embossing powder, rhinestone jewels, self adhesive snowflake embellishments, Dimensionals

Ruth


Sunday, 15 August 2021

Two Heart Themed Gift Boxes

Yesterday Lesley and Wendy came over to make a set of Double Wonder Christmas cards like this set I'd made previously.  I like to give them both a little treat and I place the packaged gifts on the table so they see them as soon as they arrive.  I'd forgotten I had these SU! 'Love You Always' treat boxes in my stash and they were ideal!  They are great boxes, they're like matchboxes so there is a box and a sleeve that slides over the box.  They're a good size and there's no gluing needed to put them together so that's brilliant!  Here are both boxes together.


I placed the gift at the bottom of the box and covered it with some scrunched up tissue paper.  To decorate the sleeves I chose some bright, happy hearts paper from the SU! 'Pattern Party' DSP pack and made wraps  to go around the boxes.  I cut pieces of Granny Apple Green CS and wrapped those around the sleeves, folding around the boxes as I went rather than scoring before applying the CS to the boxes.  I taped the ends of the Granny Apple Green CS together and then cut narrower pieces of patterned paper and wrapped those around the boxes in the same way, taping the ends together.  The decorative sleeves can be slid off so Lesley and Wendy can re-use their boxes and redecorate them if they wish.

I stamped the 'love you, friend' sentiment (from the SU! 'Shaded Summer' set) in VersaMark on Bermuda Bay CS, heat embossed with white embossing powder and die cut two labels (using a die from the SU! 'Seasonal Labels' die set.)  I die cut two Real Red stitched hearts using a die from the long retired 'Trim Your Stocking' die set.  I cut strips of Granny Apple Green Textured Weave ribbon, made zig zags and attached them to the boxes with double sided tape.  I popped up the labels and the hearts and added rhinestone jewels to finish.


Here's another view.  The boxes really are a good size!  Both ladies ordered the SU! 'Christmas Season' bundle and they used their stamps and dies to create their cards.  I thought the 'Gold Holly Leaves' embellishments that are part of the 'Painted Christmas' suite would be a perfect gift for them so that's what was inside the boxes!


Lesley and Wendy loved their gifts and we had such a happy day together crafting, chatting and laughing!  We're getting together again on Saturday 2nd October - World Card Making Day!

Supplies:
Stamps: SU! 'Shaded Summer' set 
CS: SU! Bermuda Bay, Granny Apple Green & Real Red, 'Love You Always' Treat Boxes
Patterned paper: SU! 'Pattern Party' DSP pack
Ink: VersaMark
Tools: SU! 'Seasonal Labels' & 'Trim Your Stocking' die sets
Embellishments & Accessories: SU! Granny Apple Green Textured Weave ribbon, white embossing powder, Rhinestone Jewels & Dimensionals

Ruth

Friday, 13 August 2021

Greenery & Berries Merry Christmas Card

The SU! 'Painted Christmas' patterned paper is just so lovely and I was drawn to the unusual colour of the leaves and pine boughs paper.  It's not overtly Christmassy, more wintry I'd say.  Here's the card and envelope together.


Here's the card.  I glued a large panel of the patterned paper onto the Evening Evergreen card base and added a Pear Pizzazz stitched strip (cut using the strap die from the 'All Dressed Up' die set.)  I die cut a large Basic White label using a die from the 'Seasonal Labels' die set and stamped the sentiment in Evening Evergreen ink.  I stamped and die cut the leaves, boughs and berries and arranged them on the label, popping up the berries.  That pop of red from the berries is so eyecatching!  I popped the label up onto the card base and then considered embellishment options!  I have to confess I tend to hoard any fancy embellishments - jewels and gems I use frequently - but the SU! 'Mini Pinecone Embellishments' have languished, neglected in my stash!  I thought two pinecone trinkets attached with a linen thread bow was a lovely finishing touch!


Here's a closer look.


Here's the inside of the card.  The 'Happiest Christmas Wishes' sentiment comes from the retired SU! 'Dashing Deer' set and I wanted to use a label die and have some greenery and berries tucked underneath.  The label die I used was too long for the sentiment but I cut it out full size and then repositioned the shape, nestling the shape into the die where I wanted it to go and cut again so I got the perfect size label!  I added a strip of the pretty paper and a strip of Evening Evergreen CS.


Here's the envelope with more pretty paper and a popped up die cut name label.


Very happy with how this turned out and very happy I have another Christmas card added to the stash!

Supplies:
Stamps: SU! 'Christmas Season', 'Arrange a Wreath' & 'Dashing Deer' sets
CS: SU! Evening Evergreen, Pear Pizzazz & Basic White
Patterned paper: SU! 'Painted Christmas' DSP 
Ink: SU! Evening Evergreen, Pear Pizzazz, Real Red & Soft Succulent
Tools: SU! 'Seasonal Labels', 'All Dressed Up' & 'Stitched So Sweetly' die sets
Embellishments & Accessories: SU! linen thread, Mini Pinecone Embellishments, Dimensionals

Ruth

Wednesday, 11 August 2021

Holly Christmas Greetings Card

While putting the Christmas cards I've made so far away in their box I came across this holly paper envelope.  I remember I made it late last Christmas as a gift card holder for my hubby.  I made it so late and in such a rush I didn't even write his name on the label!  He gave the envelope back to me and I stashed it away in my Christmas cards box.  When I spotted the envelope I took it out of the box and thought I'd make a card to go inside!  Here's the card and envelope together.


Here's the card.  Because the envelope isn't a regular size I had to custom make the card to fit so the card measures 5" x 4".  I adhered a panel of holly paper from the SU! 'Poinsettia Place' DSP pack to a mat layer of Old Olive CS and glued that to the front of the Real Red card base.  I stamped the sentiment in Real Red ink onto Soft Sea Foam CS and cut it out with a stitched rectangle die.  I stamped holly leaves and berries from the SU! 'Christmas Season' set, die cut the shapes and snipped some  berries off.  I die cut a smaller stitched rectangle and adhered both rectangles to the card front, sliding the smaller rectangle underneath the larger one. I popped up the holly leaves and berries and added a Real Red rhinestone jewel to the tittle (the dot above the i!) in the word Christmas.


Here's the inside of the card.  I stamped the sentiment in Old Olive ink onto Soft Sea Foam CS and cut it out with another stitched rectangle die.  I added a strip of the holly paper and drew a line above it with a Real Red Stampin' Write marker.


Here's the envelope made using the Envelope Punch Board with a popped up die cut name label.  It was fun to create the card to go with the envelope I already had!


Supplies:
Stamps: SU! 'Christmas Season' & 'Greatest Part of Christmas' sets
CS: SU! Old Olive, Real Red & Basic White
Patterned paper: SU! 'Poinsettia Place' DSP pack
Ink: SU! Old Olive, Pear Pizzazz & Real Red ink pads, SU! Real Red Stampin' Write marker
Tools: SU! 'Seasonal Labels' & 'Stitched Rectangles' die sets Envelope Punch Board, Sizzix 'Card, Fancy Frame Flip-its #2' die set 
Embellishments & Accessories: SU! Real Red Rhinestone Jewels, Dimensionals

Ruth

Monday, 9 August 2021

Good Things Faux Tearing Technique Card

My hubby Owen has just received a cochlear implant and it's been a long wait for it to happen.  It's early days yet but everything looks really promising so far.  There's going to be a lot of rehab over the next few months and I thought Owen might appreciate an encouragement card.  I took the opportunity to ink up my SU! 'Enjoy the Moment' stamp set which I've had for a while.  I love the sketchy design style of the stamps and seed pods are great for masculine cards.  Here's the card and envelope together.


Here's the card.  The colour combo is Just Jade, Misty Moonlight and Soft Suede along with white.  I've CASEd a card from page 26 of the SU! 2021 - 2022 annual catalogue which features the Faux Tearing technique.  I changed a few details to make it my own card.  I tore two pieces of paper, taped them down over a panel of Basic White CS and added Just Jade and Soft Suede inks using blender brushes.  Keeping the paper taped in place, I stamped the images in Misty Moonlight ink.  After removing the paper mask pieces I stamped the sentiment in Misty Moonlight ink.  I stamped the poppy seed heads on a separate piece of Basic White CS and fussy cut the image out.  I stamped it in Misty Moonlight first but wasn't happy with the way that looked so I tried it in Soft Suede ink and I liked that much better.  I added some linen thread tied in a knot and popped up the image.  As a final touch I added some spritzing using a Soft Suede Stampin' Write marker.


Here's the inside of the card with a strip of Just Jade patterned paper, some stamping and more spritzing.


Here's the envelope where I've used dies from the 'Tasteful Labels' die set to make a popped up name label.  I stamped the poppy seed heads in stamped off twice Misty Moonlight ink on the white label.  I added more Soft Suede ink spritzing too.   


Supplies:
Stamps: SU! 'Enjoy the Moment' & 'Positive Thoughts' sets
CS: SU! Soft Suede & Basic White, white copy paper for masking
Patterned paper: SU! In Color DSP pack
Ink: SU! Just Jade, MIsty Moonlight & Soft Suede ink pads, SU! Soft Suede Stampin' Write marker
Tools: SU! 'Tasteful Labels' die set, ink blender brushes 
Embellishments & Accessories: SU! linen thread & Dimensionals

Ruth

Saturday, 7 August 2021

Rainbow Strips Flower Happy Birthday Card

Dena Rekow from the Creativity Cave shared a lovely card on her August 2nd 2021 YouTube video and I just had to CASE the card and make my own version!  Here's the card and envelope together.


Here's the card.  I die cut stitched rectangles from Polished Pink, Pale Papaya, Pear Pizzazz, Pool Party, Fresh Freesia and Highland Heather  CS and stamped a floral image on each panel using VersaMark ink for a subtle tone on tone look.  I glued the rainbow strips to a panel of Basic White CS, added a stitched zig zag border using a die from the SU! 'Basic Borders' die set and glued that to a Basic Black card base.  I loved Dena's idea of stacking a number of fancy flower die cuts onto one of the solid flower die cuts, the dimension is fabulous!  I added die cut leaves as well and I popped an Opal Round gem in the centre of the flower.  The sentiment is heat embossed with white powder and cut with a fishtail flag die.  This card will likely be a RAK card sent to the U.S. so I didn't pop any element up - the flower has great dimension already!


Here's a closer look at the flower.


Here's the inside of the card.


Here's the envelope.  I added die cut stitched rectangles as an address label element to go with the stamped floral images.


What a great card to make, I'm already planning a Christmas snowflake version in blue, aqua and purple rather than a rainbow colour scheme!

Supplies:
Stamps: SU! 'Shaded Summer' & 'Fancy Phrases' sets
CS: SU! Basic Black, Fresh Freesia, Highland Heather, Pale Papaya, Pear Pizzazz, Pool Party, Polished Pink & Basic White (regular & thick)
Ink: VersaMark, VersaFine Onyx Black 
Tools: SU! 'Summer Shadows', 'Basic Borders' & 'Stitched Rectangle' die sets, MFT 'Fishtail Flags' Stax die set
Embellishments & Accessories: SU! white embossing powder, Opal Rounds gem 

Ruth

Thursday, 5 August 2021

Alcohol Ink Background Ornament Dangly Tent Card

Yes, another alcohol ink background card!  This time I tried traditional Christmassy colours and made a dangly tent card.  Here's the card and envelope together.


I made the card from Old Olive CS and cut a stitched rectangular aperture from the front.  I scribbled Dark Mango Melody, Dark Old Olive and Dark Real Red Stampin' Blends onto a panel of vellum and dabbed on 99% isopropyl alcohol with a flat paintbrush to create the background.  I taped the vellum to a sheet of Basic White CS, cut it to size and glued it to the back of my Old Olive tent card.  Although I'd used a Dark Real Red Stampin' Blend on the background, Real Red CS didn't look quite right so I used Polished Pink as my accent colour.  I die cut the solid ornament in Metallic Gold specialty paper and cut the fancy overlay ornament in Polished Pink.  I then added a gold topper and some gold cord and attached the ornament so it will dangle freely.  I stamped the sentiment in VersaMark and heat embossed with gold embossing powder, die cut it with a fishtail flag banner die and glued that in place.  To finish off the front I added some gold Gilded Gems.


Here's a closer look.


Here's a side view so you can see I added a W shaped CS piece which means the tent card will stand up better on display.


Here's the back of the card.  The sentiment stamps come from the SU! 'Peace & Joy' set.  I drew a line from the letter Y with a gold Sharpie, added an ornament, topper and a bow.  A bit busy for just a sentiment panel but at least it's fun!


Supplies:
Stamps: SU! 'Peace & Joy',& 'Tag Buffet' sets
CS: SU! Old Olive, Polished Pink & Basic White, Gold Metallic specialty paper, vellum
Ink: SU! Old Olive & Polished Pink, VersaMark, Dark Mango Melody, Dark Old Olive & Dark Real Red Stampin' Blends markers , gold Sharpie marker
Tools: SU! 'Delicate Ornament' & 'Mini Treat Bag' die sets, Claina Palmer 'A6 Double Stitched Nested Dies' set, MFT 'Fishtail Flags' Stax die set, SU! 1 3/4" circle punch, flat paintbrush
Embellishments & Accessories: 99% isopropyl alcohol, SU! gold embossing powder, gold cord & Gilded Gems

Ruth

01 09 10